Locations are grouped by mission. Search or filter, then open the illustrated route.
Import adds completed items and preserves existing progress.
Progress is saved in this browser, shared between languages. Clearing browser data removes it; devices do not sync.
Main mission · 01 · The Banished Hero
| Item | Location | Walkthrough |
|---|---|---|
| Check the right cave for supplies, then take the left route past the soldiers to break the first Soulstone. | 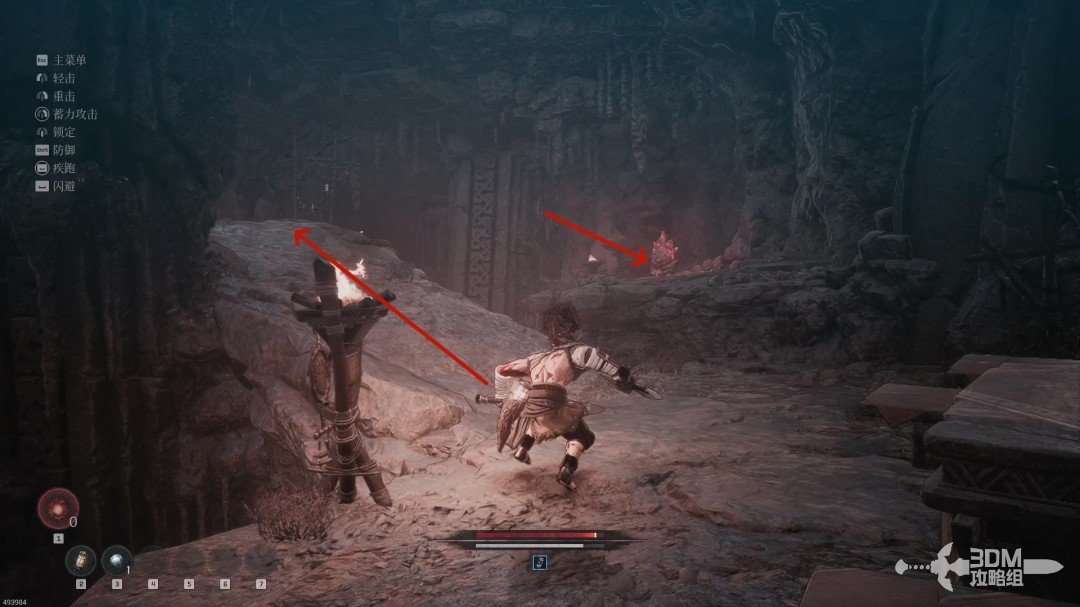 View route → | |
| Stay on the upper route at the junction. Leave the cave, avoid the collapsed path, and take the left slope to the second Soulstone. | 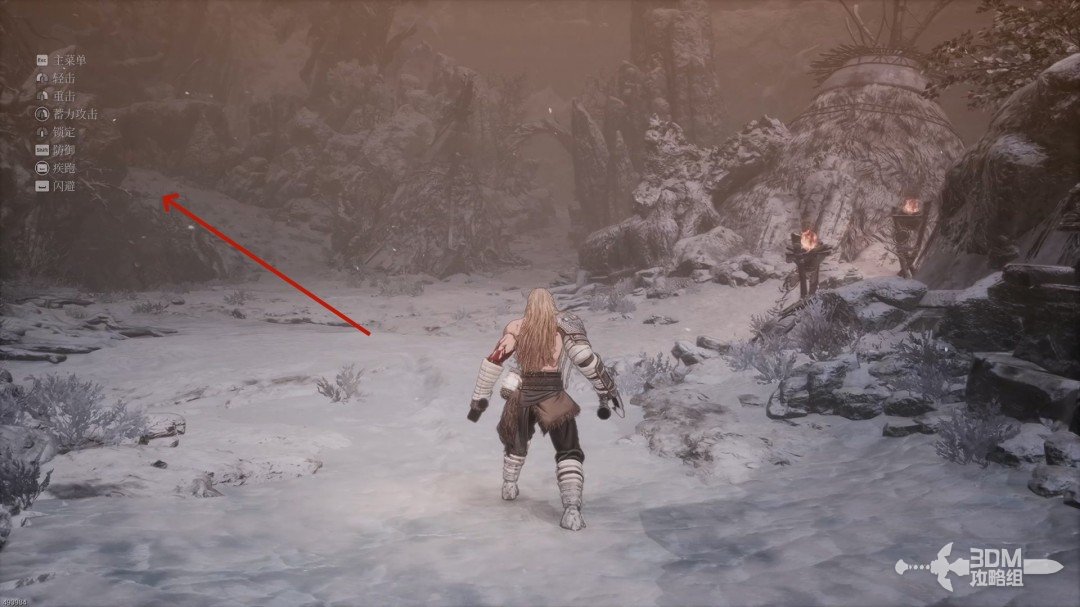 View route → |
Main mission · 02 · Trials of the Frozen Mountain
| Item | Location | Walkthrough |
|---|---|---|
| Clear the snowfield wolves and circle behind the wooden lookout. | 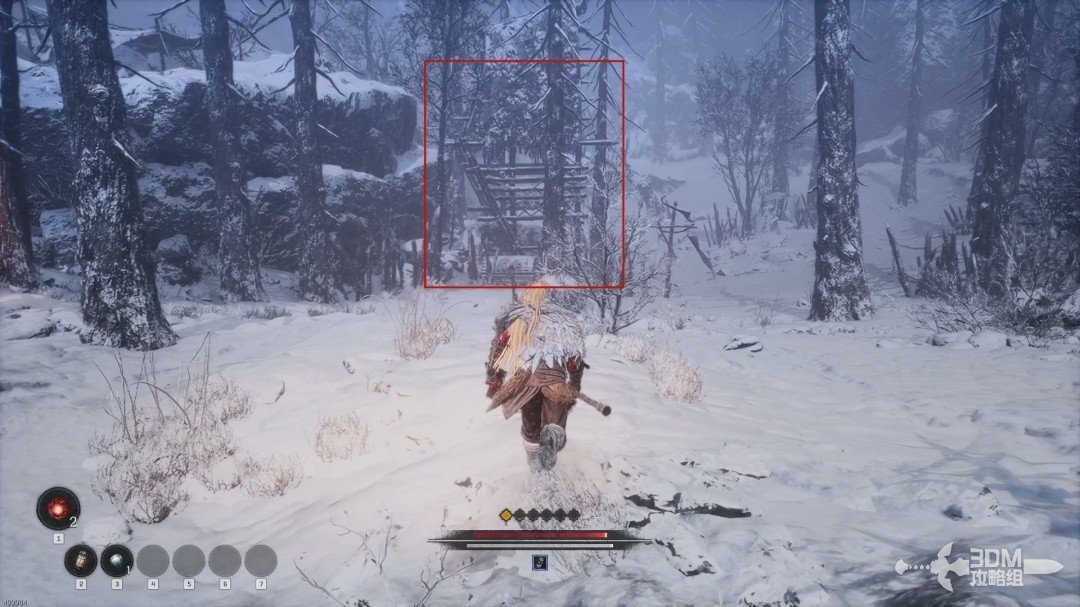 View route → | |
| Deep in the cave left of the wolf slope, beside the soldier’s corpse and diary. | 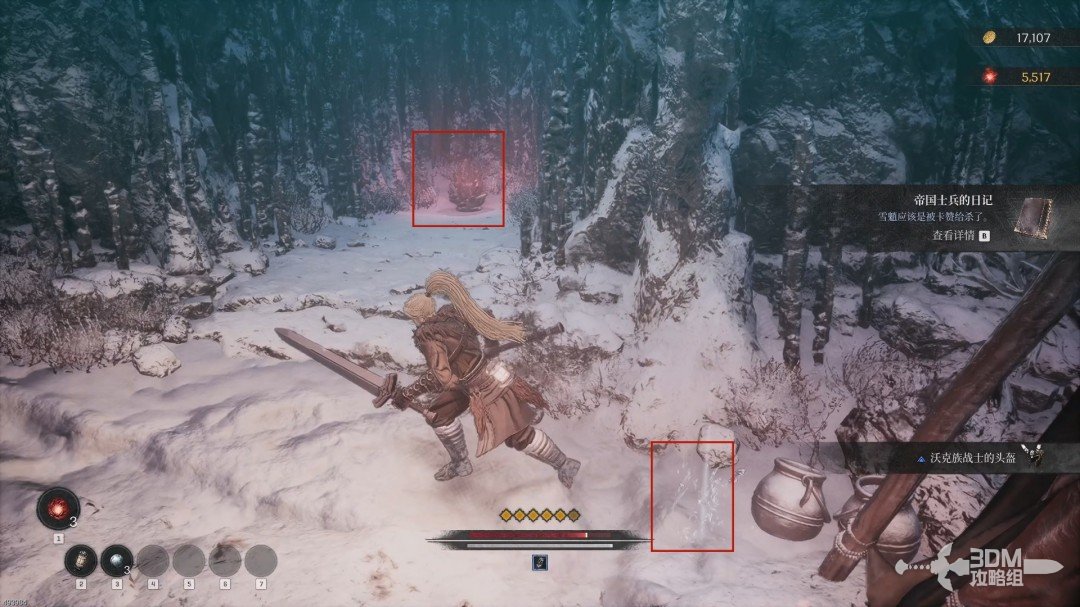 View route → | |
| From the paired ladders, circle right through the cave, then climb from the left branch to the Soulstone ledge. | 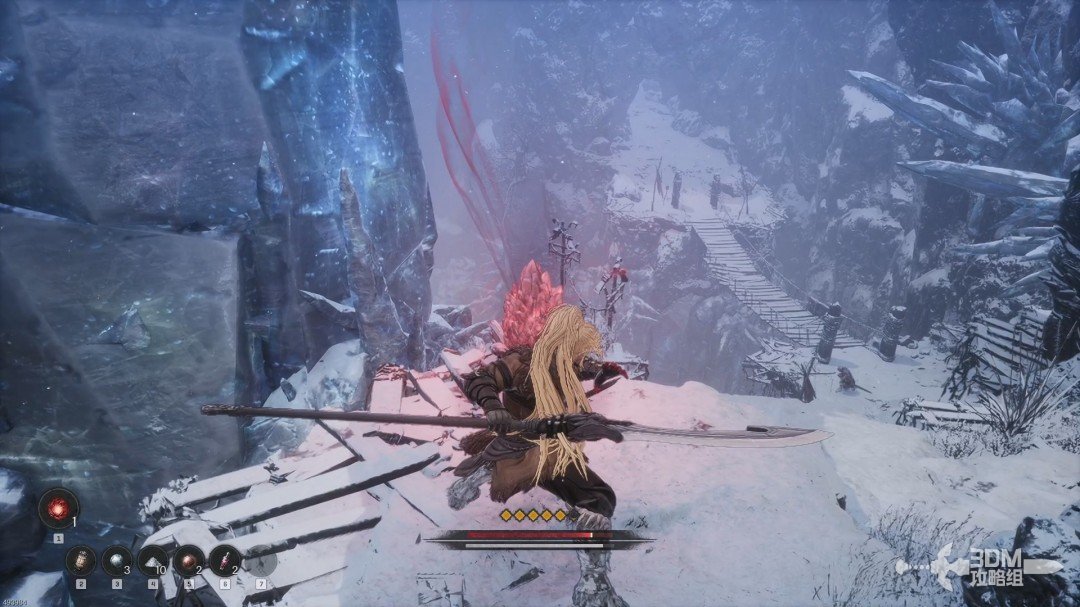 View route → |
Main mission · 03 · Forgotten Temple
| Item | Location | Walkthrough |
|---|---|---|
| Destroy the purple remains of fallen skeletons. Break the wooden barrier on the left branch for the temple's first Soulstone. | 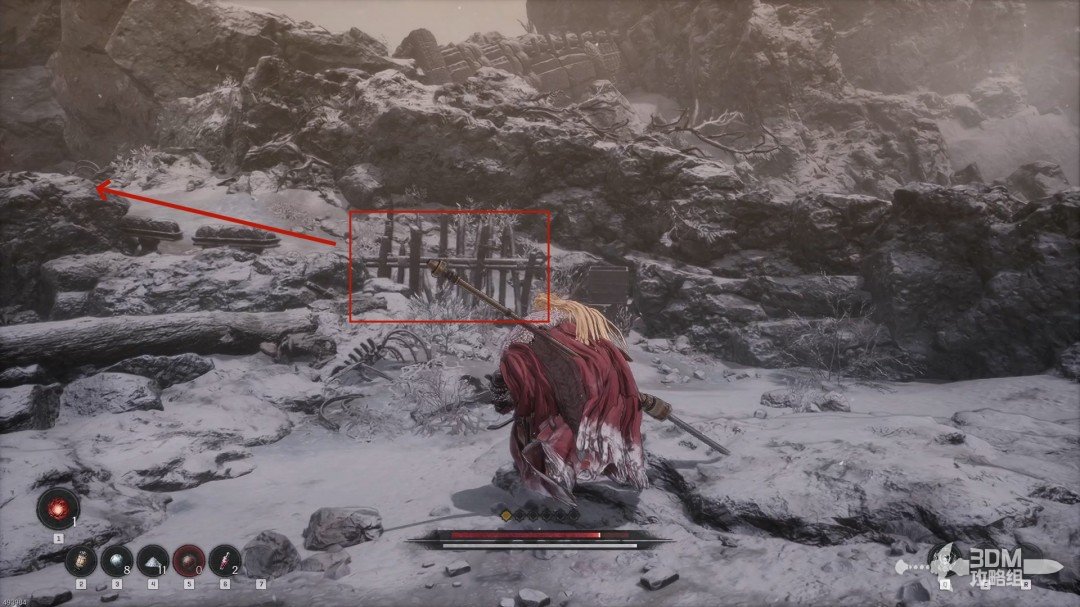 View route → | |
| Open the main door, activate the checkpoint, and search the side rooms on the same floor for the second Soulstone behind the jars. | 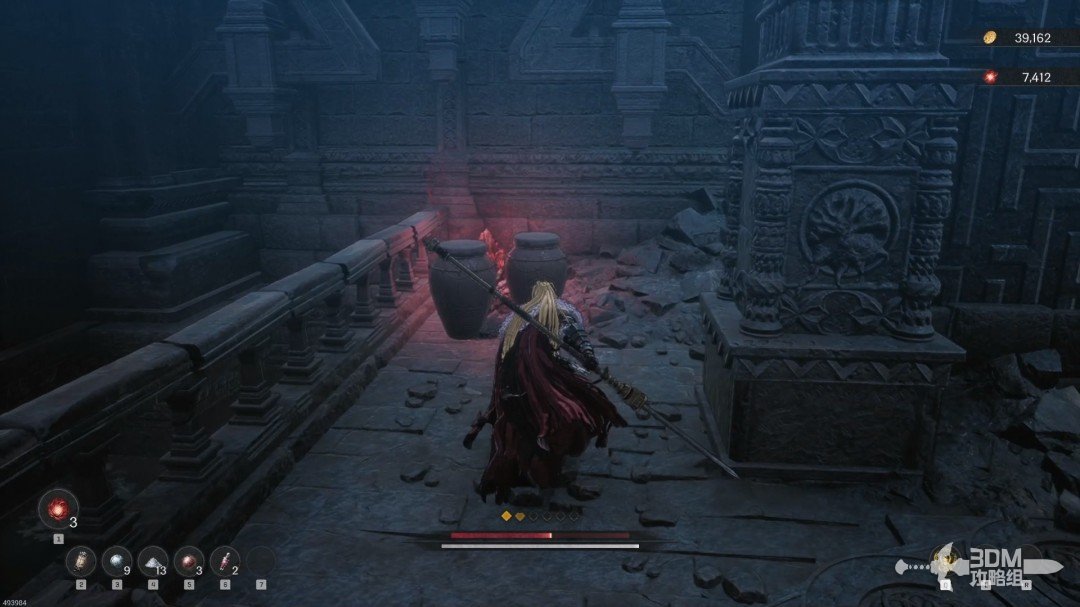 View route → | |
| Face the statues toward each other to raise the platform. Avoid the disappearing side tiles and throw a javelin at the third Soulstone opposite. | 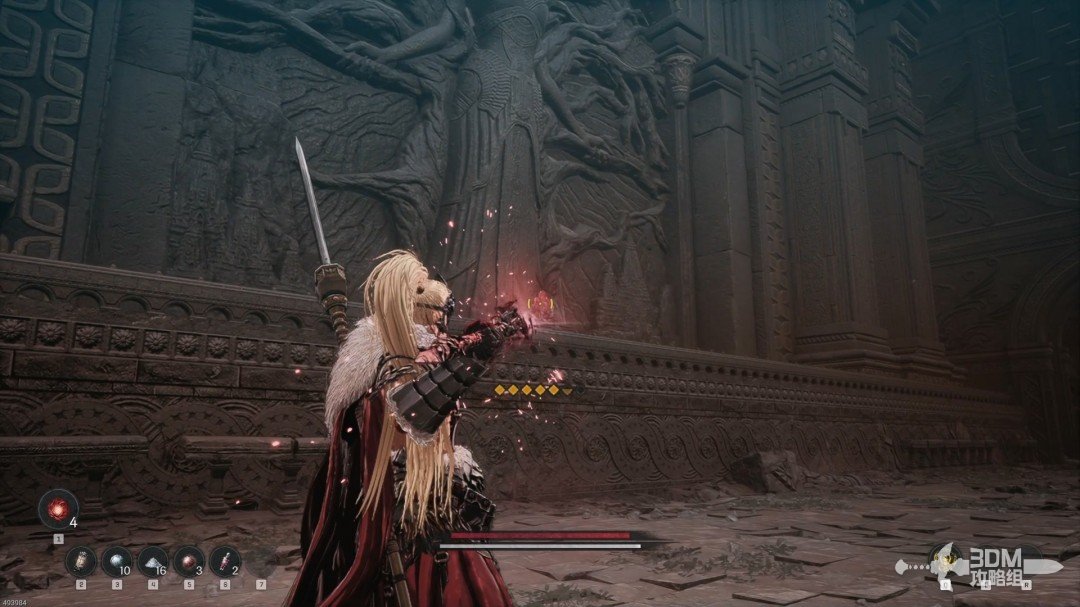 View route → |
Main mission · 04 · First Act of Revenge
| Item | Location | Walkthrough |
|---|---|---|
| Enter the new mission after speaking to Daphrona. Climb the ladder on the cave's right side for the first Soulstone. | 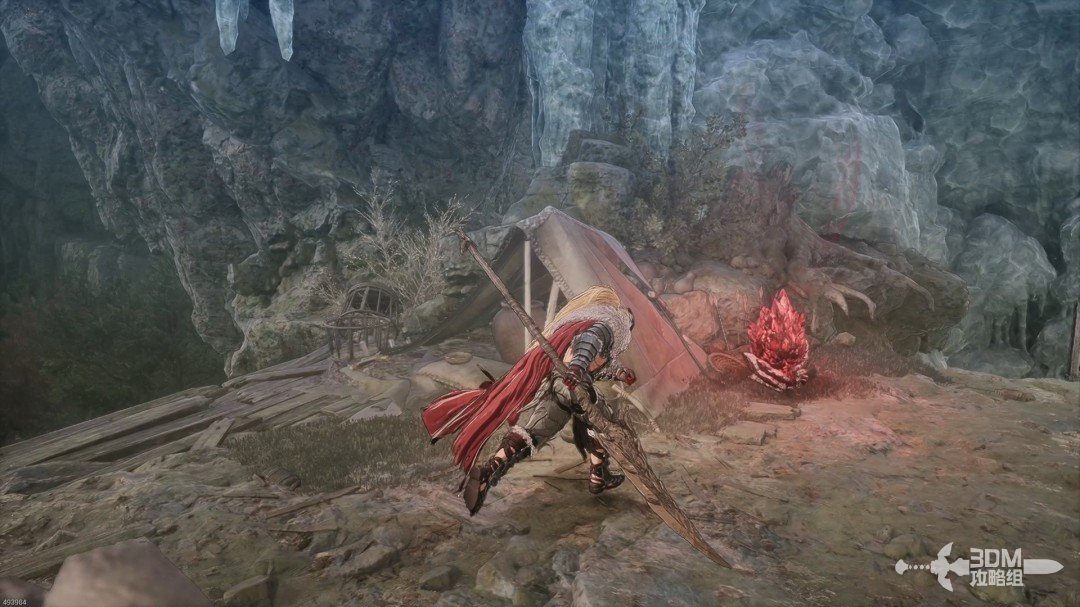 View route → | |
| Descend to the village dock checkpoint. Open the wooden gate and check behind the lookout tower on the left for the second Soulstone. | 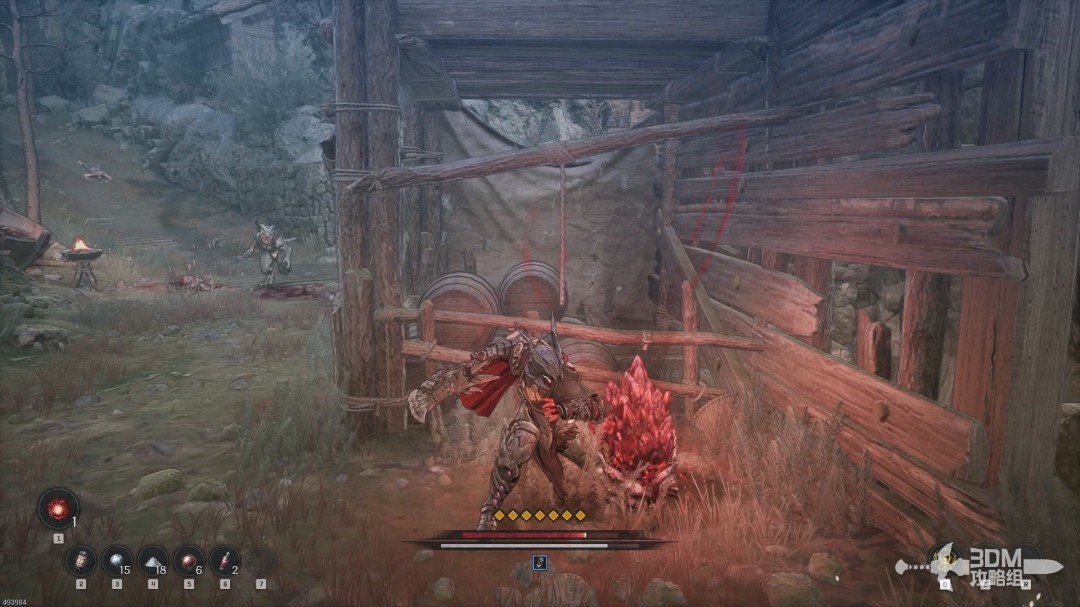 View route → | |
| Defeat the lightning dragonkin beyond the door, using the nearby rolling rock if helpful, then break the third Soulstone overhead. | 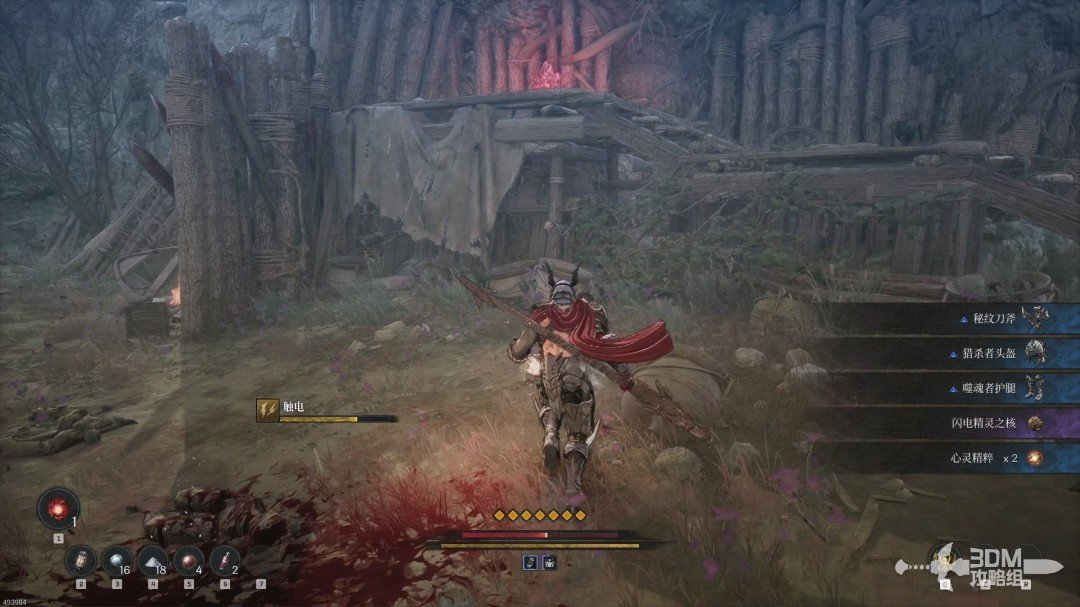 View route → |
Main mission · 05 · Strange Stench
| Item | Location | Walkthrough |
|---|---|---|
| Pass the giant bat and sandworm memory, follow the path to its end, and javelin the first Soulstone in the distance. | 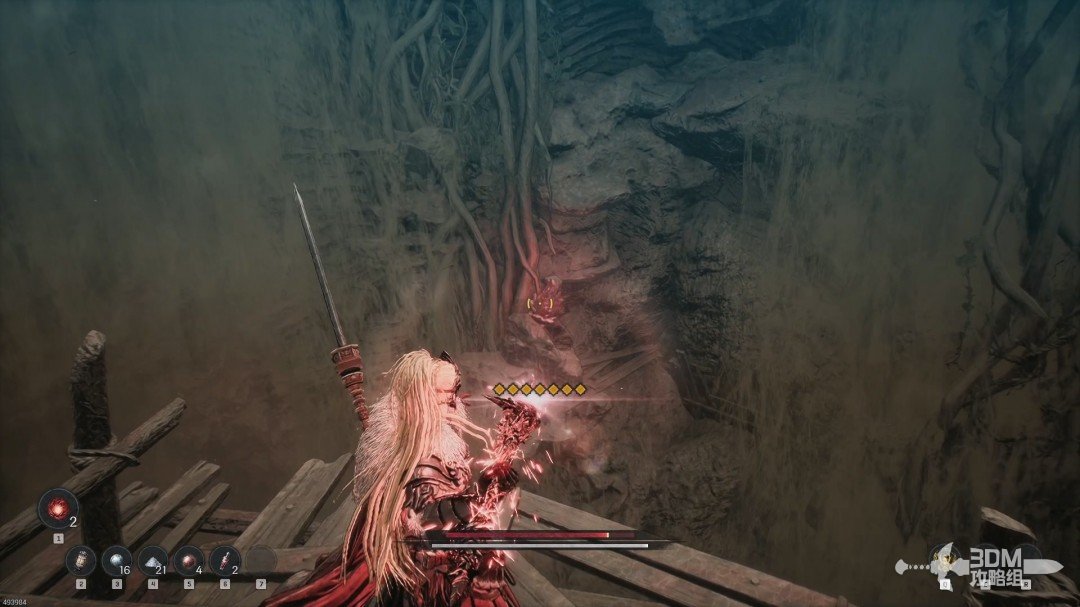 View route → | |
| Open the shortcut, cross the wooden bridge, and reach the next checkpoint. Drop from the right side of the slope for the second Soulstone. | 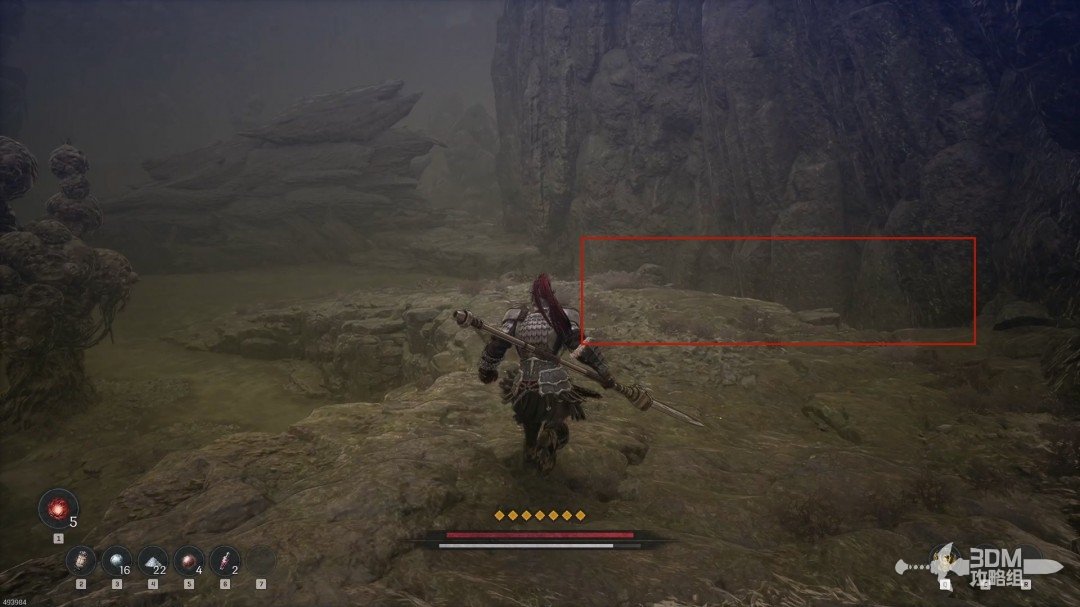 View route → | |
| Break the boards and clear the explosive barrel passage. Return to the swamp edge and approach the glowing third Soulstone. | 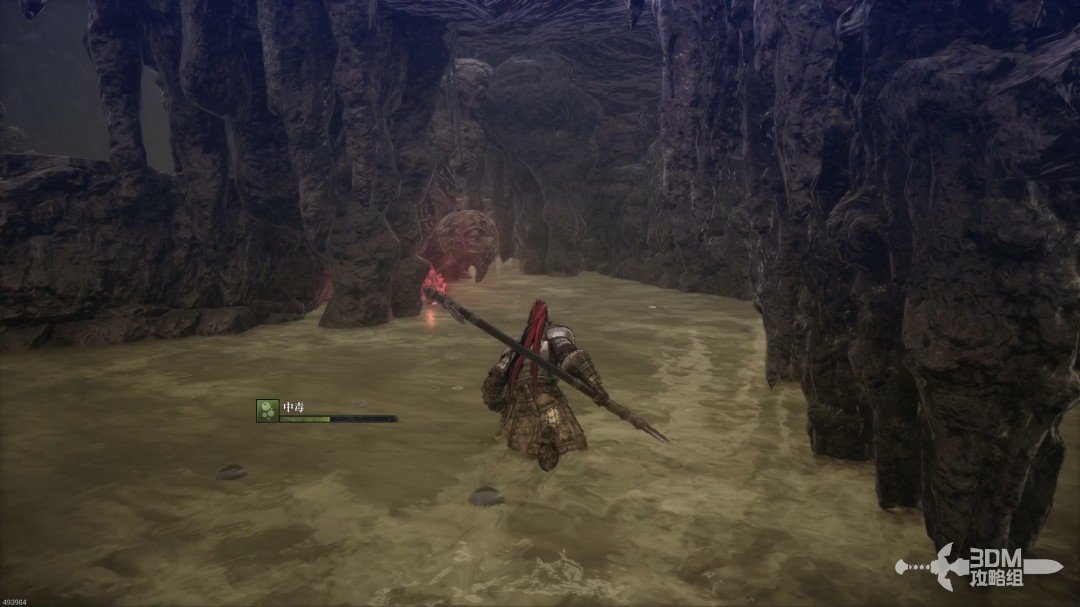 View route → |
Main mission · 06 · Traitor Revealed
| Item | Location | Walkthrough |
|---|---|---|
| Search the roof chest and climb the next ladders. Take the right lower route inside the building for the first Soulstone on a beam. | 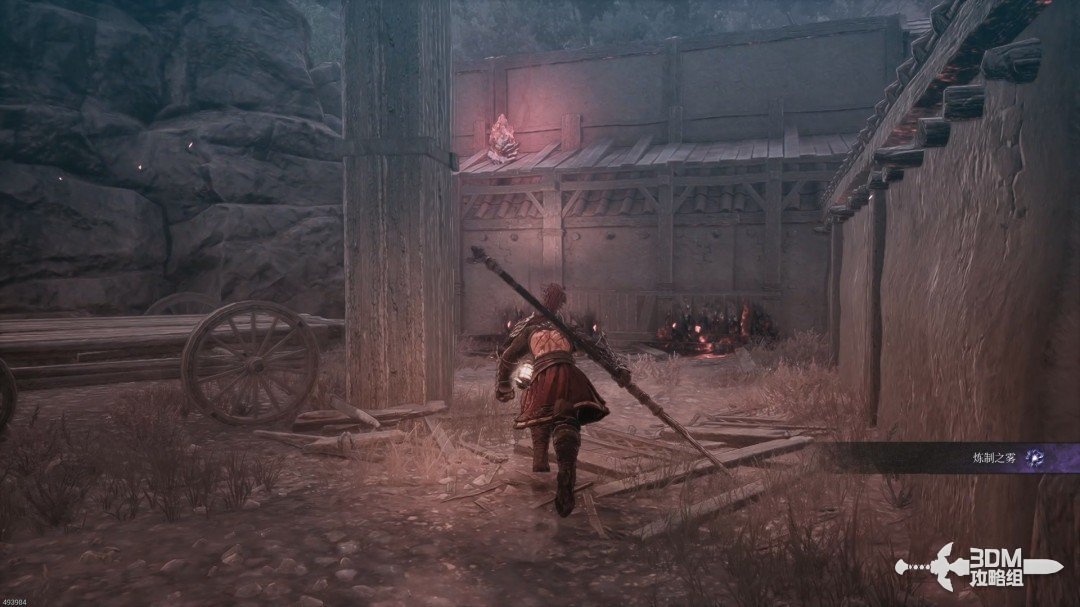 View route → | |
| Return to the stairs, take the left route through the small doorway, and climb to the second Soulstone at the top. | 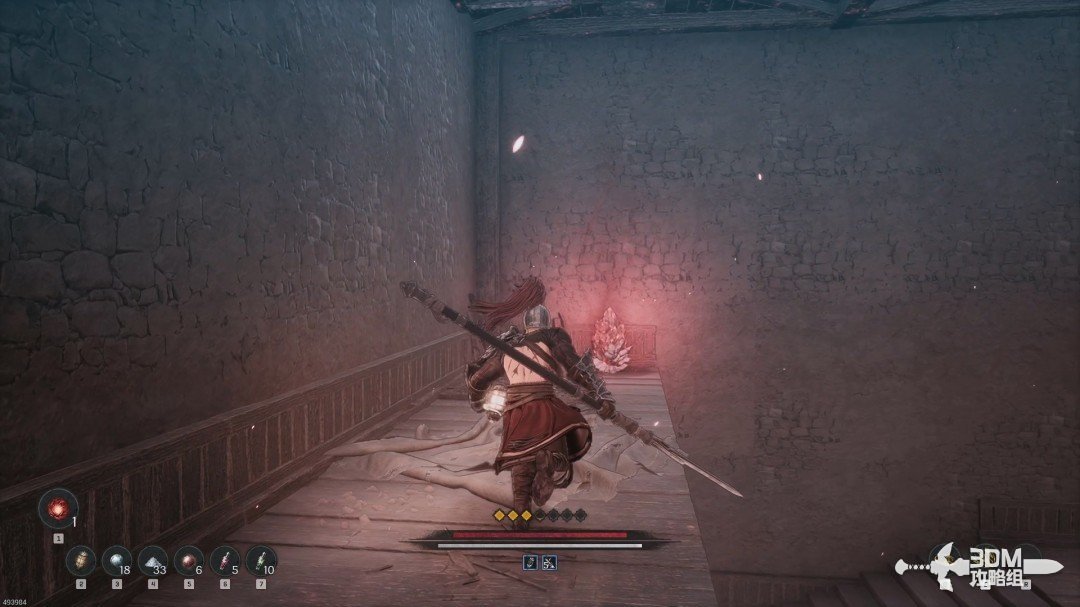 View route → | |
| Beyond the cellar, break the loose wall beside two barrels. Take the third Soulstone and watch for the ambush inside. | 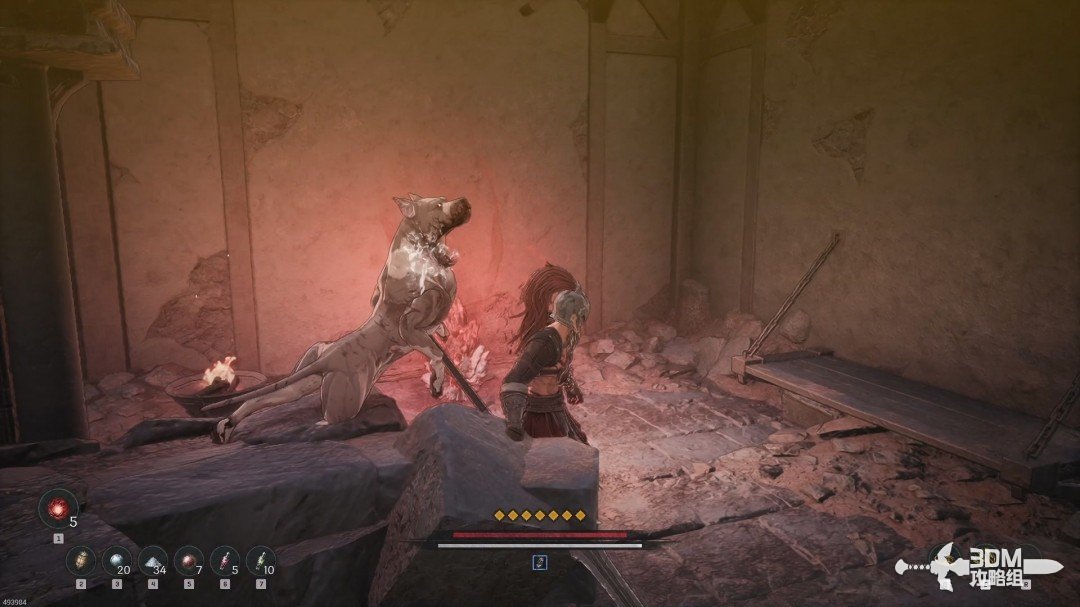 View route → | |
| Descend carefully between ledges. Check behind the boards beside the required passage for the fourth Soulstone. | 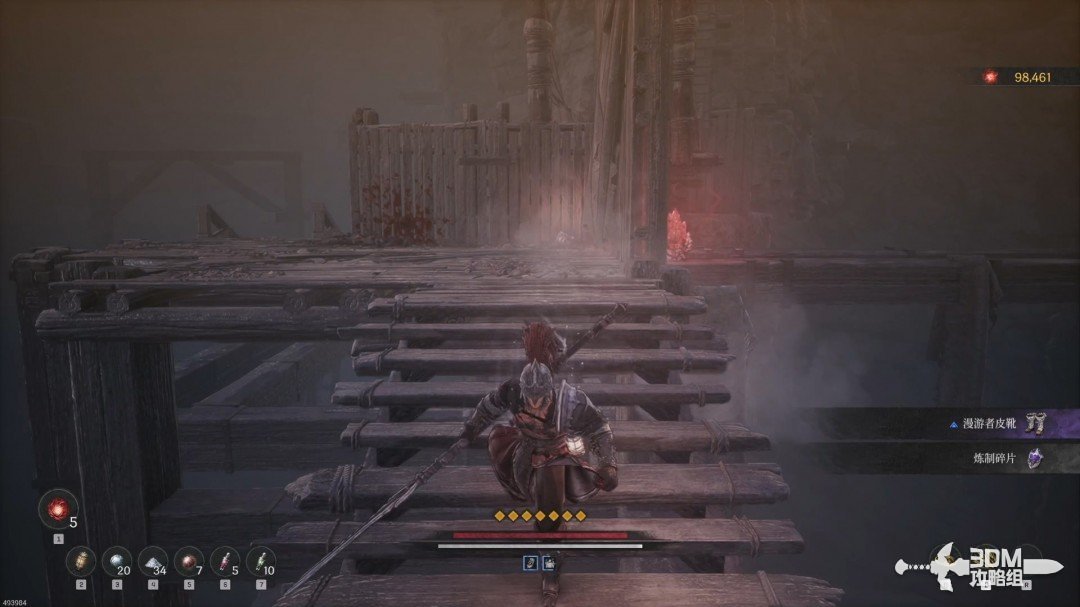 View route → |
Main mission · 07 · Veiled Knives
| Item | Location | Walkthrough |
|---|---|---|
| Speak to Tristan, enter the quarry, and lower the shortcut ladder. Clear the spawning spider for the first Soulstone and the scroll below. | 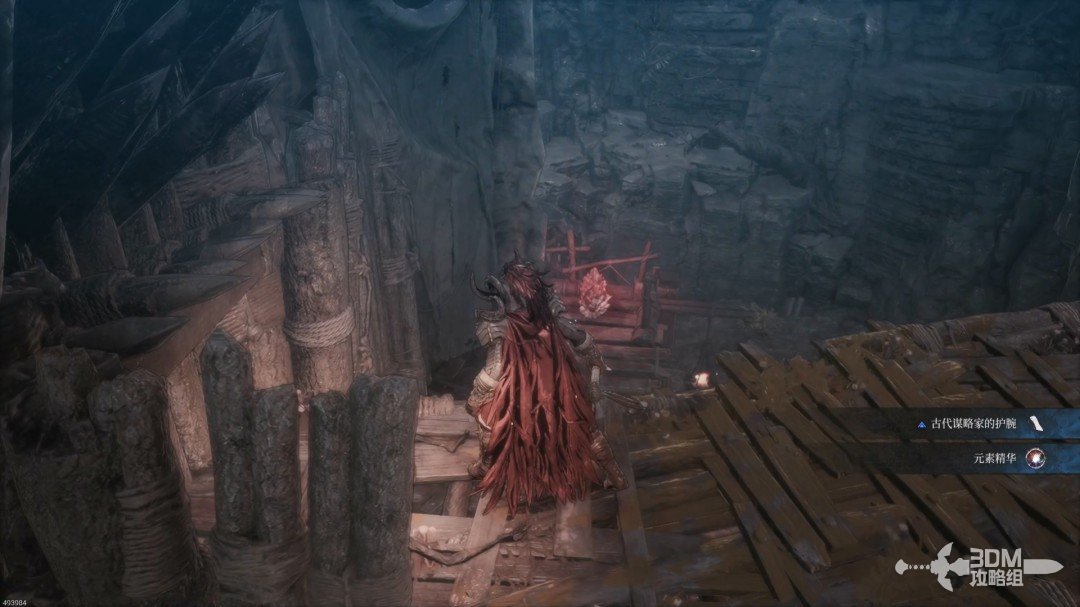 View route → | |
| Cross the spider nest and collect the poison summon scroll. Circle the locked gate and descend to the room with the second Soulstone. | 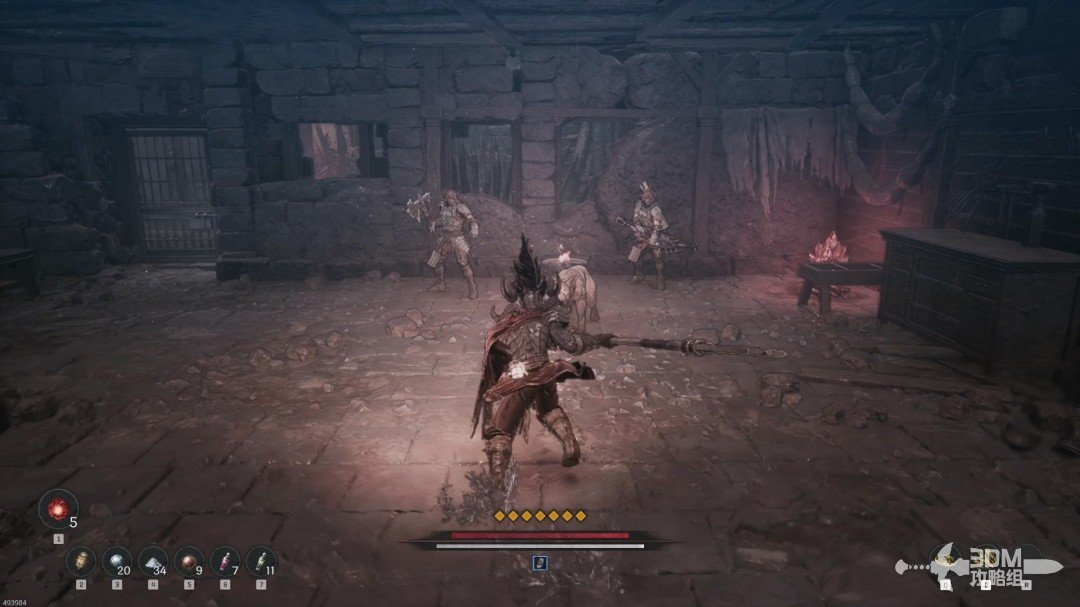 View route → | |
| Open the gate back to the route, climb the opposite ladder, and descend to the third Soulstone below. | 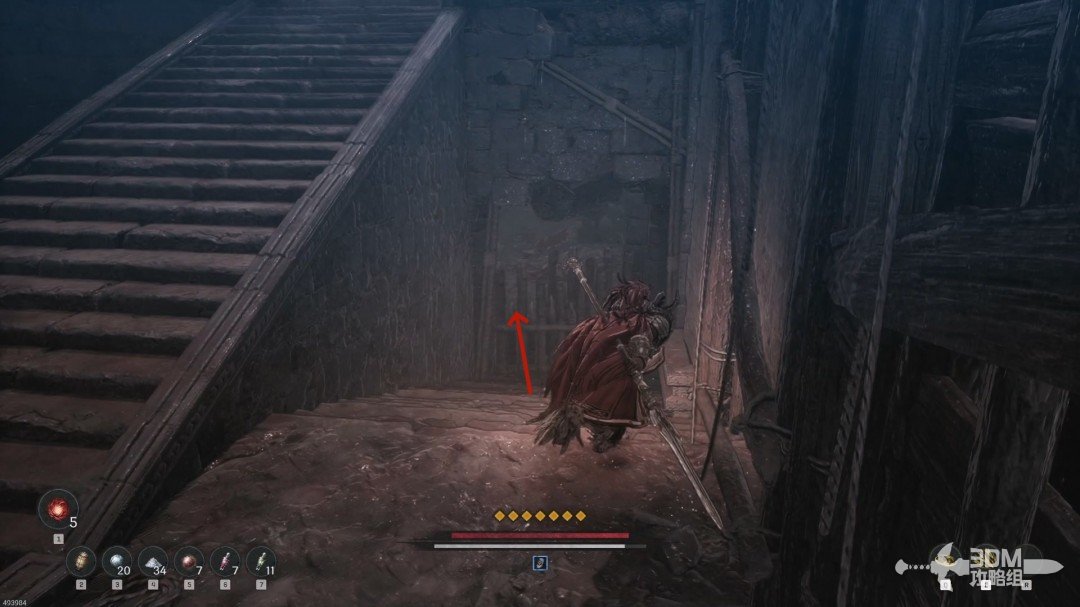 View route → | |
| At the boss checkpoint, open the left gate and javelin the fourth Soulstone on the upper right platform before resting. | 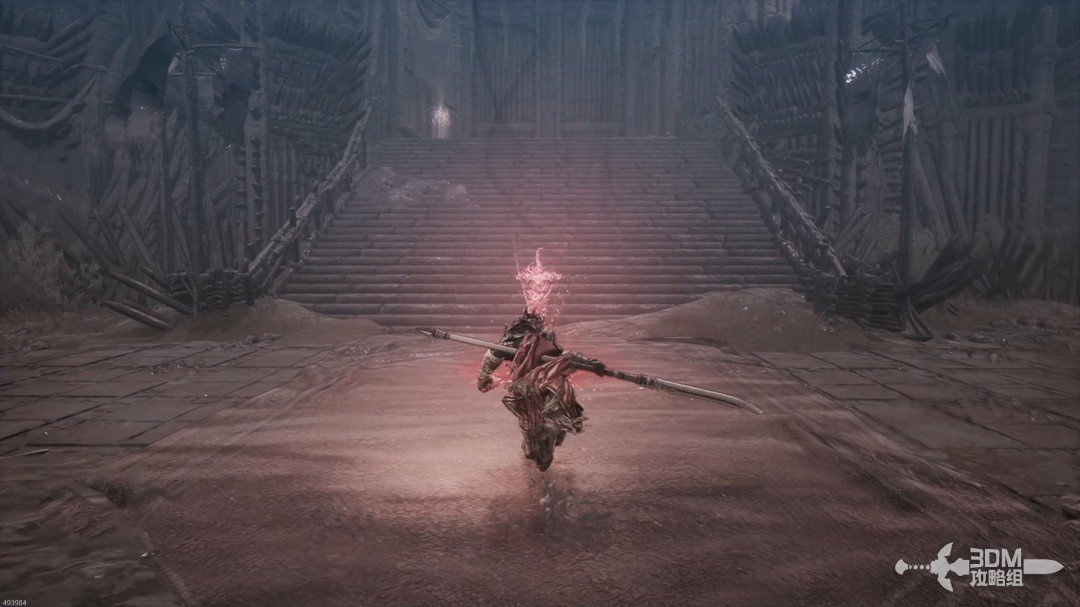 View route → |
Main mission · 08 · Devoured Village
| Item | Location | Walkthrough |
|---|---|---|
| Activate the opening checkpoint, return along the path behind you for the first Soulstone, then enter the village. | 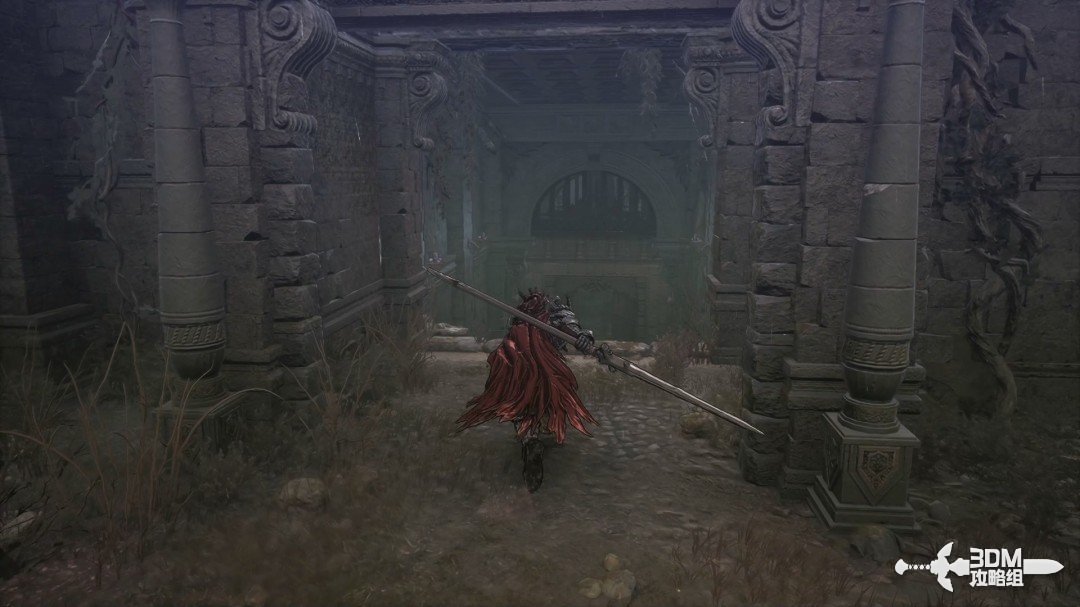 View route → | |
| Take the hidden door underground, follow the pipes, and open the gate shortcut. Break the wooden barrier behind you for the second Soulstone. | 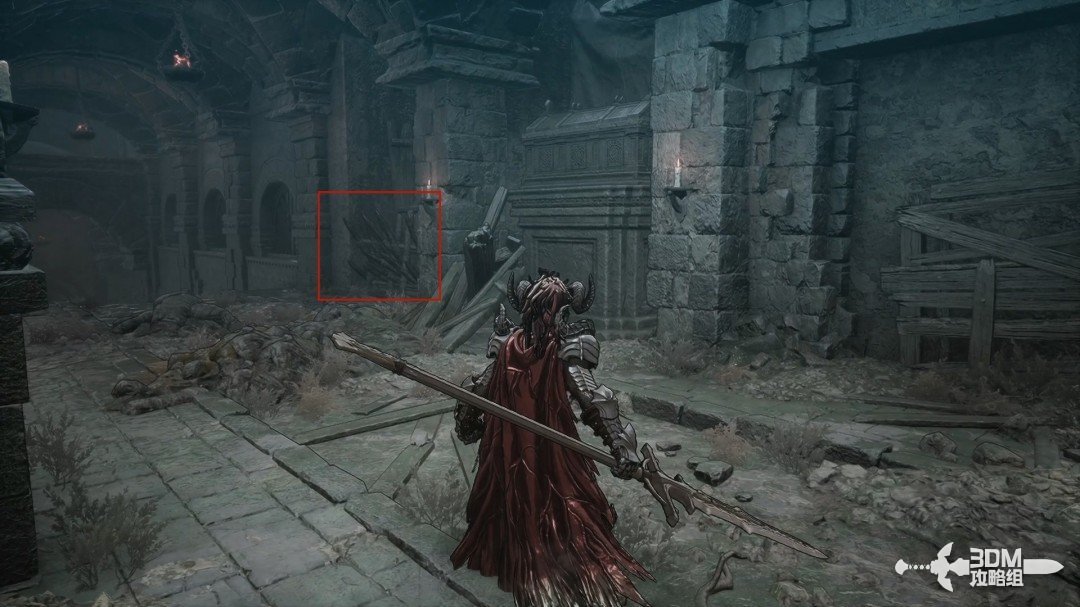 View route → | |
| Follow the pipes into the library and open the shortcut. Activate the farthest bookshelf for the third Soulstone in the passage. | 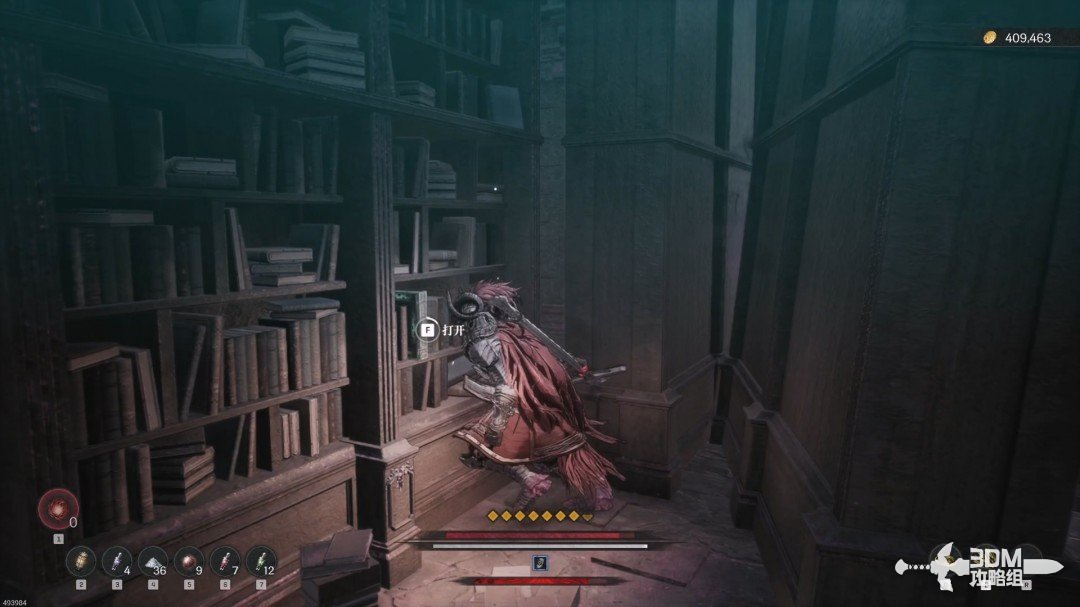 View route → | |
| Return along the left pipe to its end for the fourth Soulstone, then rejoin the mechanism route. | 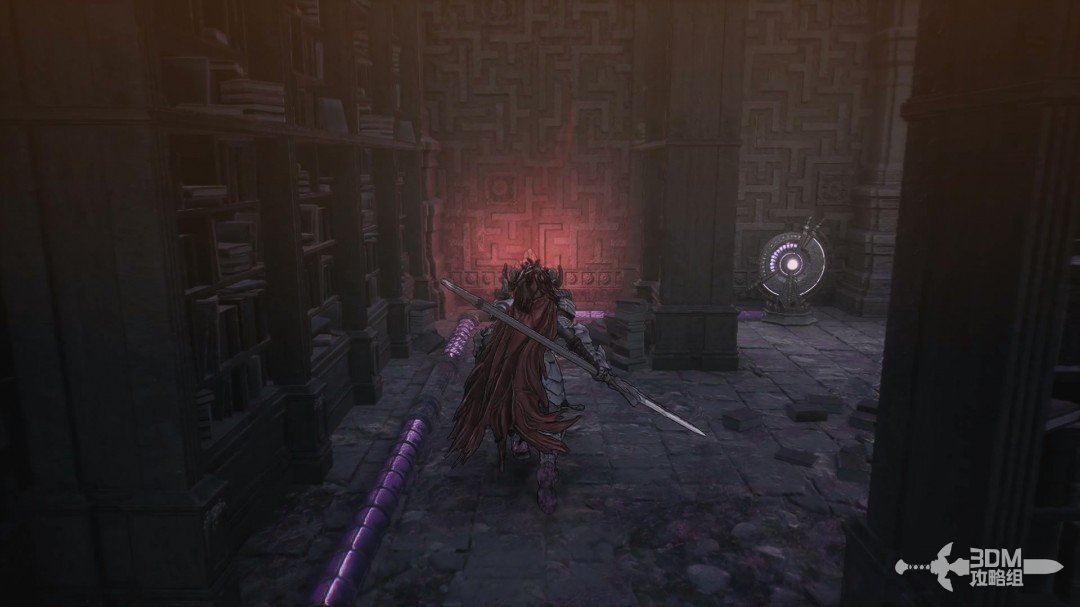 View route → |
Main mission · 09 · Inconceivable Truth
| Item | Location | Walkthrough |
|---|---|---|
| Speak to Tristan and enter the outpost. Search around the building, then break the boards behind the stairs for the first Soulstone. | 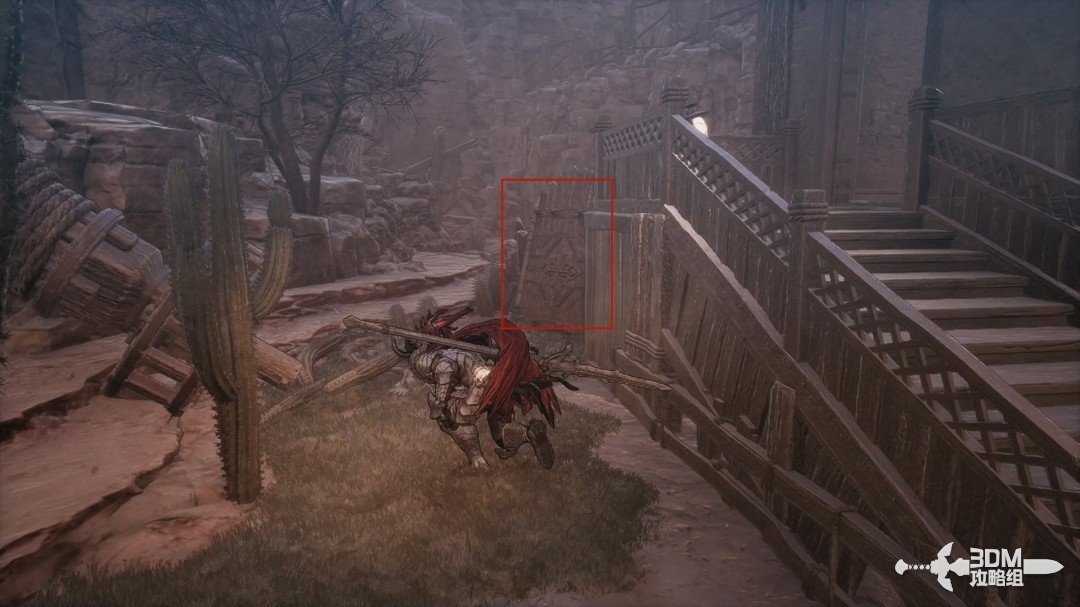 View route → | |
| Return to the left route and approach the guarded bridge. The second Soulstone is on its right side. | 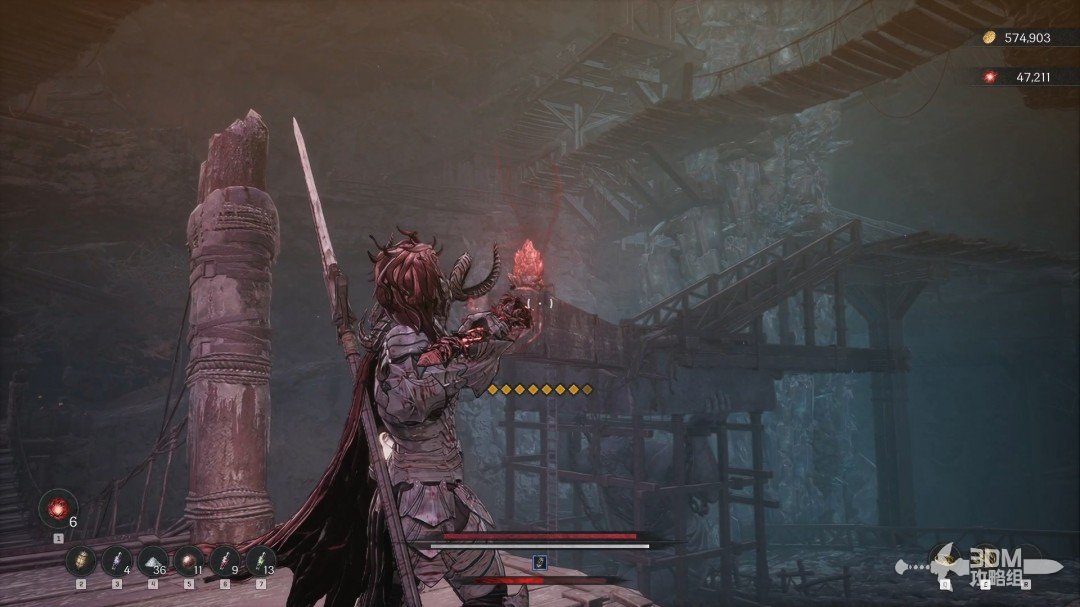 View route → | |
| Clear the fireball caster and take the right route. Look closely at the mineral wall for the camouflaged third Soulstone. | 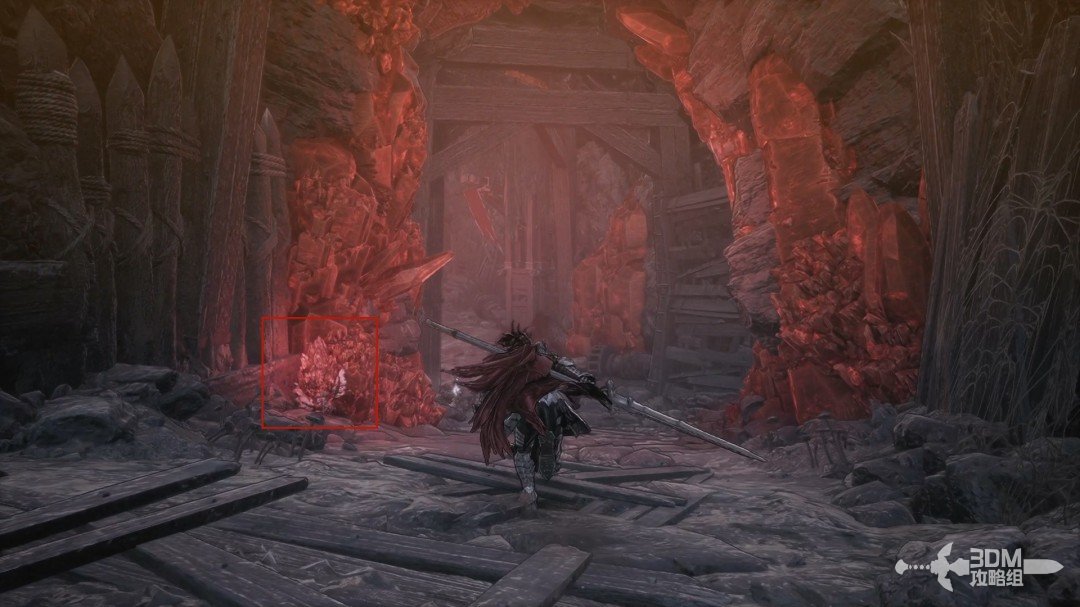 View route → |
Main mission · 10 · Witch’s Castle
| Item | Location | Walkthrough |
|---|---|---|
| Follow the city route past the checkpoint, drop to the lower platform, and look back for the first Soulstone above. | 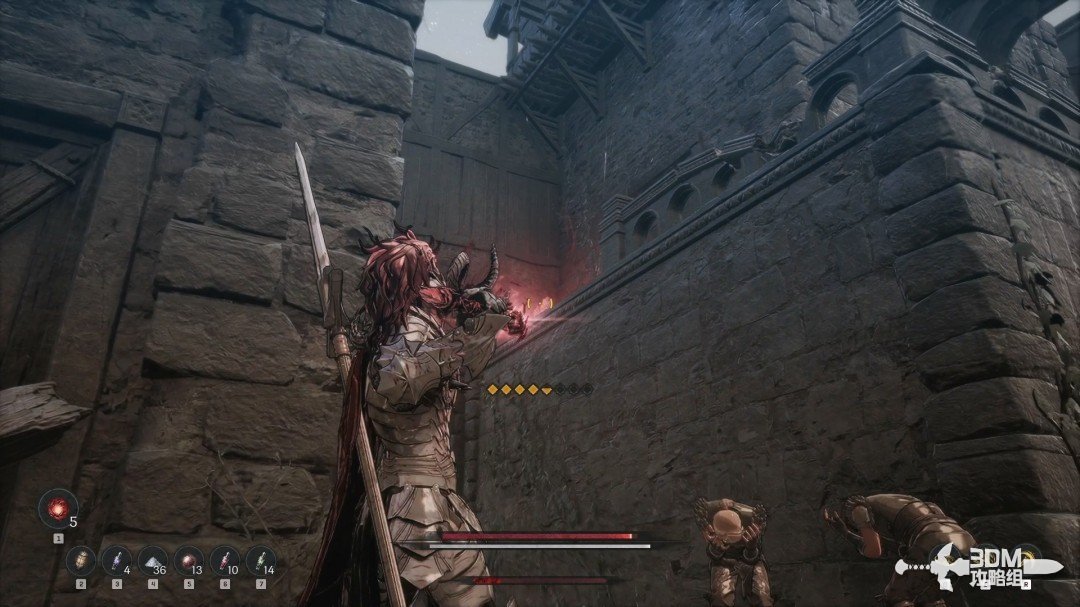 View route → | |
| Open the gate to the checkpoint and search the house beside the tree for the second Soulstone. | 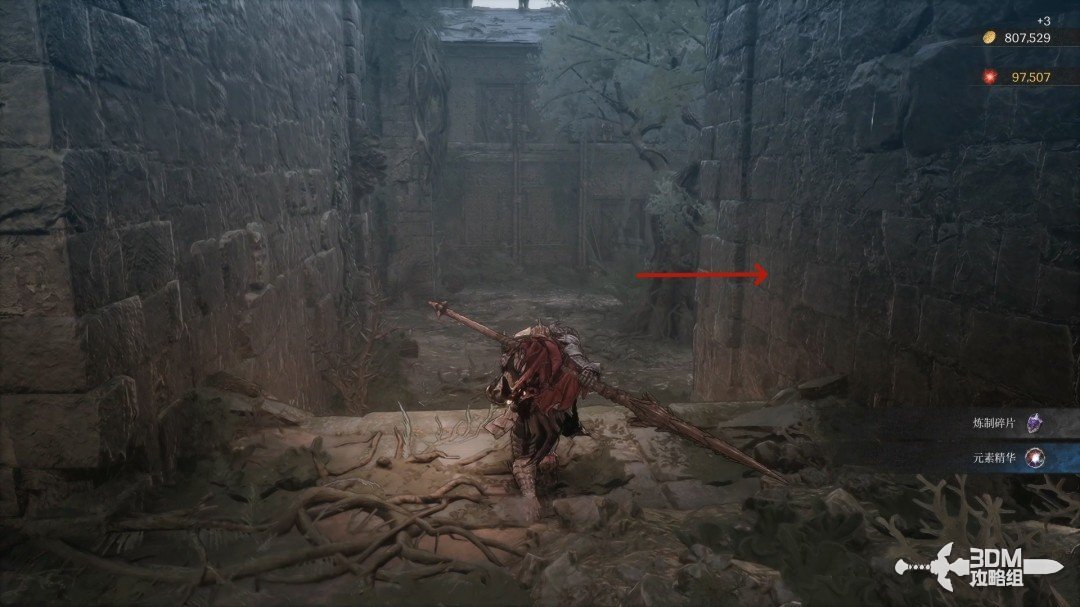 View route → | |
| Collect the water cleansing scroll behind the house, then follow the lower path to the third Soulstone behind the left gate. | 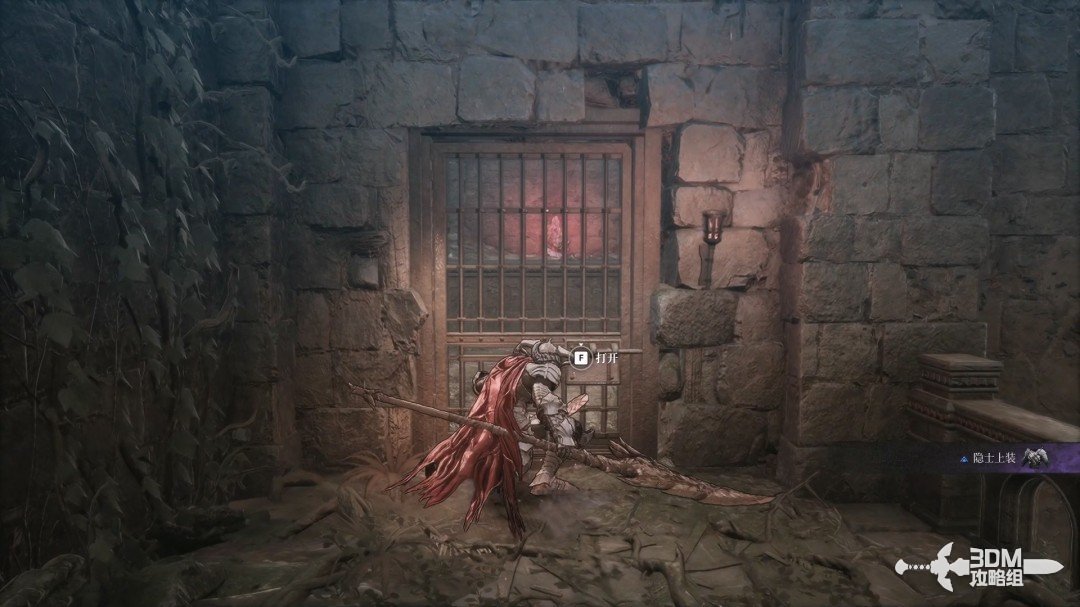 View route → | |
| Take the hall’s right stairs through the study, clear the skeletons, and climb to the Soulstone on the left. | 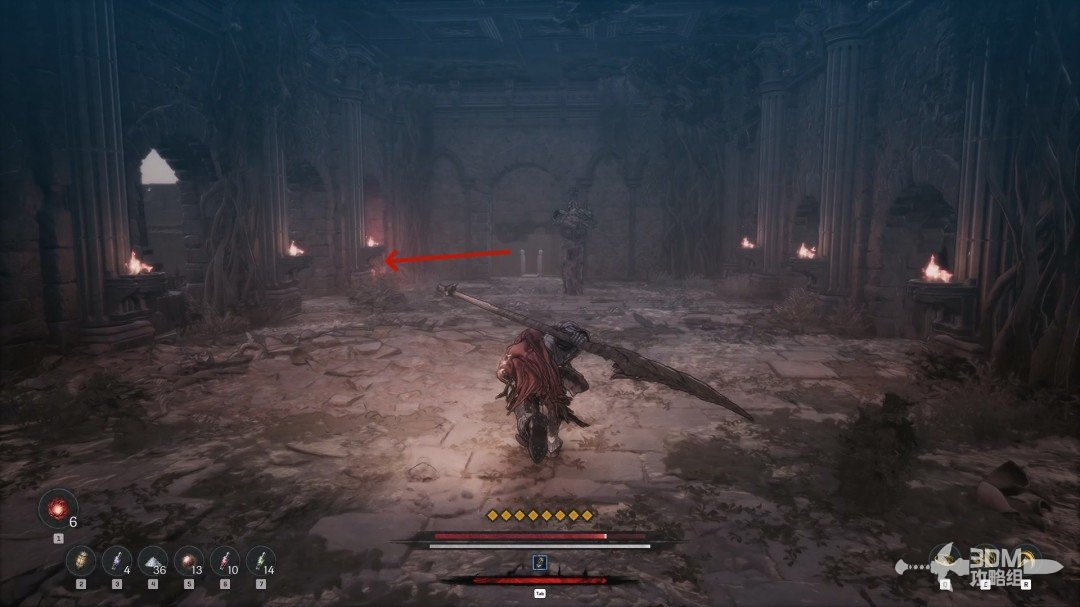 View route → | |
| Enter the library from the left stairs and activate the bookshelf mechanism for another Soulstone in the passage. | 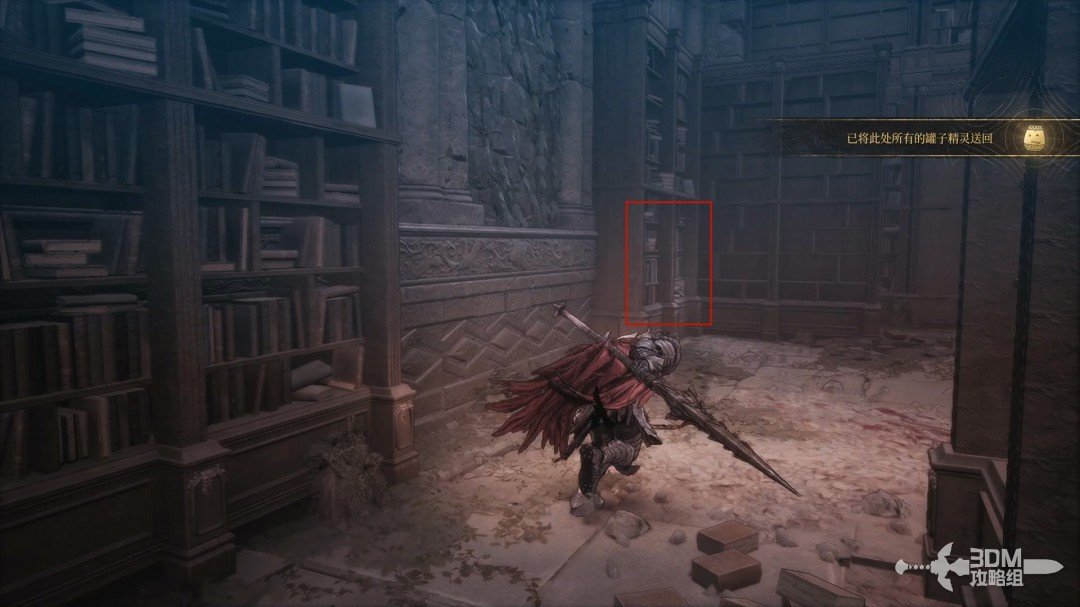 View route → |
Main mission · 11 · Hermit Mountains
| Item | Location | Walkthrough |
|---|---|---|
| After the portal, take the right branch. Clear the skeletons for the scarlet fiend scroll, then find the first Soulstone high above the right stairs. | 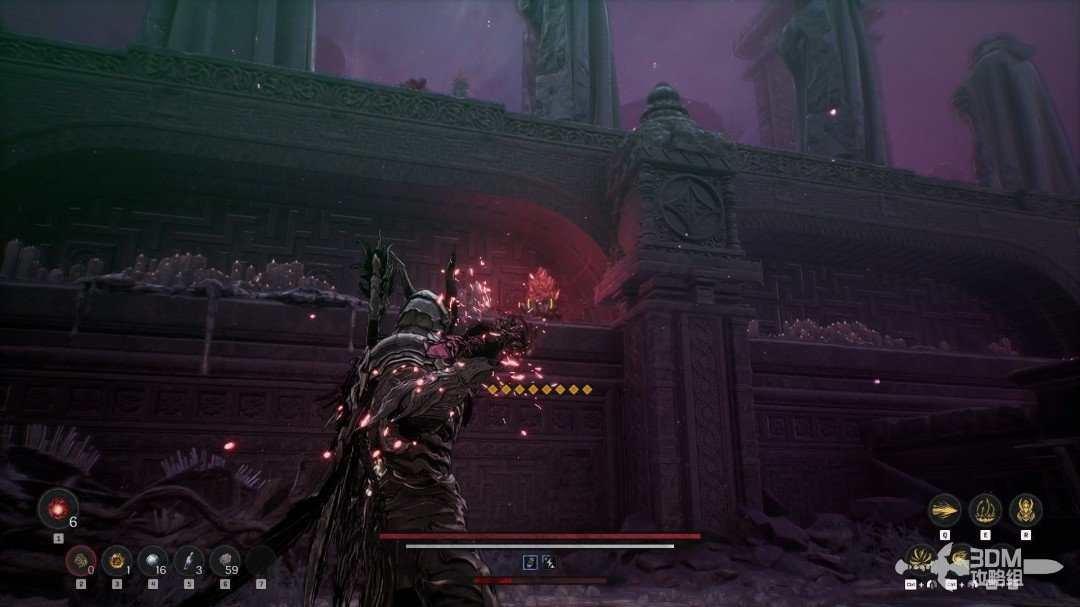 View route → | |
| Use the portal beyond the checkpoint and avoid the collapsing boards. Look left after the bridge for the second Soulstone. | 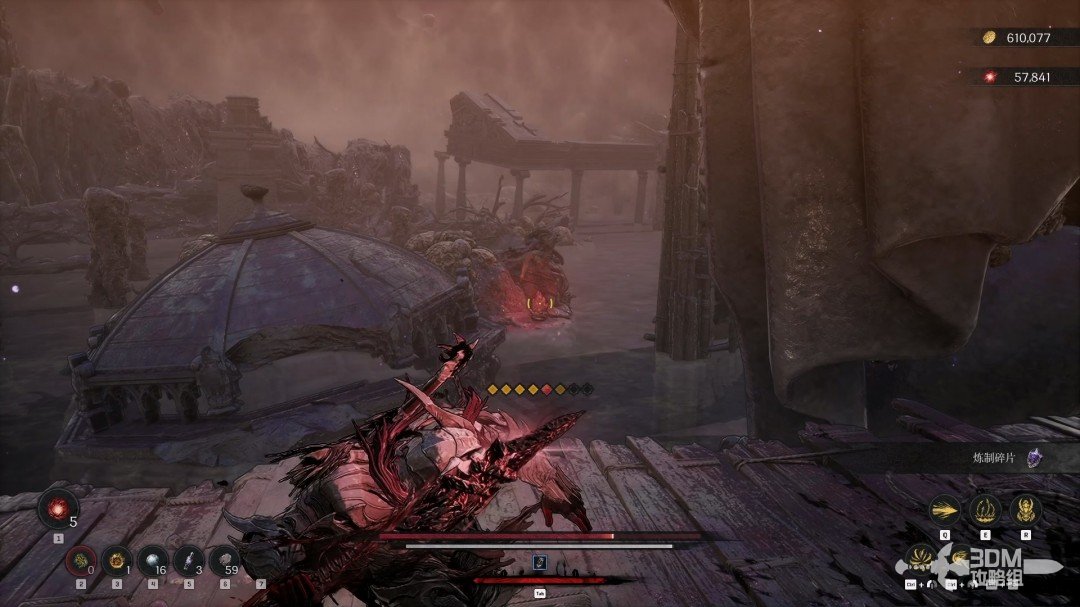 View route → | |
| Return from the minor boss, take the left slope for the illusion cleansing scroll, then the right fork for the third Soulstone behind the bat. | 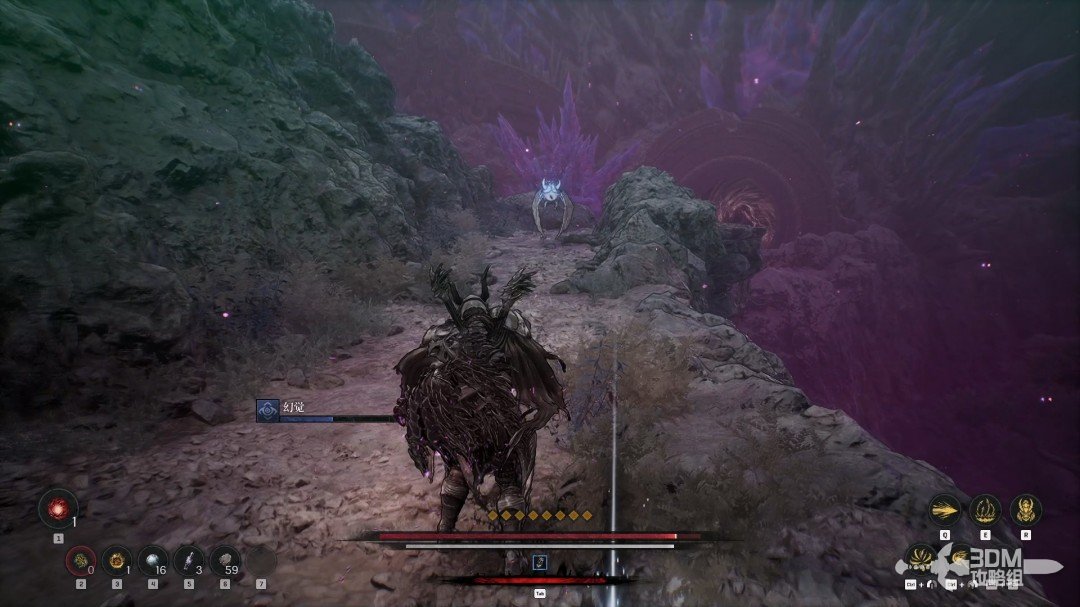 View route → | |
| Finish the phantom forest encounter, return to the junction, and take the straight route through the stone gate for the fourth Soulstone on the right. | 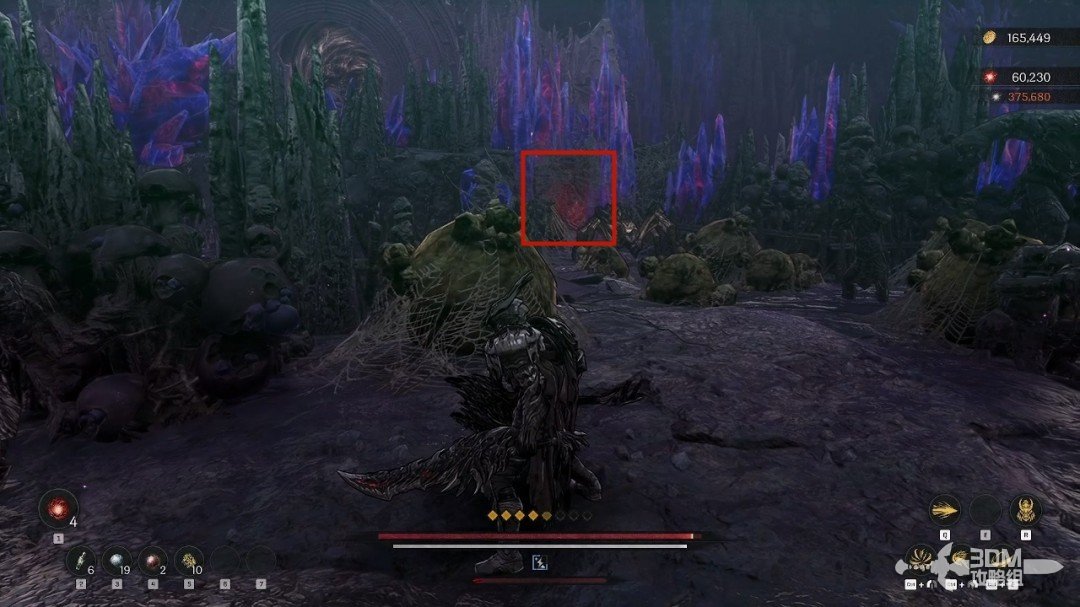 View route → |
Main mission · 12 · Corruptors’ Fortress
| Item | Location | Walkthrough |
|---|---|---|
| Defeat the corridor skeleton and break the hidden wall on the left for the first Soulstone. | 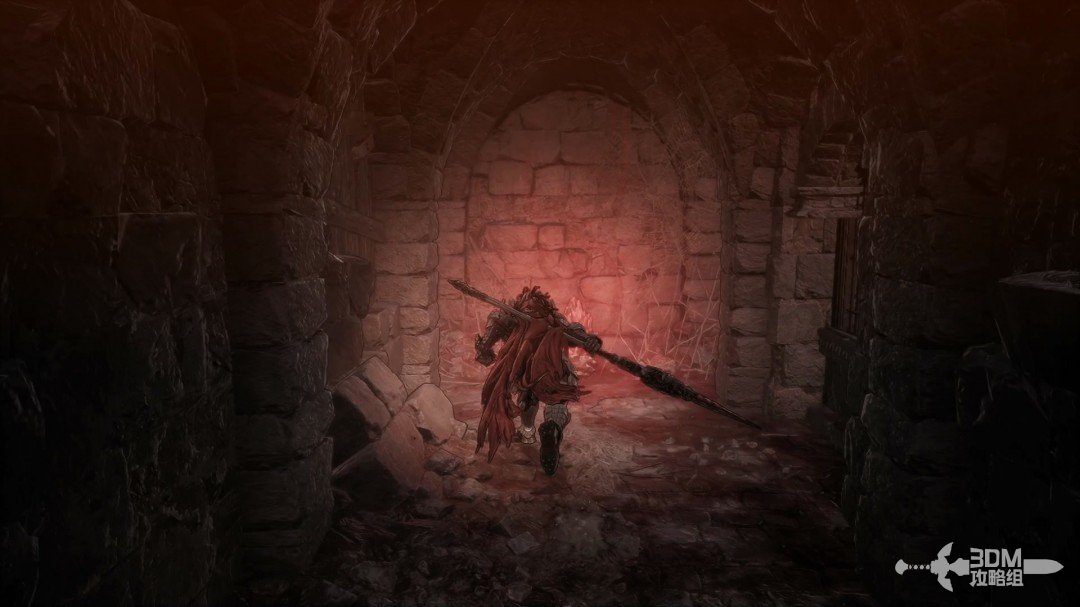 View route → | |
| Climb back up and descend through the central opening. The second Soulstone is behind crates on the left. | 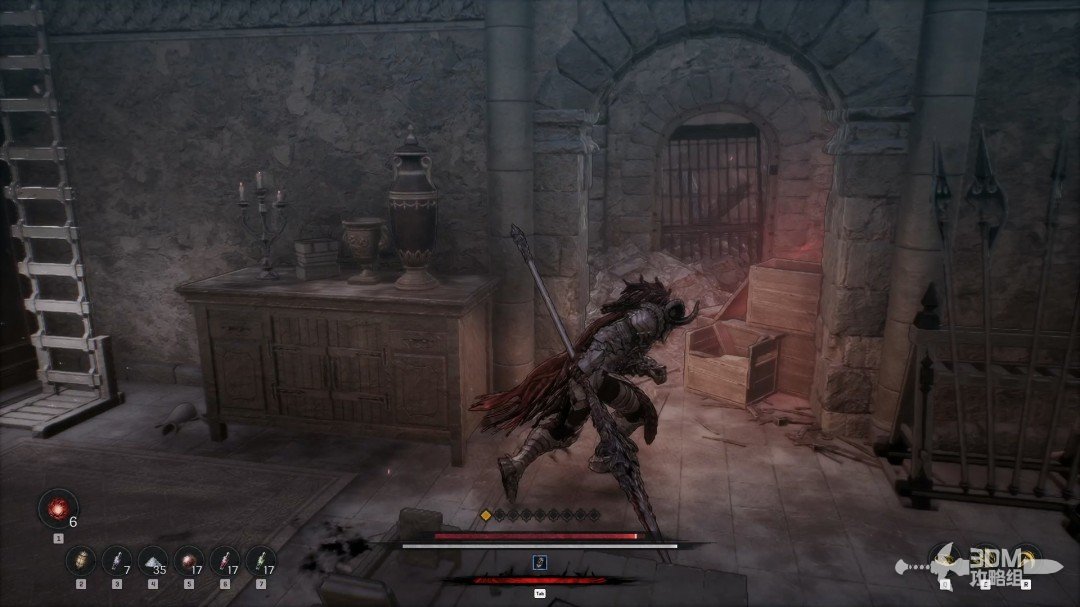 View route → | |
| Follow the left outside route and climb to the balcony for the third Soulstone. | 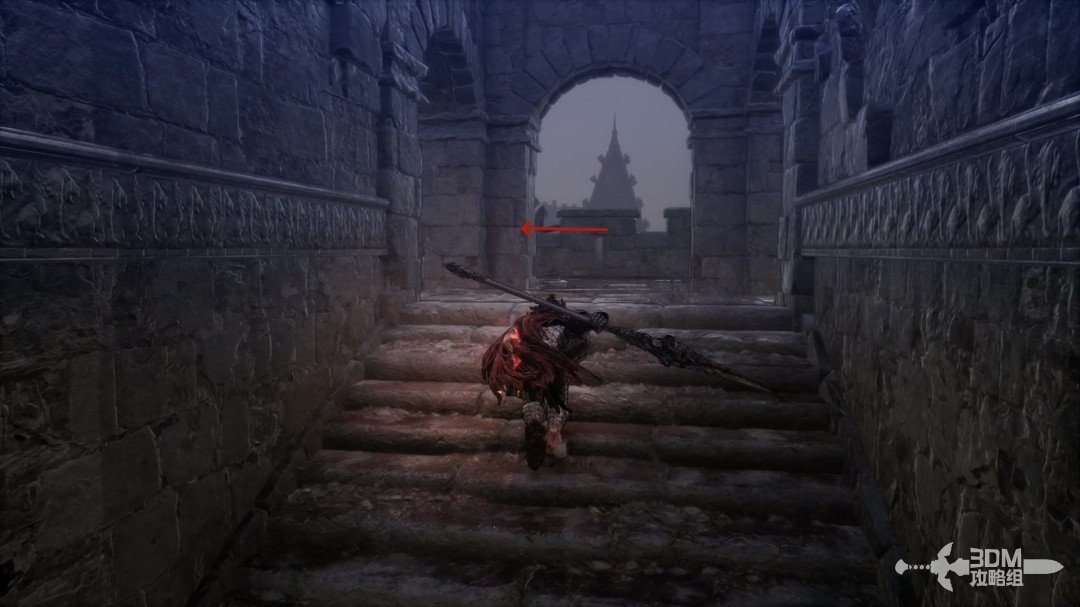 View route → | |
| Take the right stairs for the general scroll, then the left stair route beyond the doorway for the fourth Soulstone behind the soldiers. | 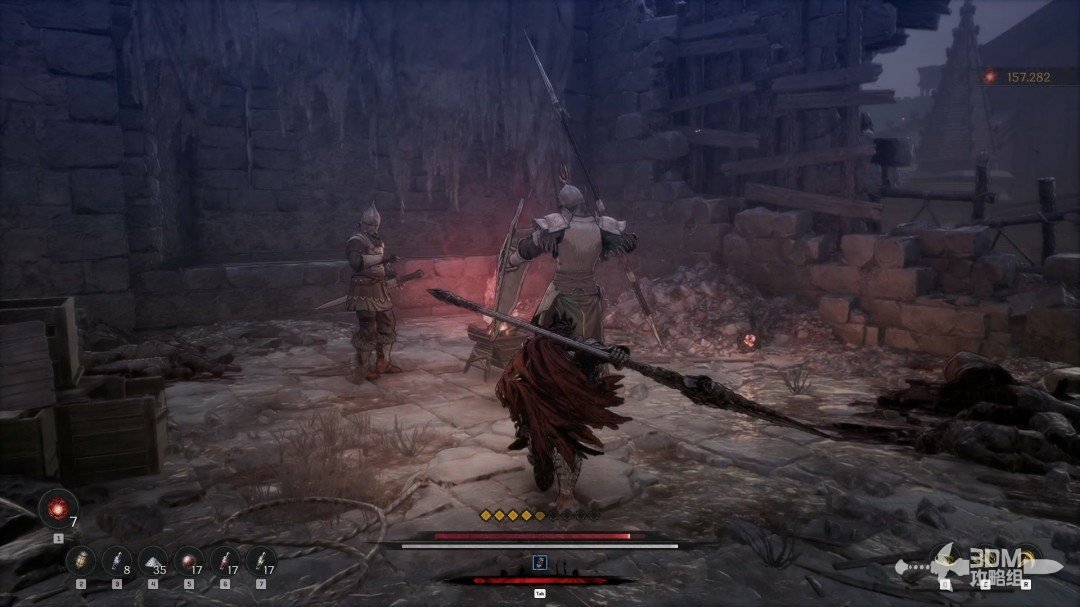 View route → | |
| Before the boss gate, break the hidden wall on the right for the fifth Soulstone, then open the main door. | 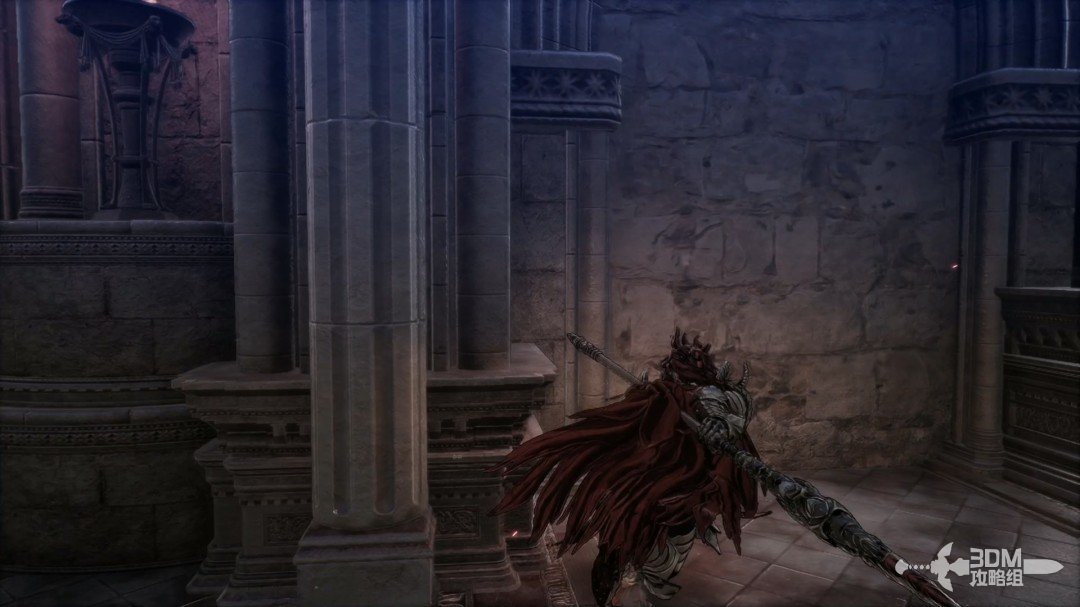 View route → |
Main mission · 13 · Strange Melody
| Item | Location | Walkthrough |
|---|---|---|
| Take the left door upstairs. Collect the gilded scroll from the room's edge before dropping through the collapsing floor for the first Soulstone. | 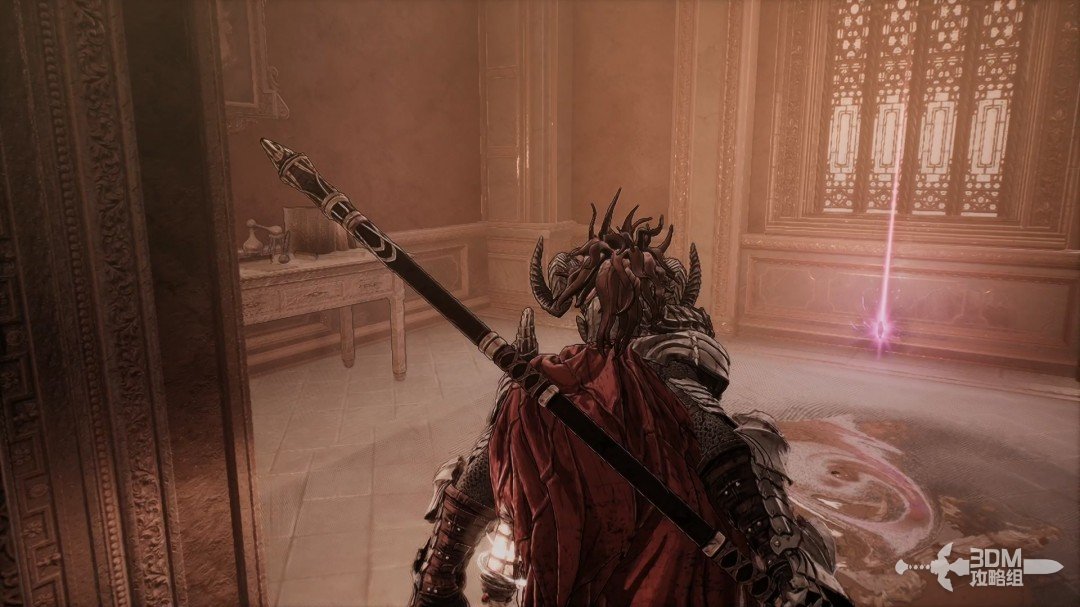 View route → | |
| Use the painting to return upstairs, enter the hidden painting passage, and find the second Soulstone behind the bard's piano. | 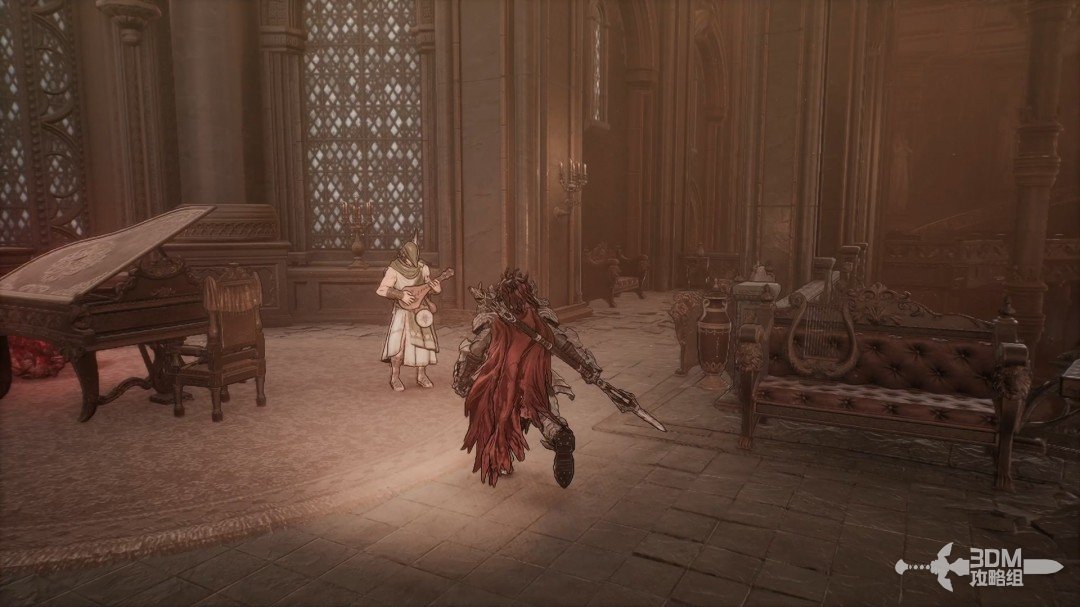 View route → | |
| Cross the long corridor, rest, and defeat the stair elite. The third Soulstone is in the room along the other stair route. | 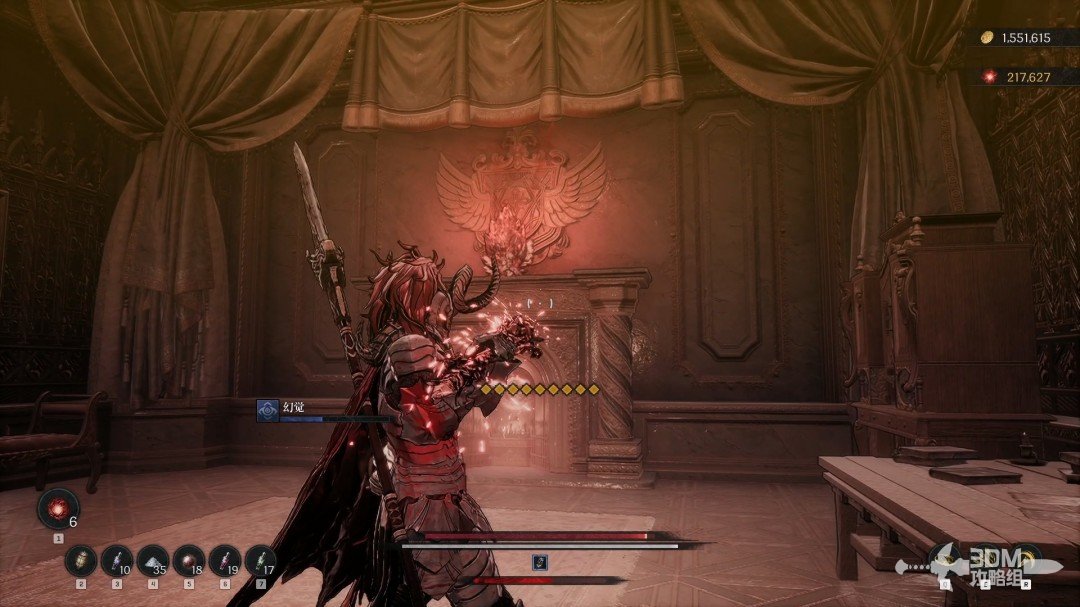 View route → | |
| Take the Central Theatre Key from the chest and search the hidden room on the right for the fourth Soulstone. | 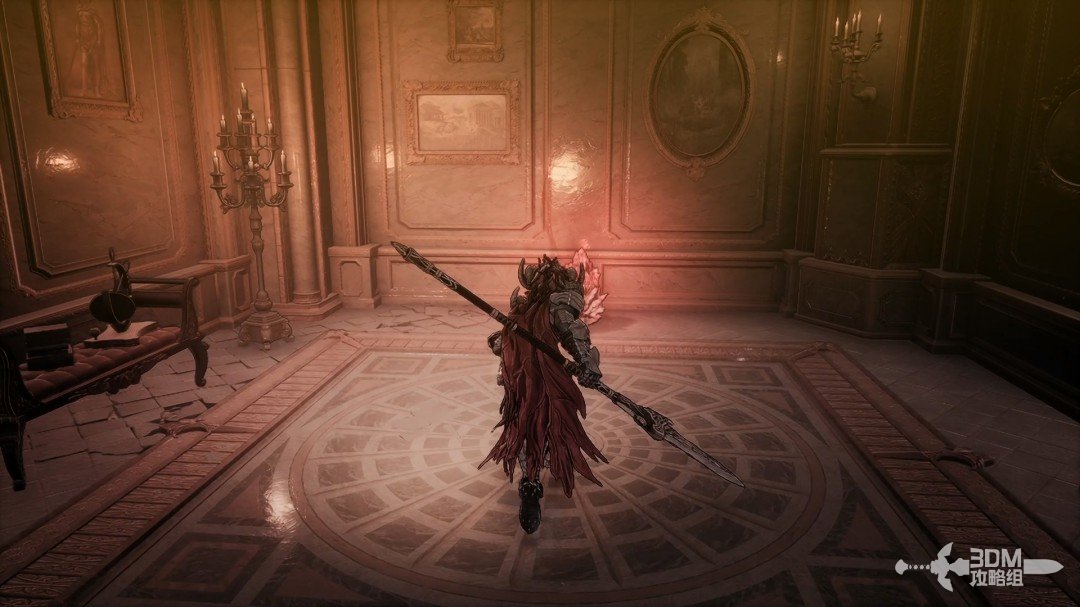 View route → |
Main mission · 14 · Fall of the Empire
| Item | Location | Walkthrough |
|---|---|---|
| Ride down to the imperial city checkpoint, break the wooden barrier on the right, and take the first Soulstone inside. | 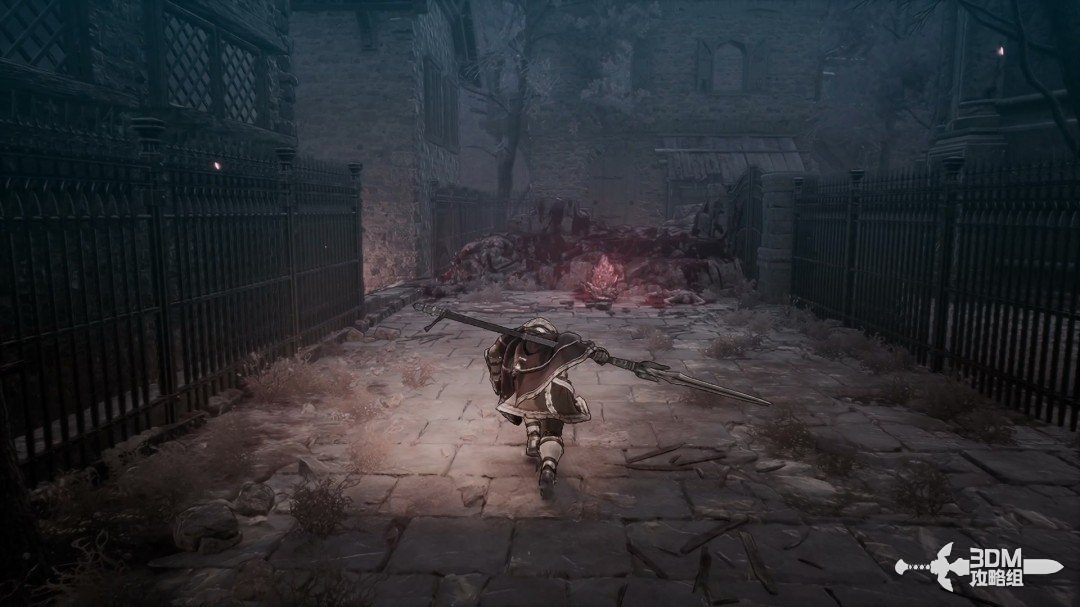 View route → | |
| Break the growths, search the chest, and take the right branch to the second Soulstone inside the wall. | 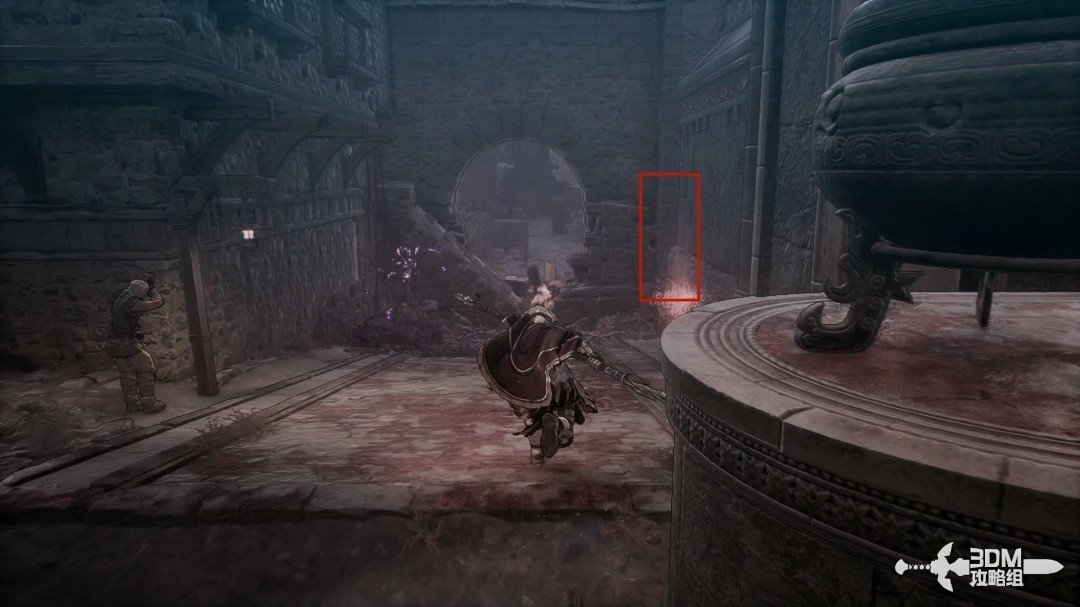 View route → | |
| Use cover against the fireball enemies, search the pipe memory, and look below the water outlet for the third Soulstone. | 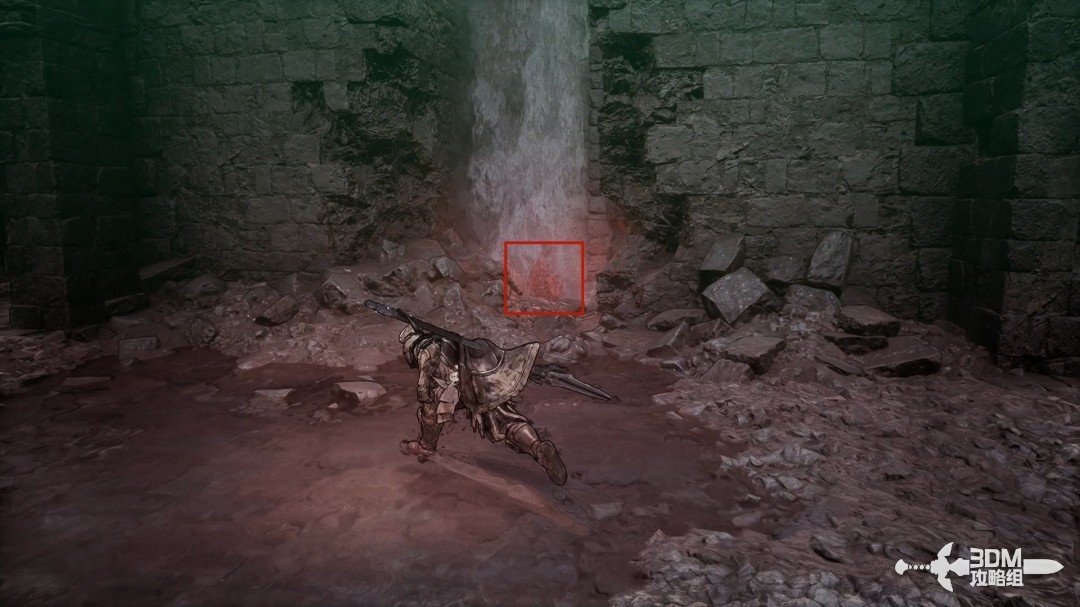 View route → | |
| Activate the church checkpoint and check behind the large statue for the fourth Soulstone. | 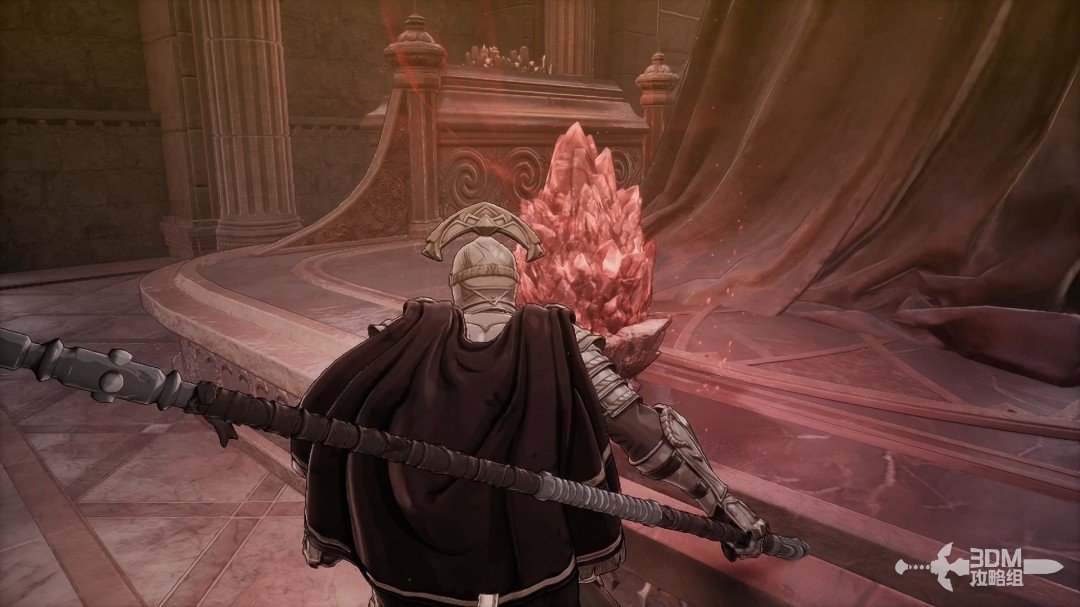 View route → | |
| Open the church shortcut, then take the right fork to the two waterwheels for the fifth Soulstone on the platform behind them. | 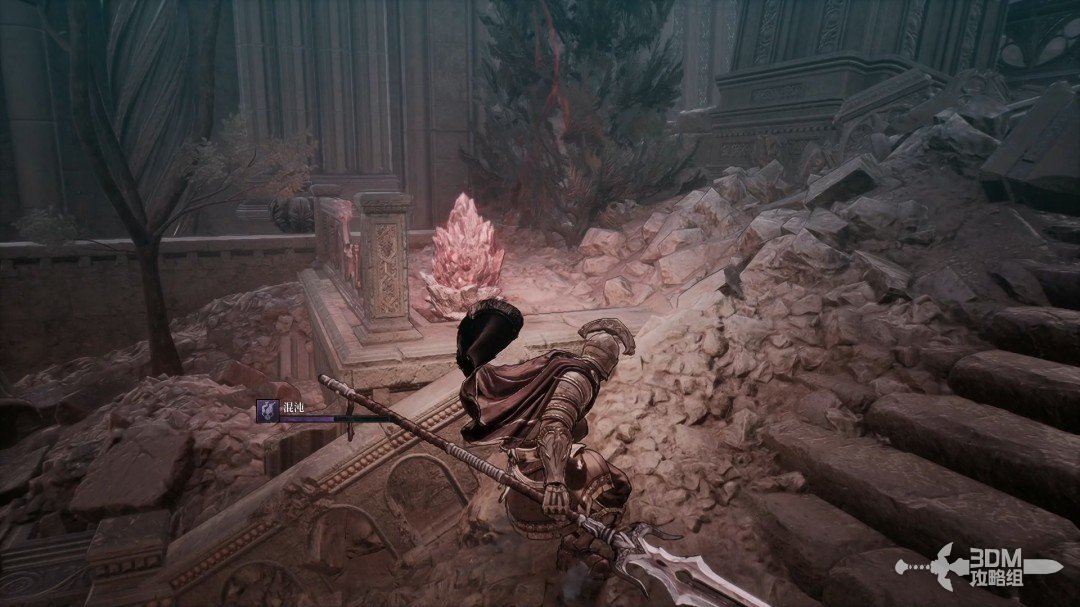 View route → |
Main mission · 15 · Bloodied Sanctuary
| Item | Location | Walkthrough |
|---|---|---|
| Reach the sanctuary checkpoint and open the main gate below. The first Soulstone is just inside on the right. | 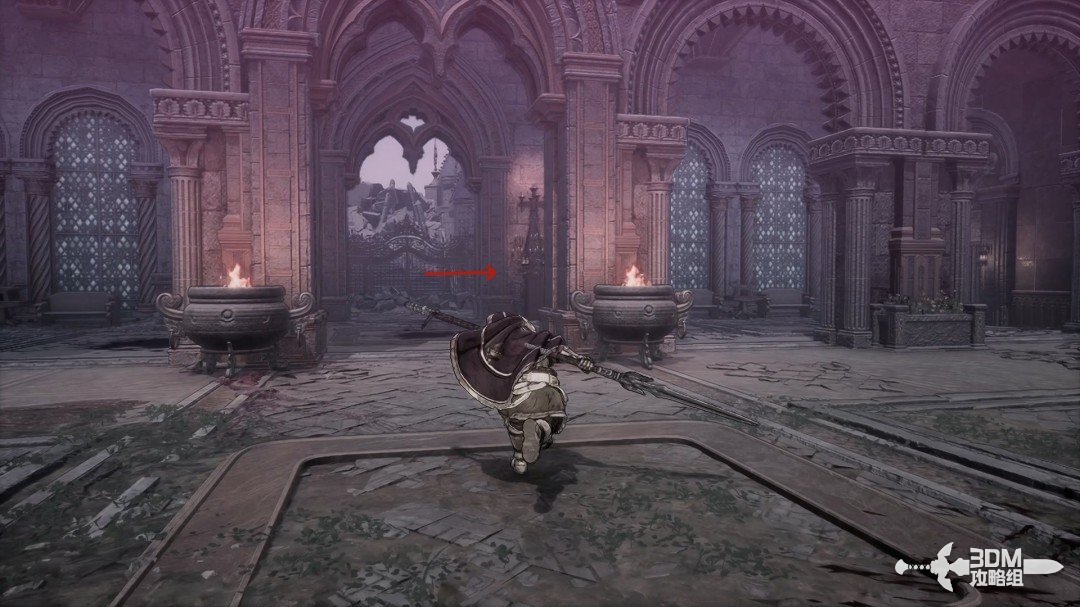 View route → | |
| Continue through the right doorway and look toward the high castle ledge for the second Soulstone, reachable now or from above later. | 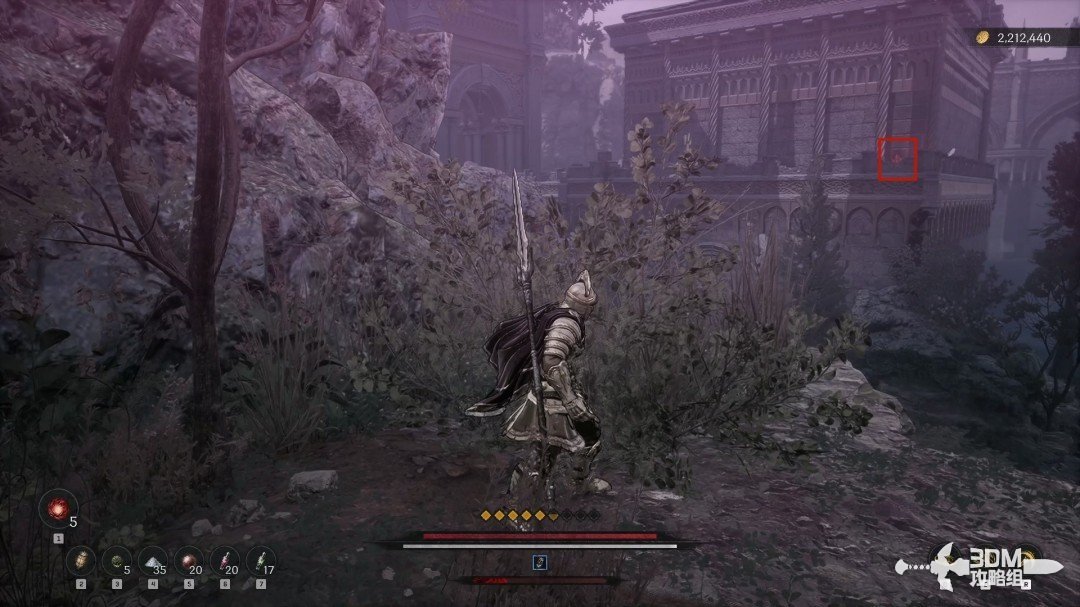 View route → | |
| Loot the chest behind the coffin and activate the checkpoint. Open the hidden door on the right for the third Soulstone. | 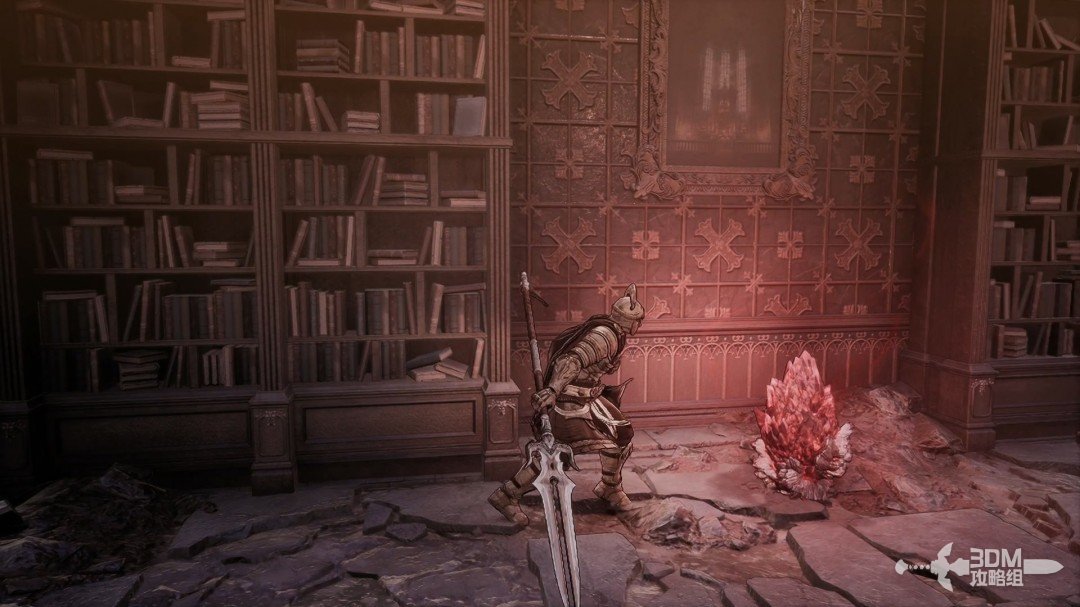 View route → | |
| After the memory, climb back up instead of dropping farther. The fourth Soulstone is behind the stairs ahead. | 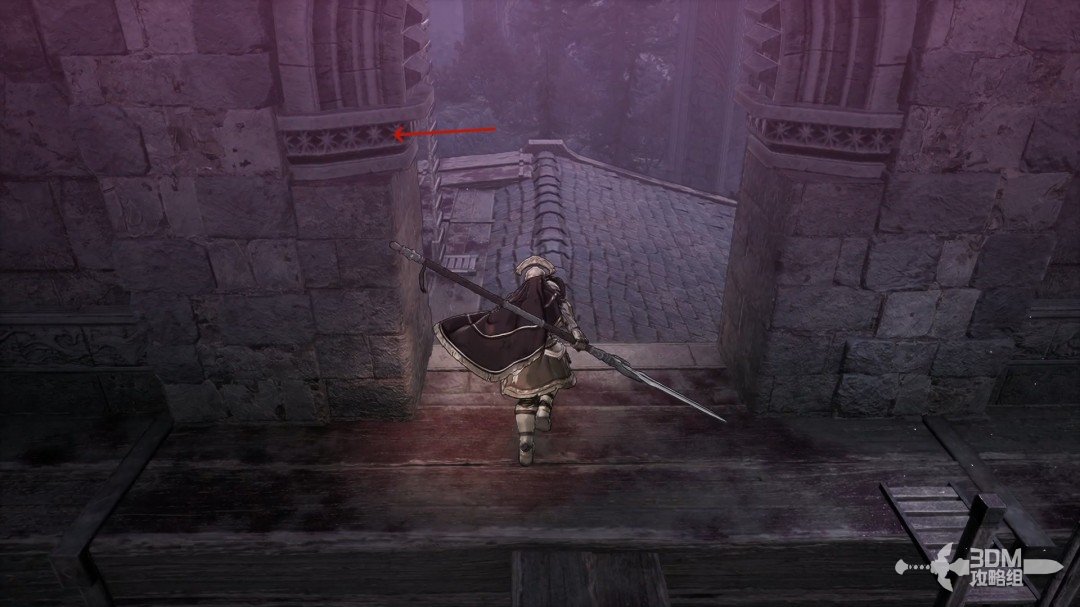 View route → | |
| Ride the elevator to the stairs and javelin the fifth Soulstone high on the right. | 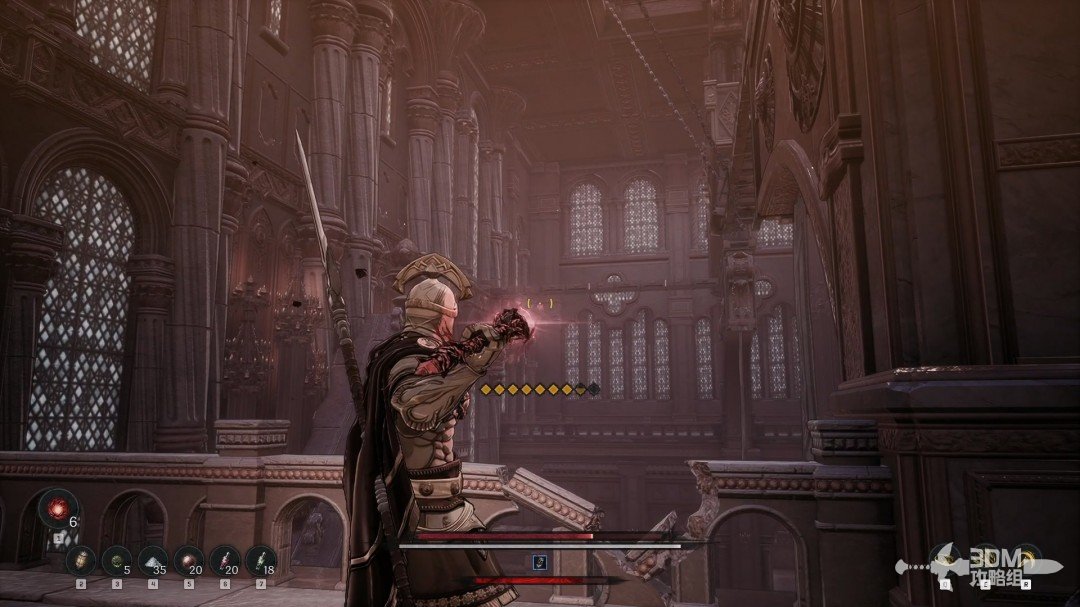 View route → |
Main mission · 16 · Master of Chaos
| Item | Location | Walkthrough |
|---|---|---|
| Search behind the statue and open the underground passage with the mechanism. Take the left branch for the first Soulstone. | 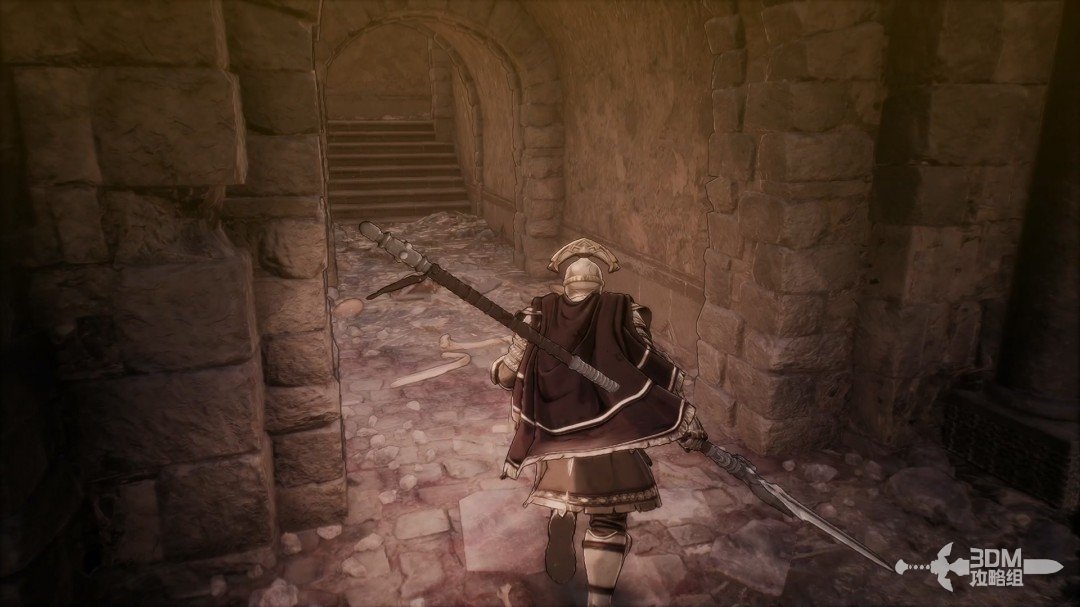 View route → | |
| Climb the right ladder to the rotating staircase, use the floor mechanism, and return to the corridor for the second Soulstone at its end. | 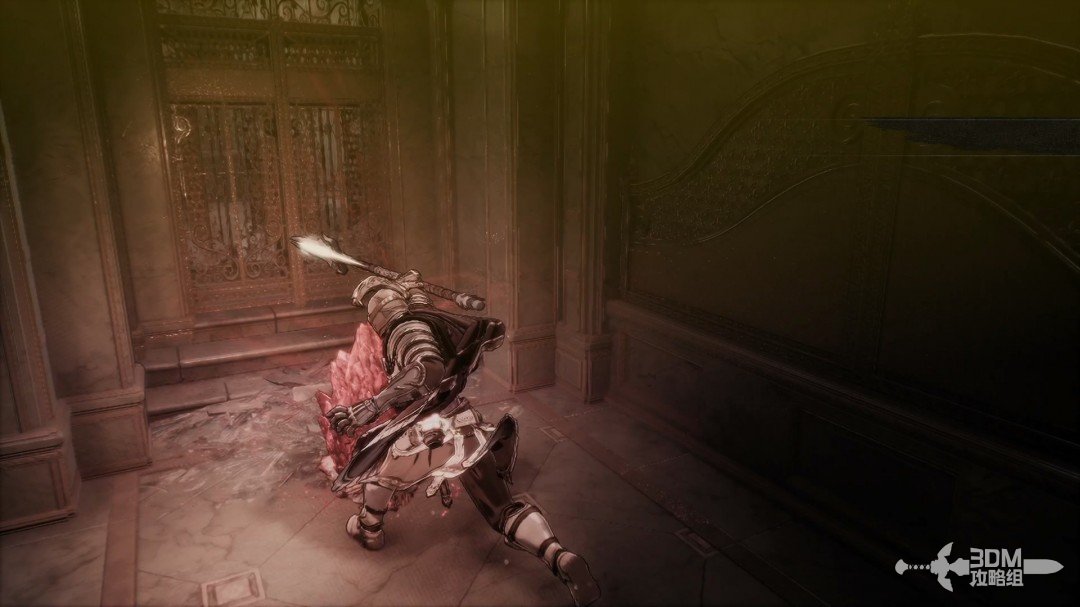 View route → | |
| Rotate the staircase to reach Daphrona's ending choice and check journal progress first. Use the study bookshelf mechanisms and find the third Soulstone above the passage. | 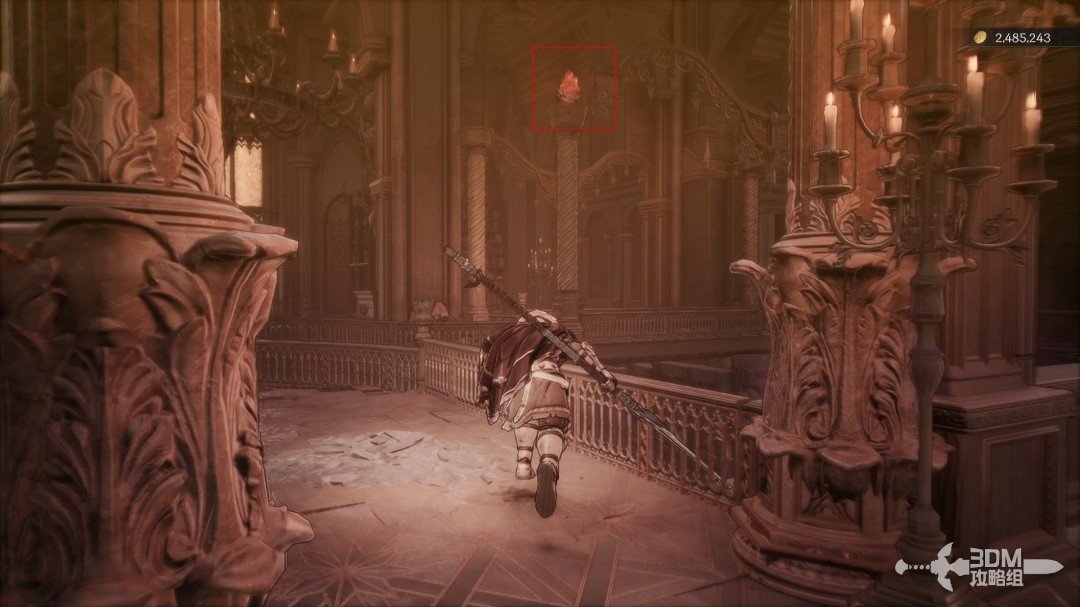 View route → | |
| Search the left room, return below, and take the right slope to the hidden wall containing the fourth Soulstone. | 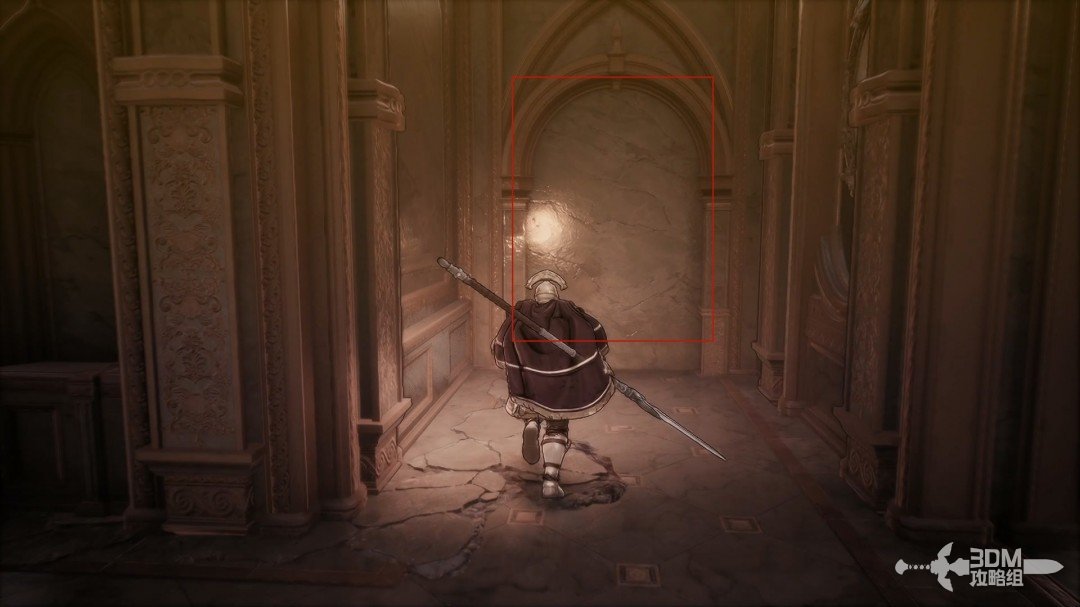 View route → |
Side mission · Jar Enthusiast
| Item | Location | Walkthrough |
|---|---|---|
| Accept Jar Enthusiast from Duimuk. Find the first jar before the bridge and the second inside the house below the invisible enemy, then take the first Soulstone outside. | 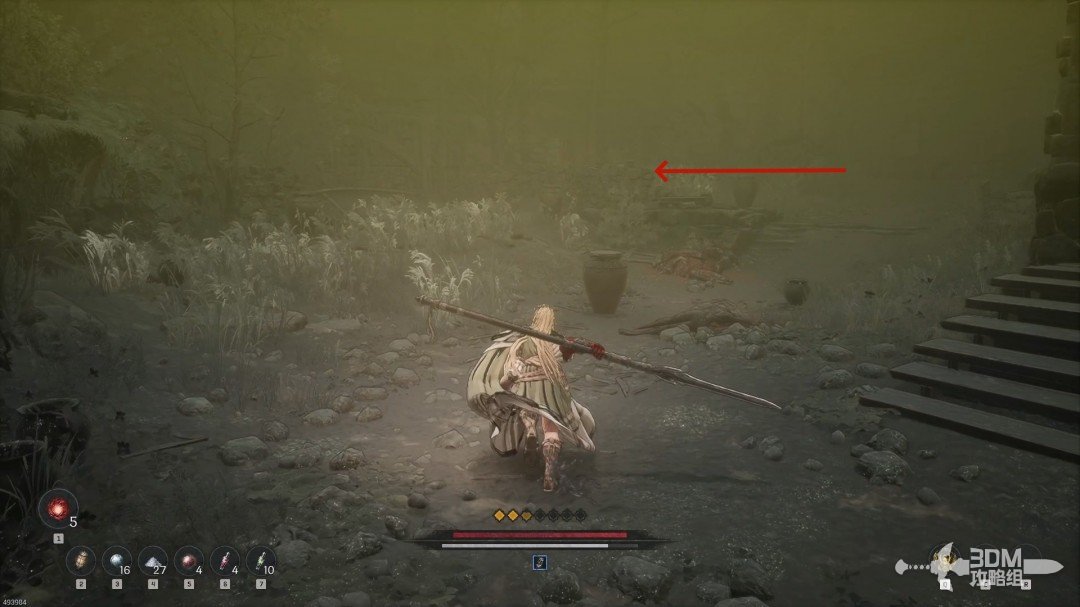 View route → | |
| Climb the right house stairs. Find jars three and four in the left houses, five above on the right, and six at the road’s left end. Take the second Soulstone behind the tower before leaving. | 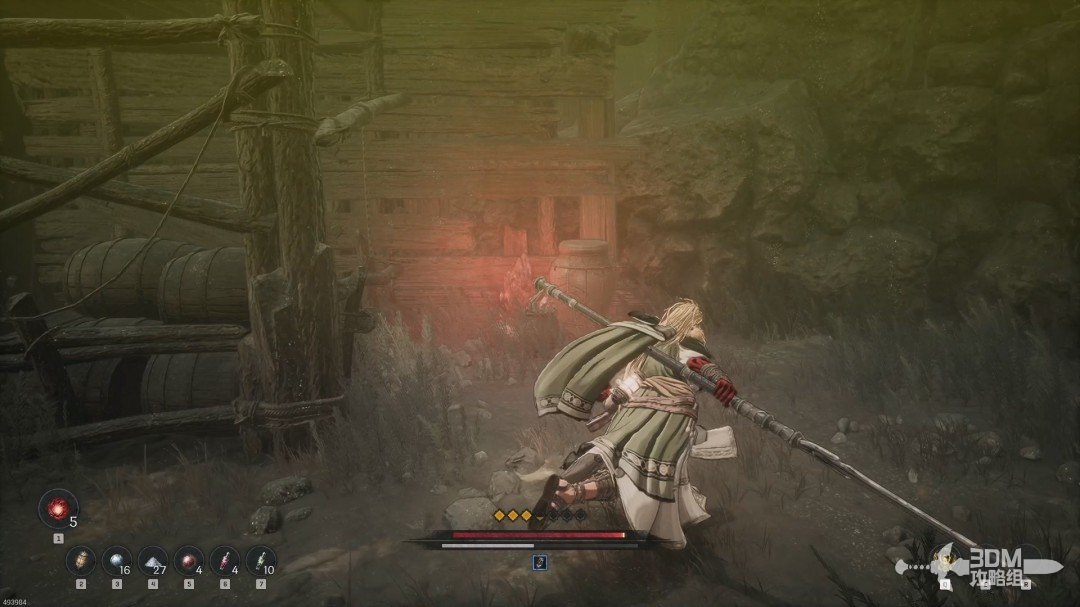 View route → |
Side mission · The Blacksmith’s Heirloom
| Item | Location | Walkthrough |
|---|---|---|
| Enter the Spider Tomb for the blacksmith's quest. At the fork, collect the Soulstone on the left and the Jarling on the right. | 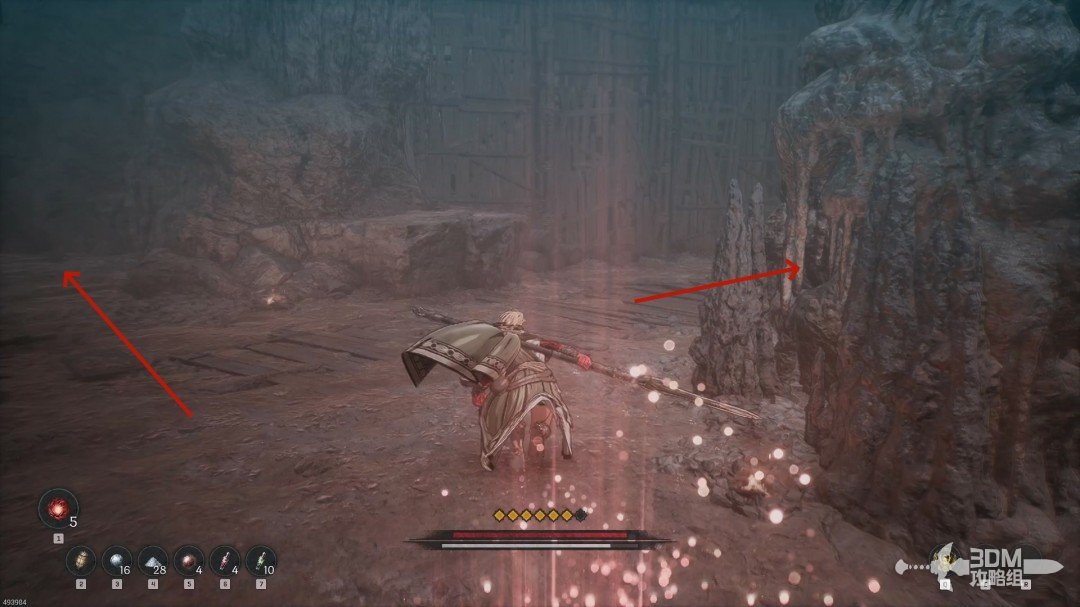 View route → | |
| Enter the door that was locked during the main mission. After the sandworm memory, take the second Soulstone on the left platform. | 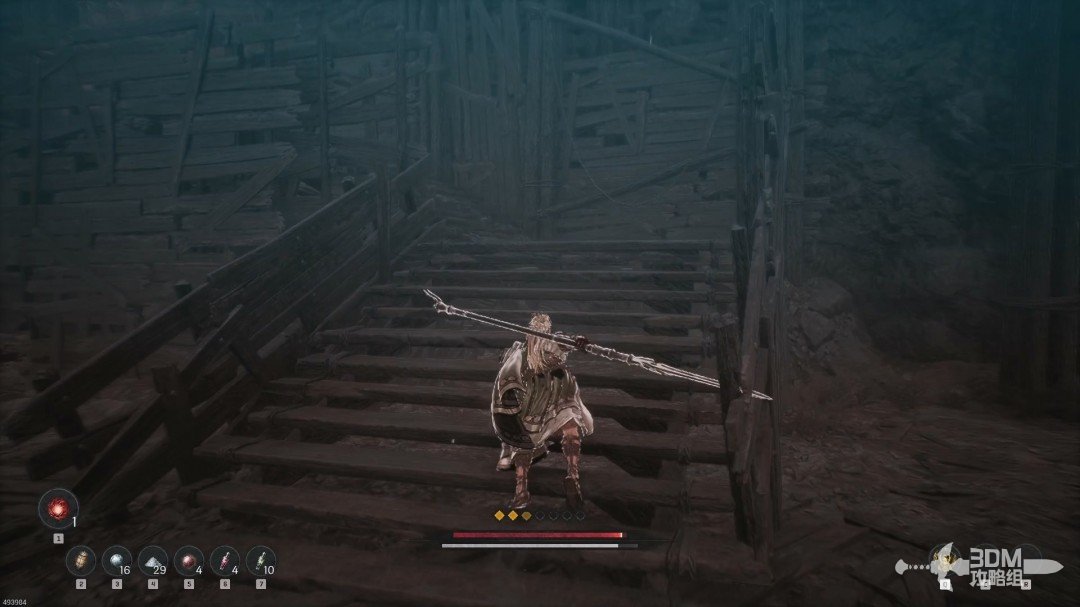 View route → |
Side mission · Tragic Night
| Item | Location | Walkthrough |
|---|---|---|
| Accept Tragic Night from Daphrona. Find the boy's diary in the right house and the first Soulstone in the house opposite. | 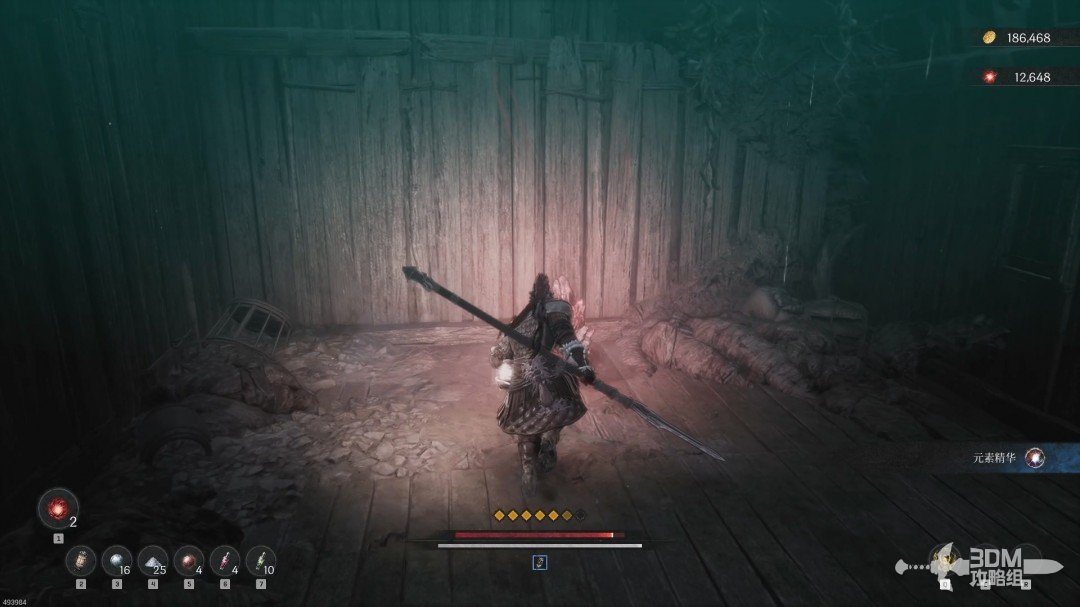 View route → | |
| Loot the wooden house on the right, turn around, and use a javelin on the second Soulstone above. | 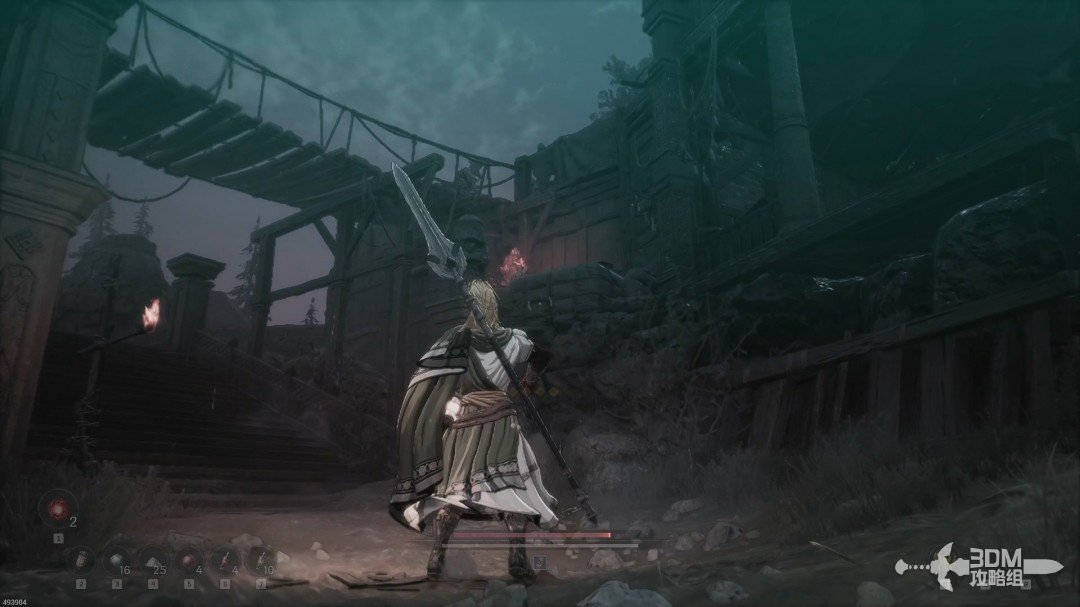 View route → |
Side mission · Silent Temple
| Item | Location | Walkthrough |
|---|---|---|
| Enter Silent Temple after speaking to Oksana. Search the left route, climb the right stairs for the Soulstone opposite, and collect the scroll below the ladder. | 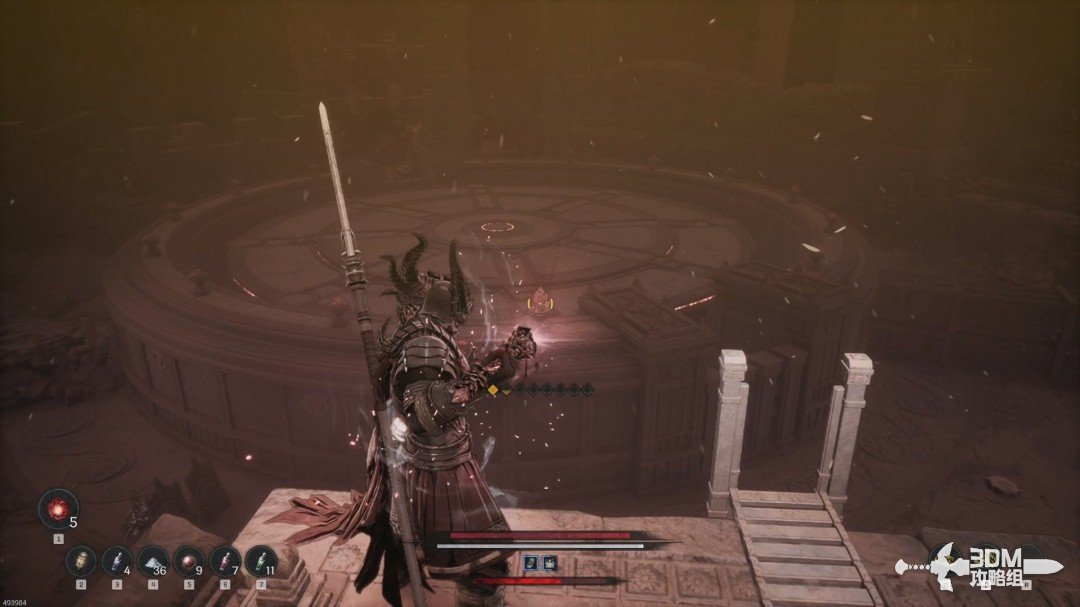 View route → |
Side mission · Human Xilence
| Item | Location | Walkthrough |
|---|---|---|
| Follow the dragon's voice and climb the stairs. Use a javelin on the first Soulstone high on the right. | 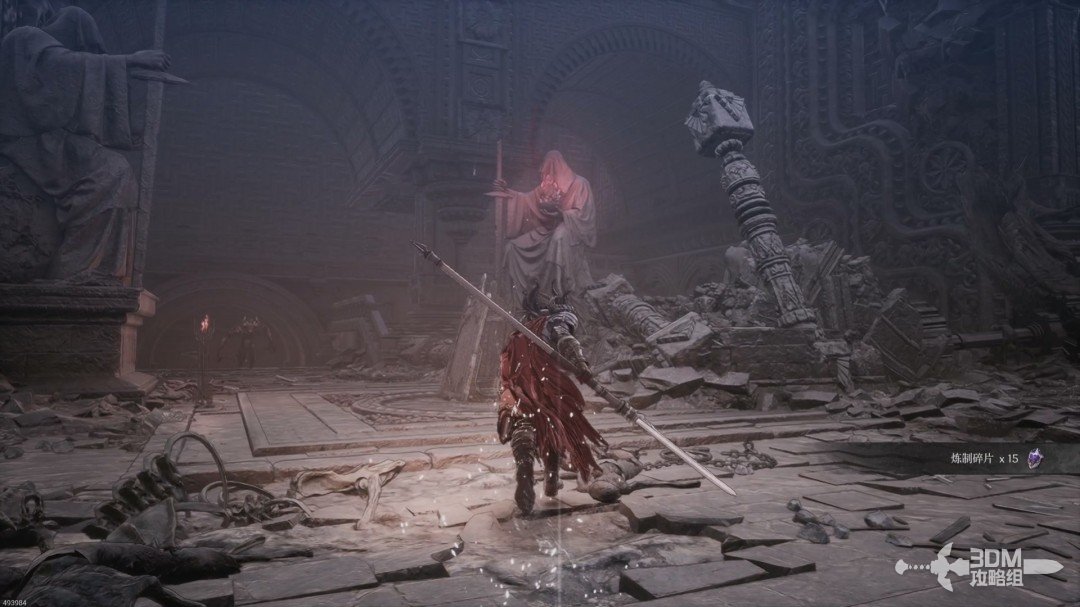 View route → | |
| Collect the hunter scroll behind the left door, then inspect the recesses for the second Soulstone in the second one. | 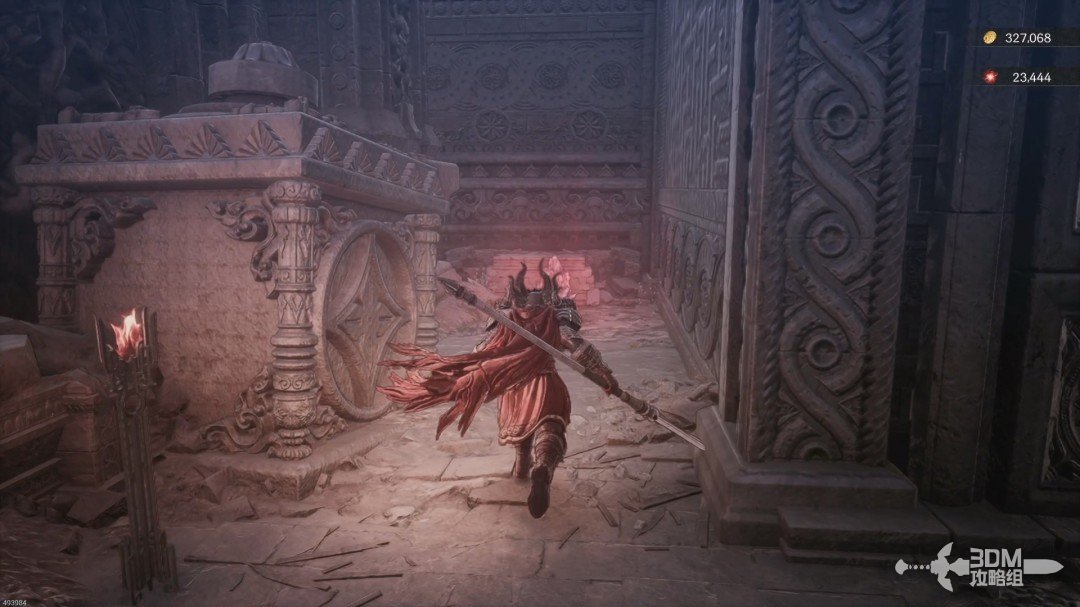 View route → |
Side mission · The Final Subjugation
| Item | Location | Walkthrough |
|---|---|---|
| Speak to Xilence, cross the bridge, climb the ladder, and turn right for the first Soulstone on the lower platform. | 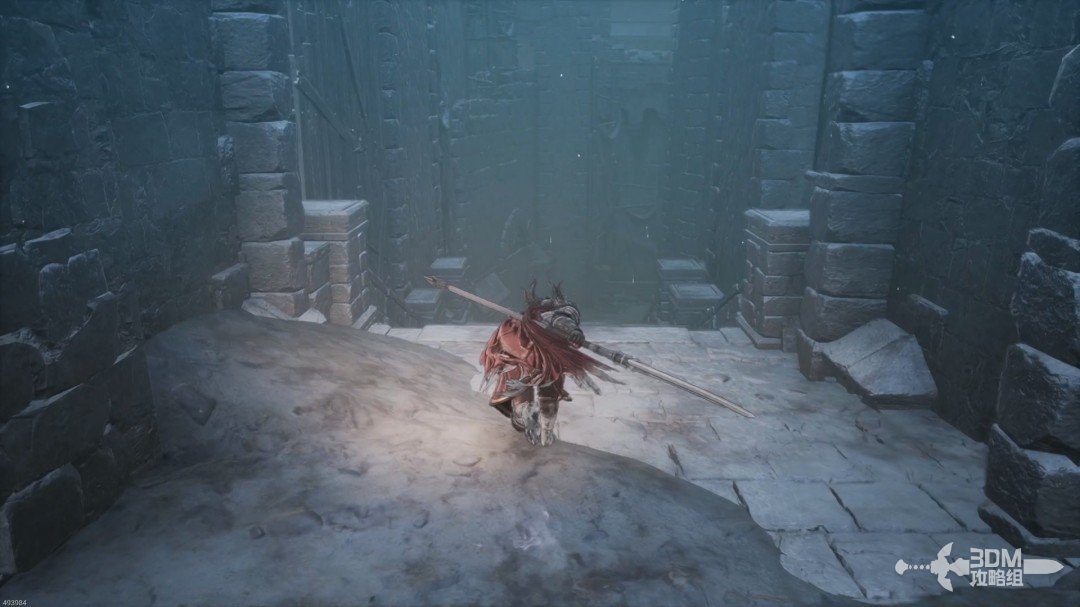 View route → | |
| At the next checkpoint, look up to the left and javelin the second Soulstone overhead. | 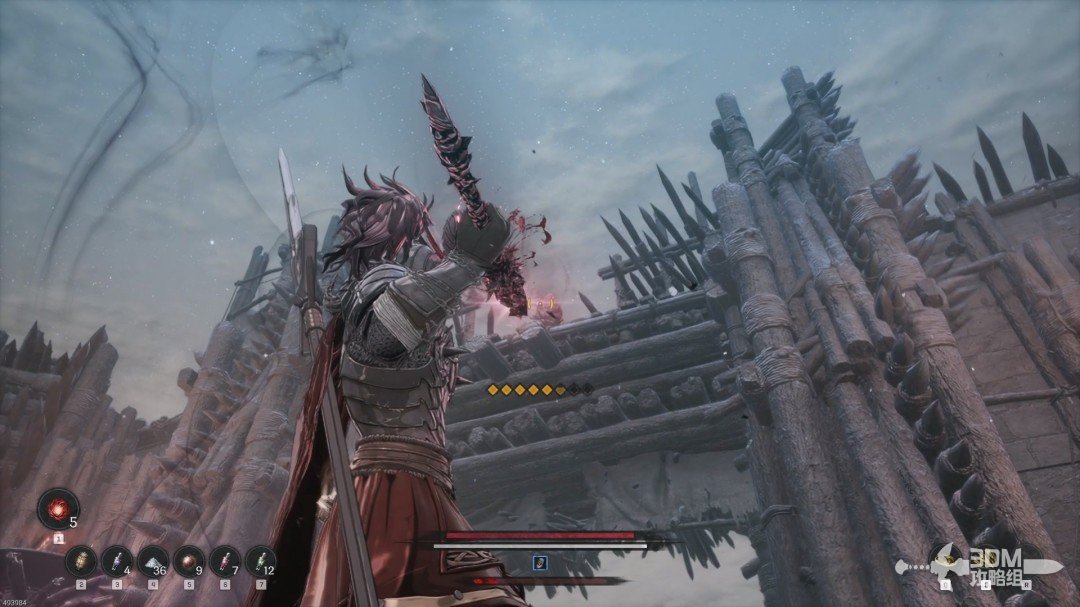 View route → |
Side mission · Pavel’s Final Words
| Item | Location | Walkthrough |
|---|---|---|
| Enter Pavel's Final Words and avoid the skulls released by defeated enemies. Follow the right passage for the first Soulstone in the corner. | 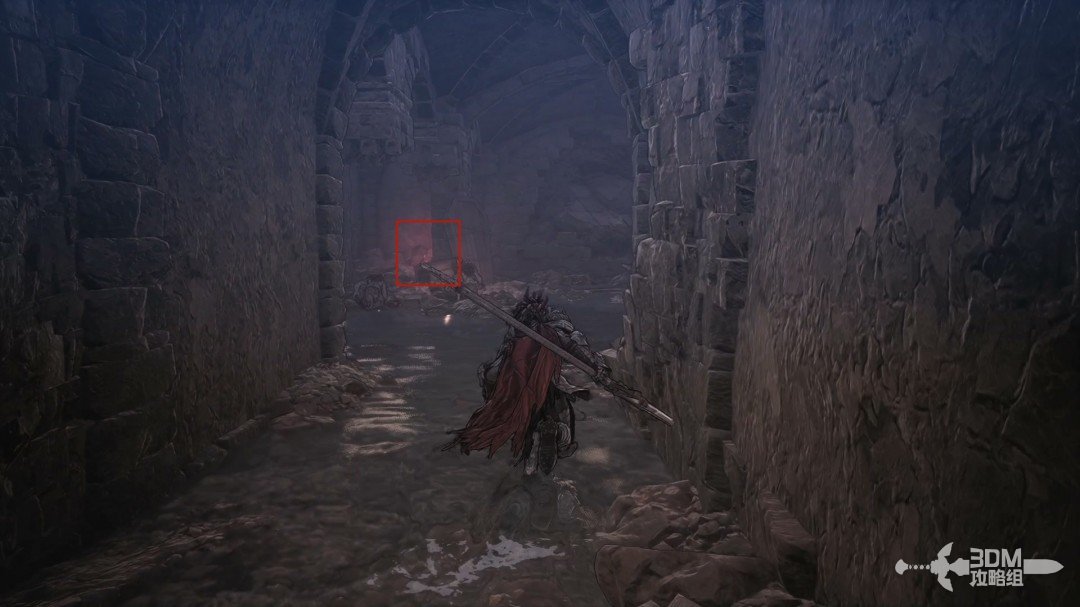 View route → | |
| Defeat the elite below the stairs for the bandit's orders. Call the elevator, then javelin the second Soulstone high behind you before riding down. | 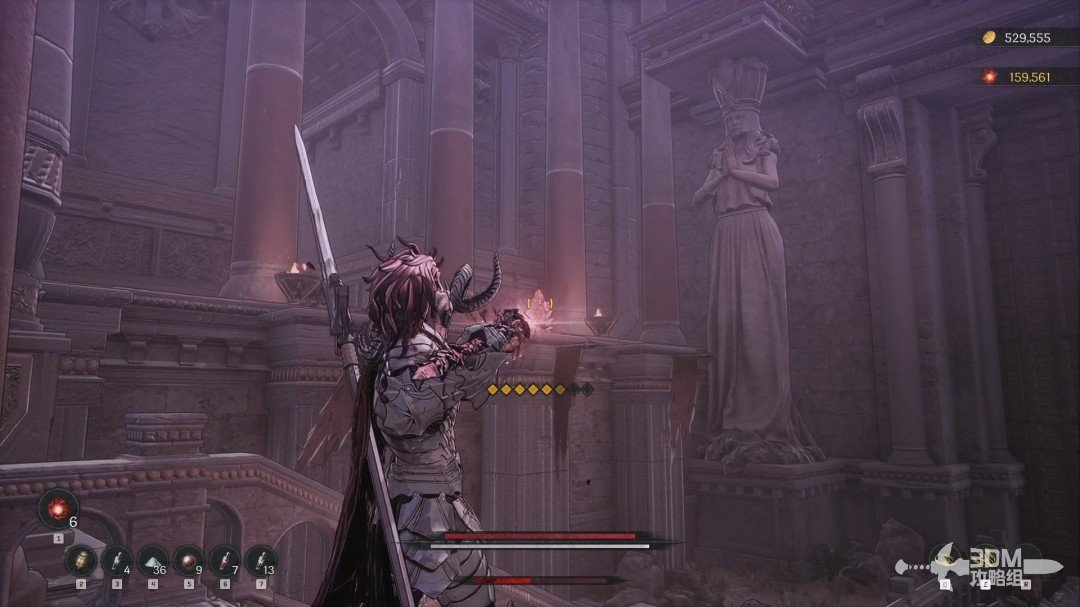 View route → |
Side mission · Why Did You Abandon Us
| Item | Location | Walkthrough |
|---|---|---|
| Watch for the shield soldier behind the boards. The first Soulstone is inside the large water jar on the right. | 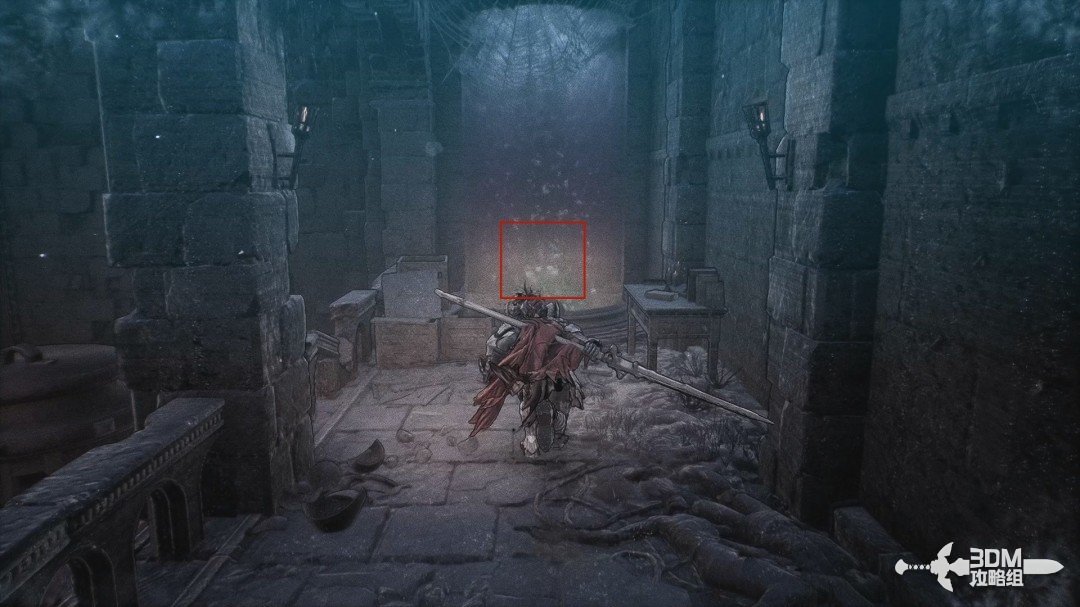 View route → | |
| Descend past the elite, return to the main route, and check the left branch for the second Soulstone. | 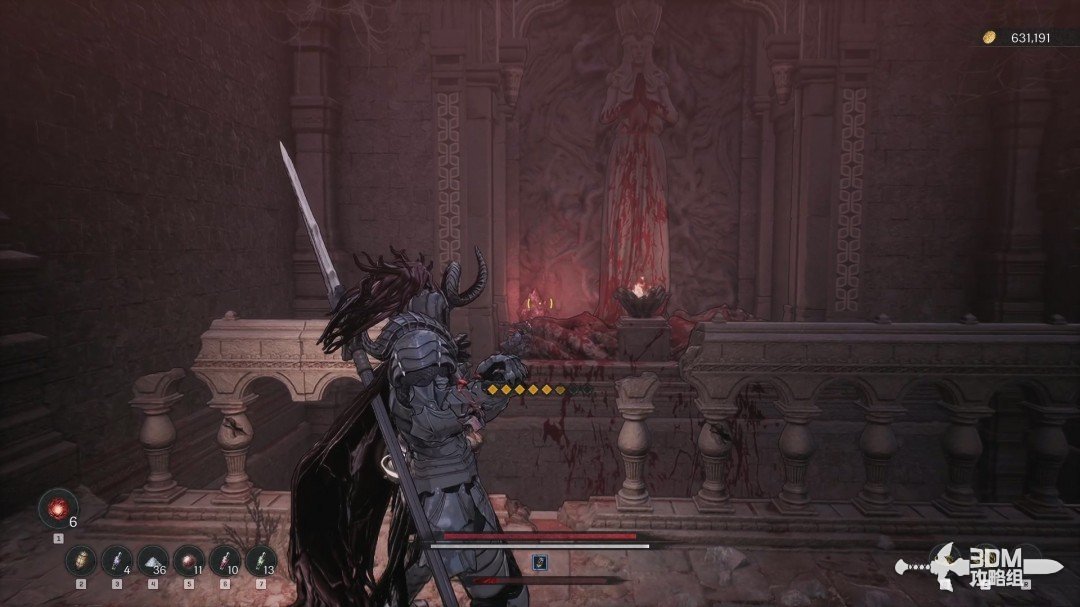 View route → | |
| At the opposite platform, check behind you as well as ahead for laser enemies. The third Soulstone is beside one of them. | 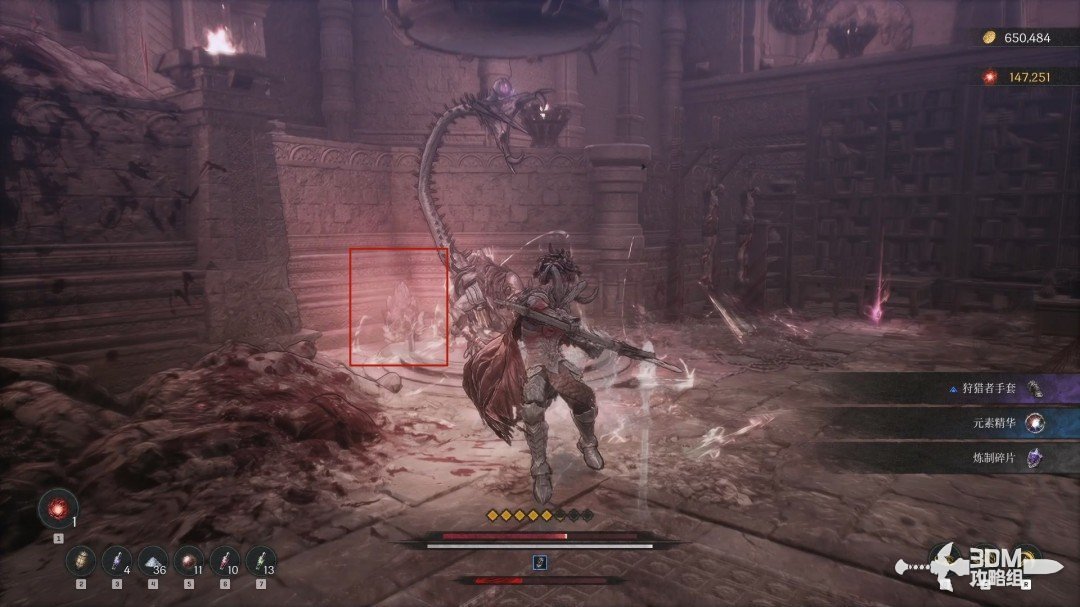 View route → |
Side mission · Escaping Linon Mine
| Item | Location | Walkthrough |
|---|---|---|
| Clear the spawning spider beyond the bridge and break the web above it for the ghostly shield. Take the right path to the first Soulstone. | 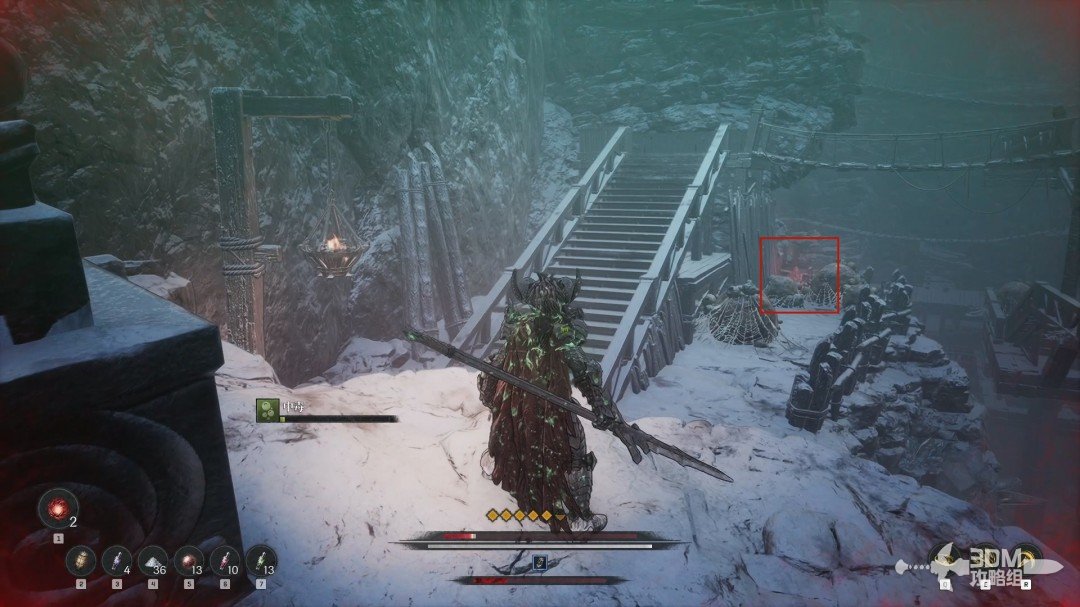 View route → | |
| Cross to the checkpoint after the trapped chest. Descend its right ladder, deal with the sandworm memory, and take the second Soulstone on the right. | 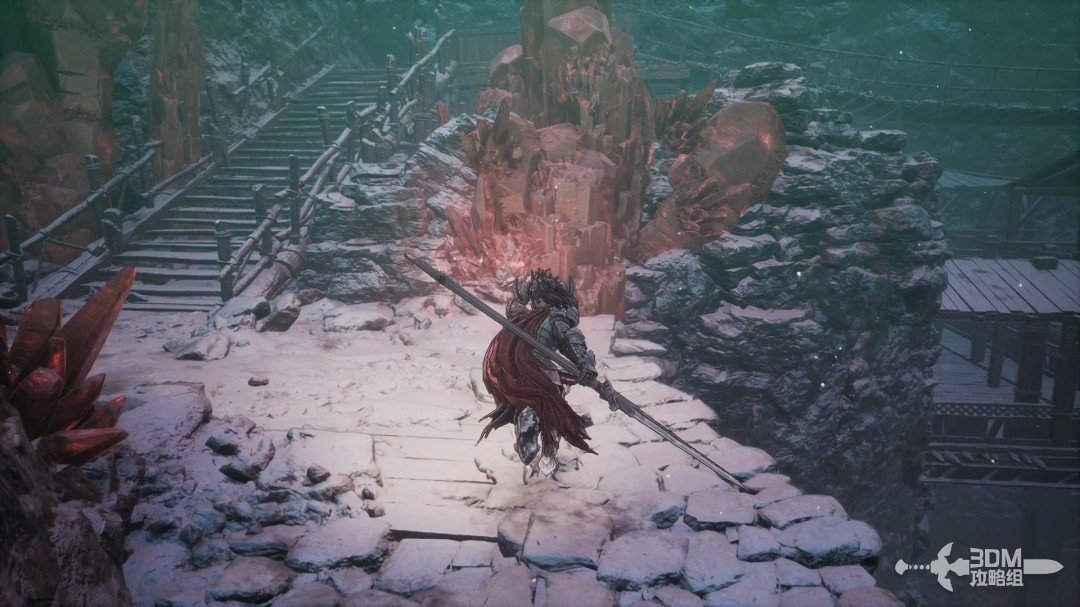 View route → |
Side mission · The Last Command
| Item | Location | Walkthrough |
|---|---|---|
| Return from the right branch and cross the room to its other exit. The mission's Soulstone is left of the stairs ahead. | 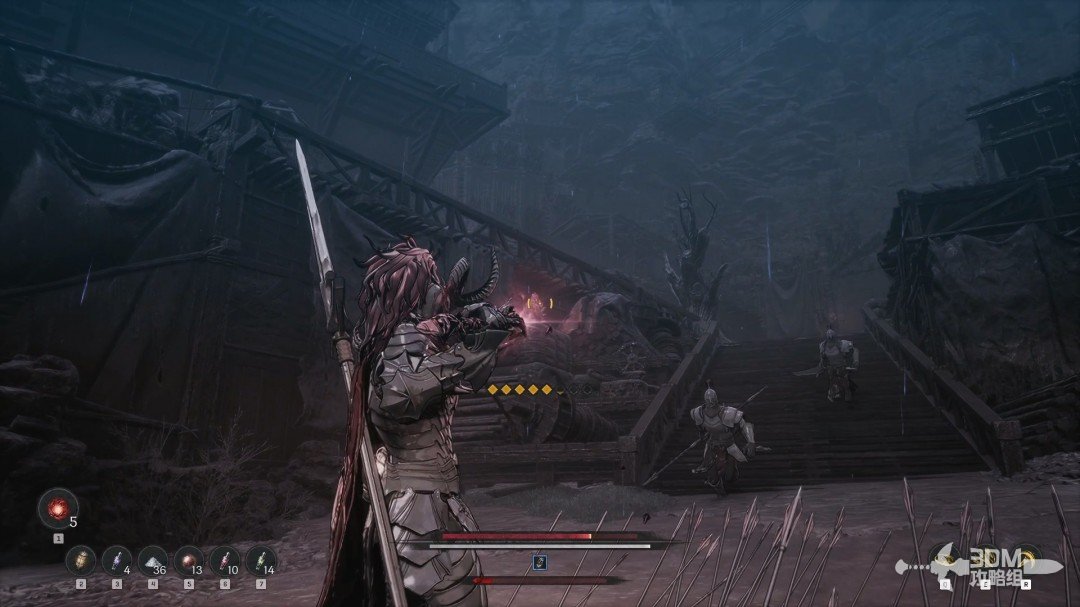 View route → |
Side mission · Lacrima
| Item | Location | Walkthrough |
|---|---|---|
| Descend along the pillar, clear the undead, and cross the bridge for the Soulstone above the left stairs. | 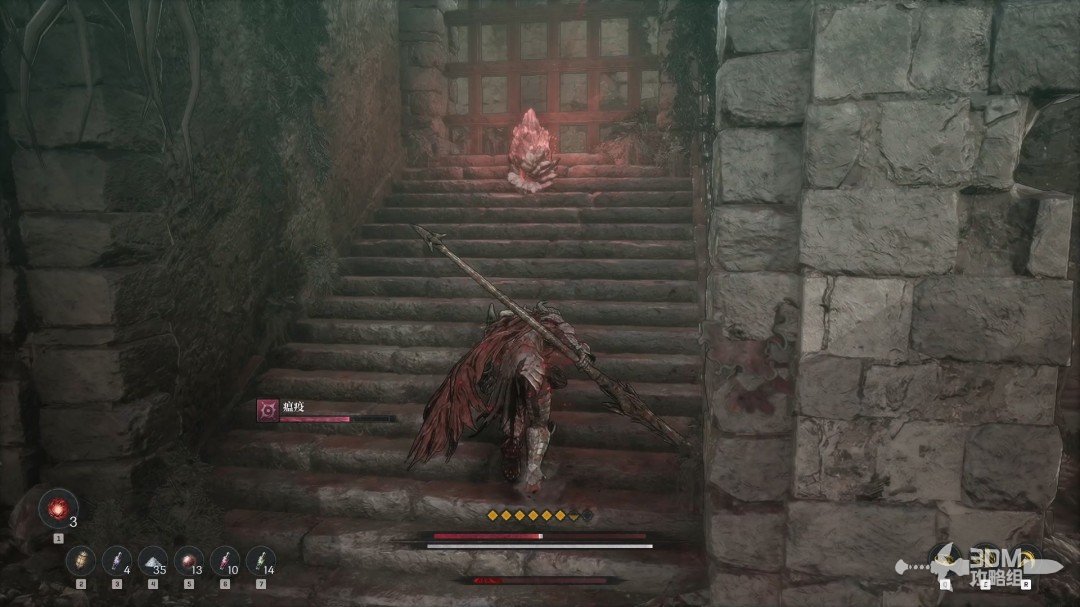 View route → |
Side mission · Unrequited Love
| Item | Location | Walkthrough |
|---|---|---|
| Investigate Lydia's fate, climb the opening stairs, and check behind the corner crates for the first Soulstone. | 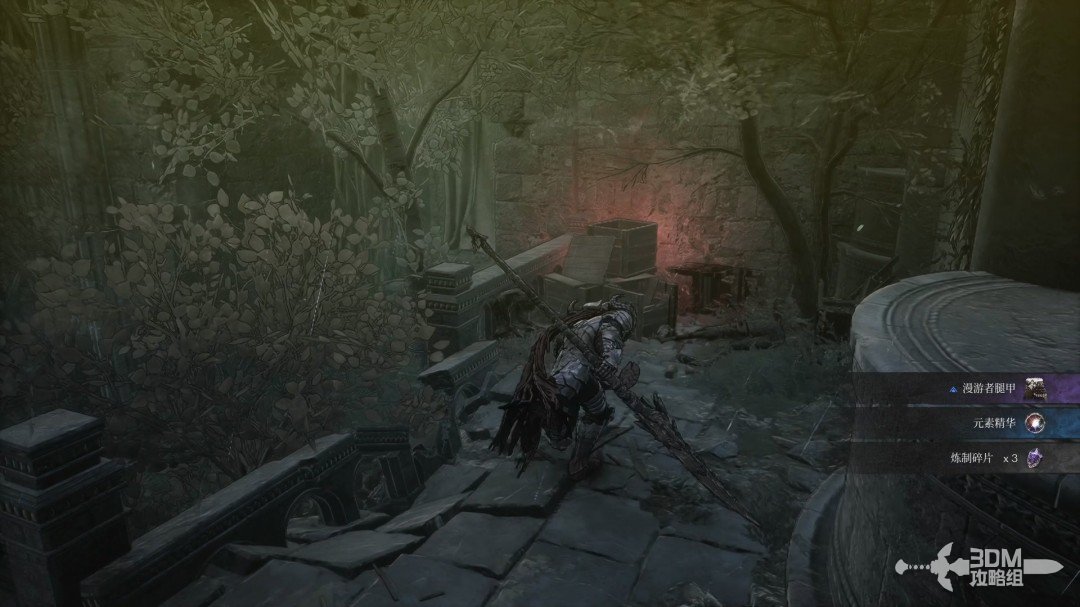 View route → | |
| Search the hall's right side and defeat the elite, then javelin the second Soulstone high to the left from the stairs. | 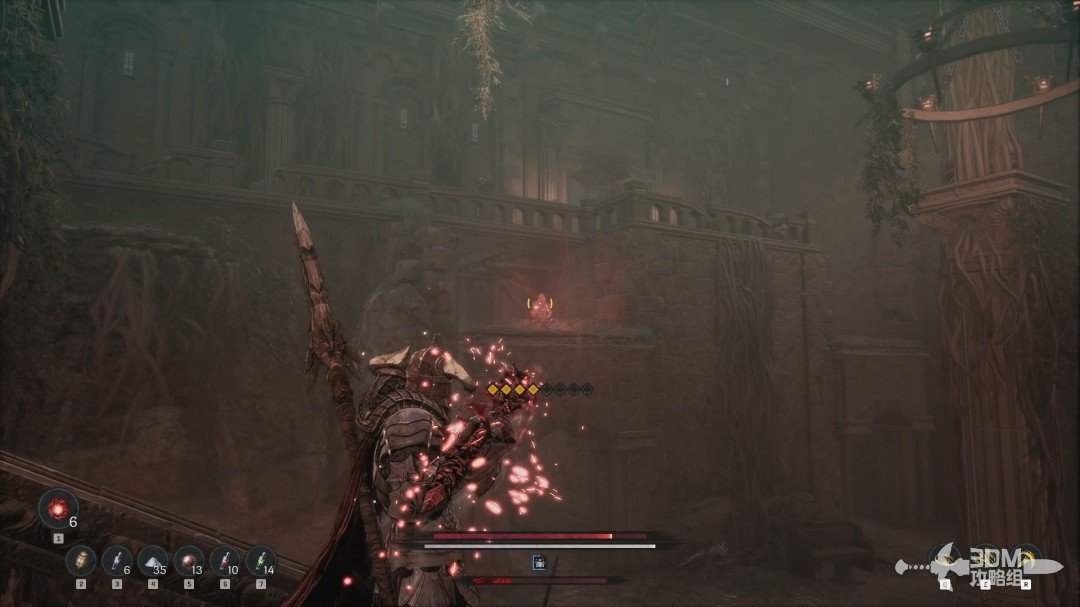 View route → | |
| At the checkpoint, inspect the descending ladder on the left and look up for the third Soulstone. | 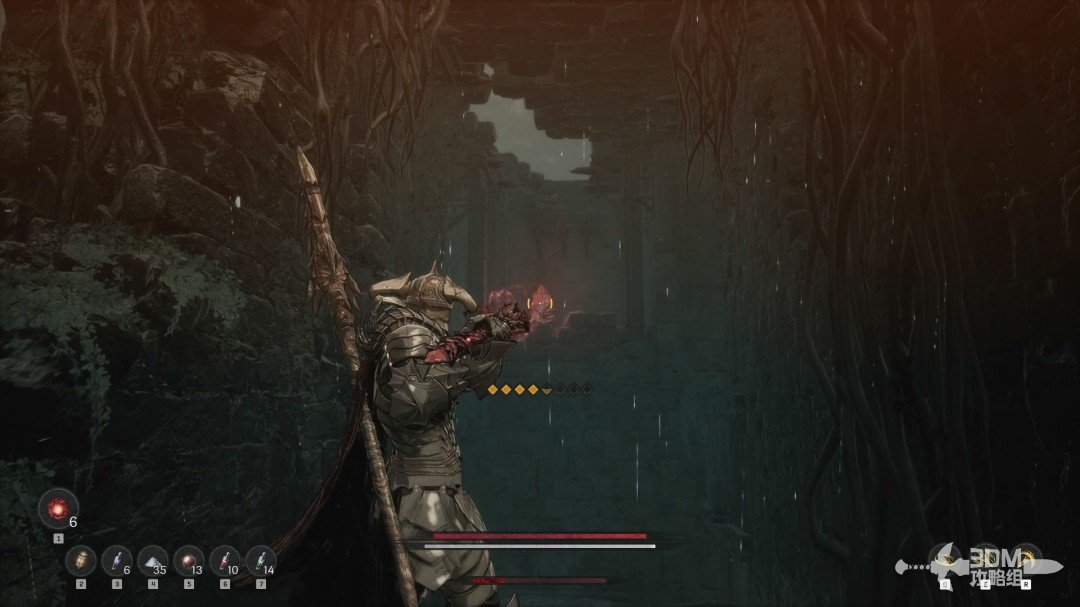 View route → |
Side mission · Varus’s Axe
| Item | Location | Walkthrough |
|---|---|---|
| Return to the opening checkpoint and use the right switch, then look high to the right for the first Soulstone. | 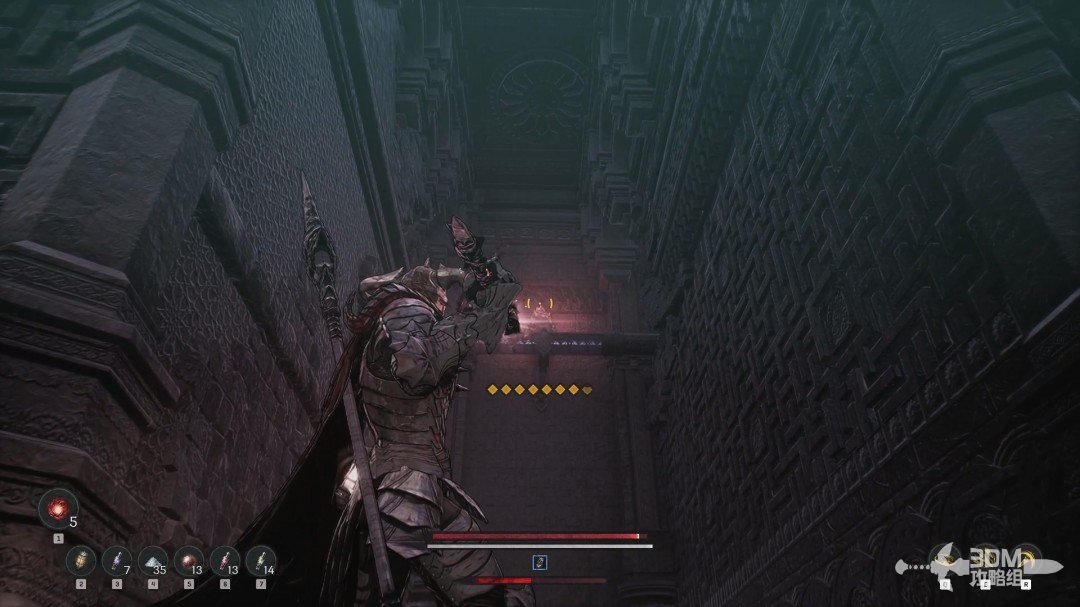 View route → | |
| Enter the newly opened door beside the checkpoint. Search the right branch, then the far left corner for the second Soulstone. | 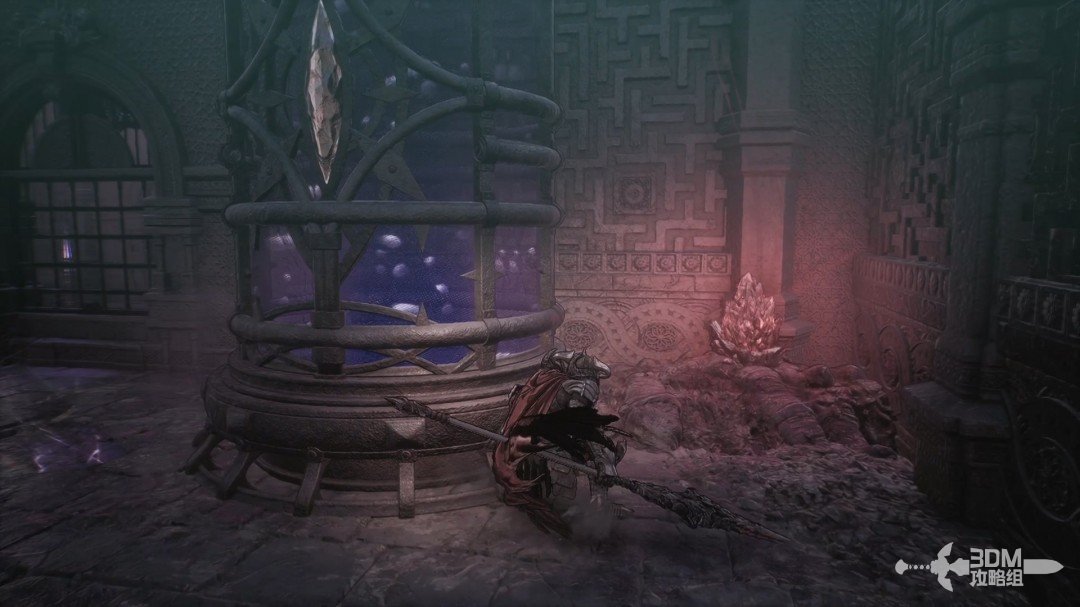 View route → |
Side mission · Atlante the Precise
| Item | Location | Walkthrough |
|---|---|---|
| Follow the left path, search behind the rock on the right for the fugitive mage scroll, and take the Soulstone in the left corner. | 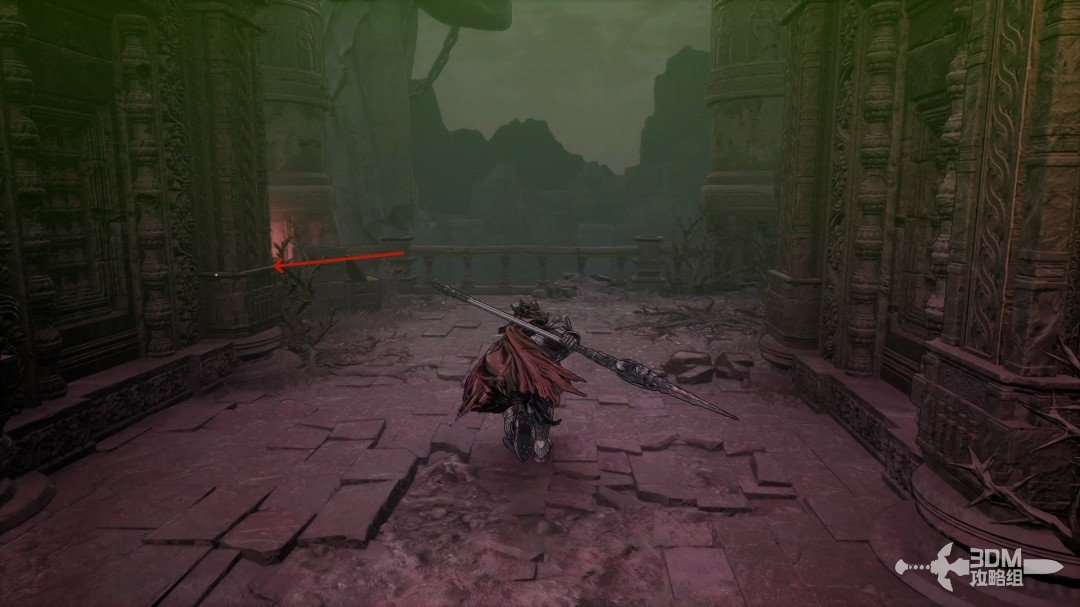 View route → |
Side mission · Crimson Trace
| Item | Location | Walkthrough |
|---|---|---|
| Enter Crimson Trace, search the right steps, and follow the left corridor to its end for the first Soulstone. | 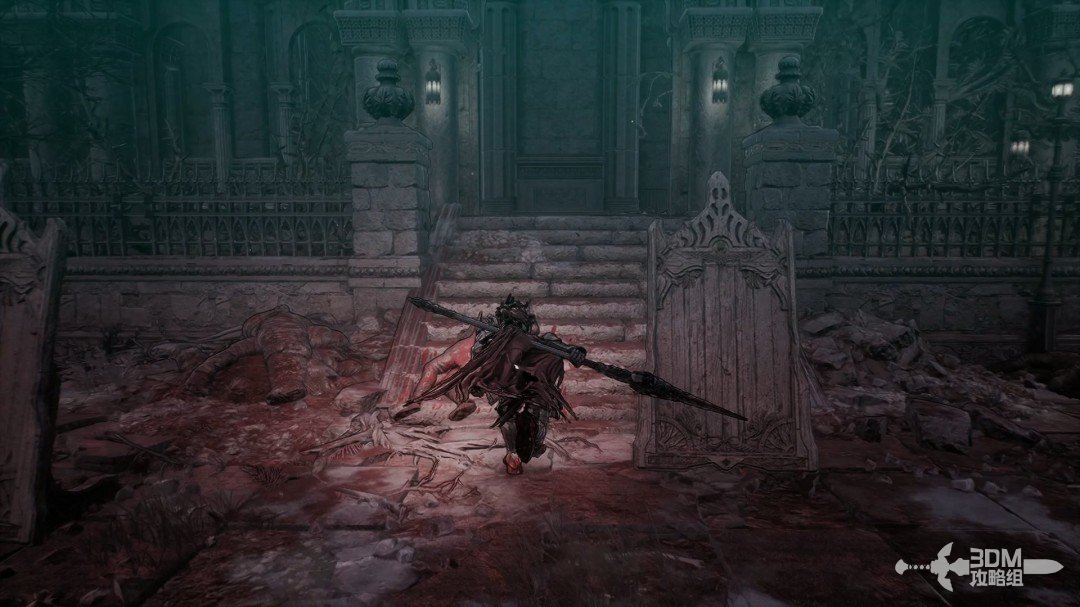 View route → | |
| Continue past the memory and enemies, then javelin the second Soulstone high on the left. | 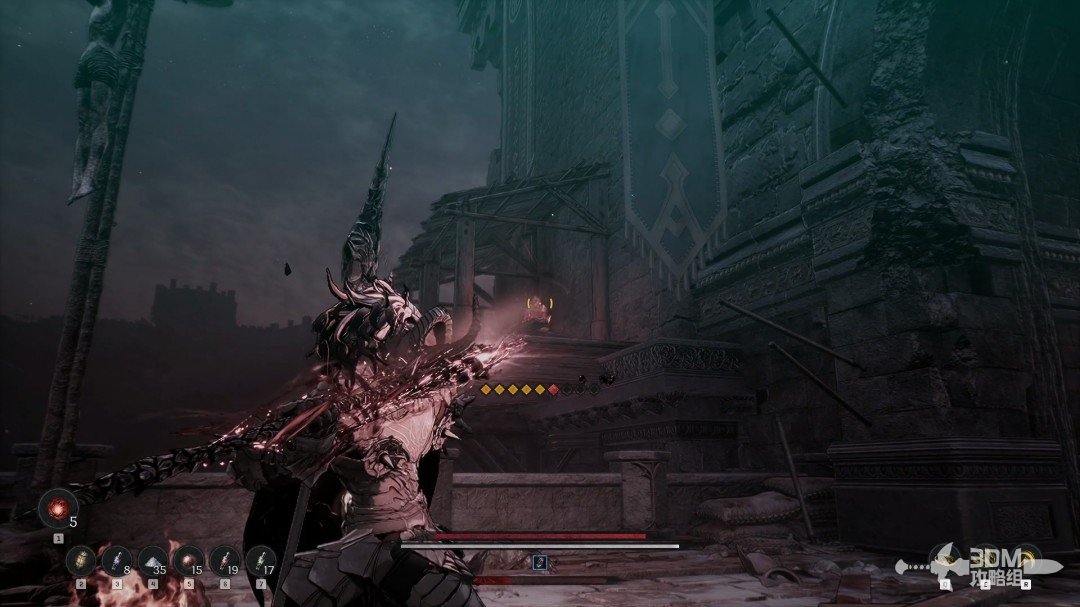 View route → |
Side mission · The Last Guard
| Item | Location | Walkthrough |
|---|---|---|
| Speak to Tristan during The Last Guard. Look across from the right side of the main route for the first Soulstone on the high platform. | 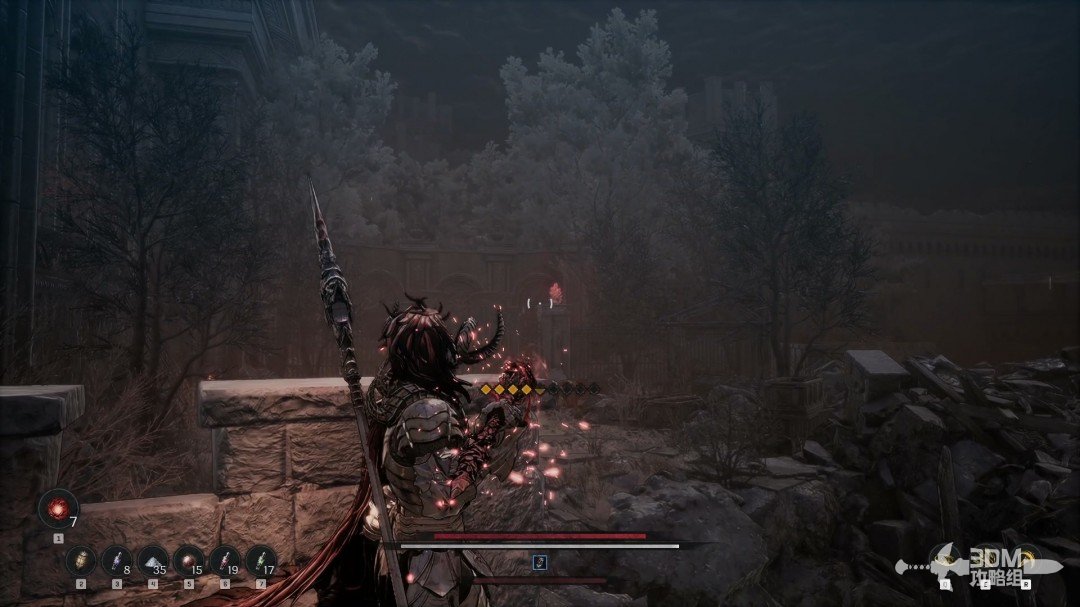 View route → | |
| Collect the memory from the body ahead in the hall, then inspect the rear area for the second Soulstone. | 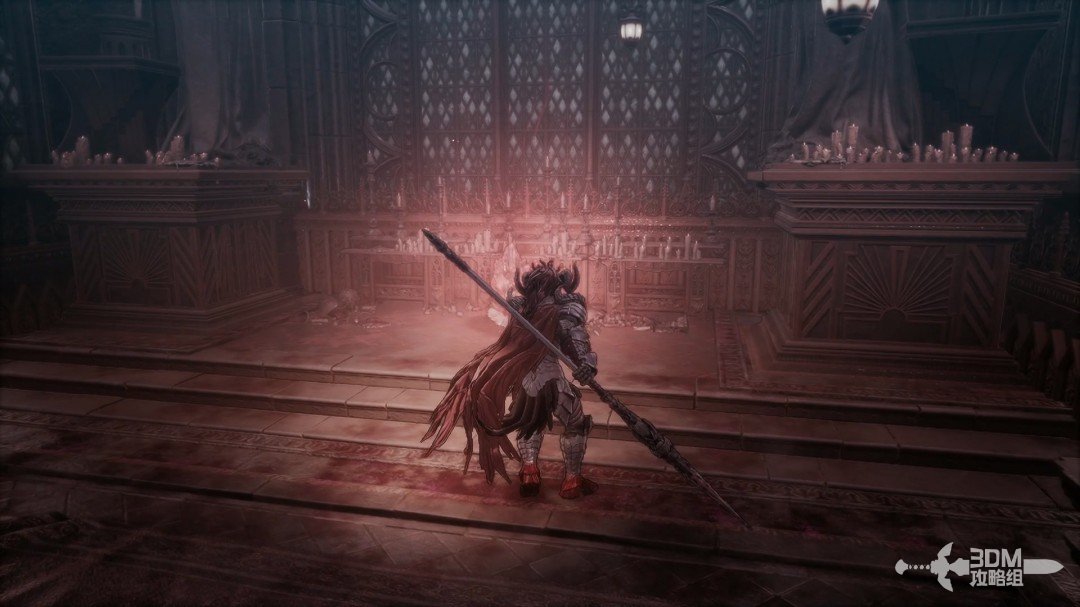 View route → |
Side mission · Transcendental Sword
| Item | Location | Walkthrough |
|---|---|---|
| Enter Transcendental Sword, descend past the checkpoint, and break the hidden wall on the right for the first Soulstone. | 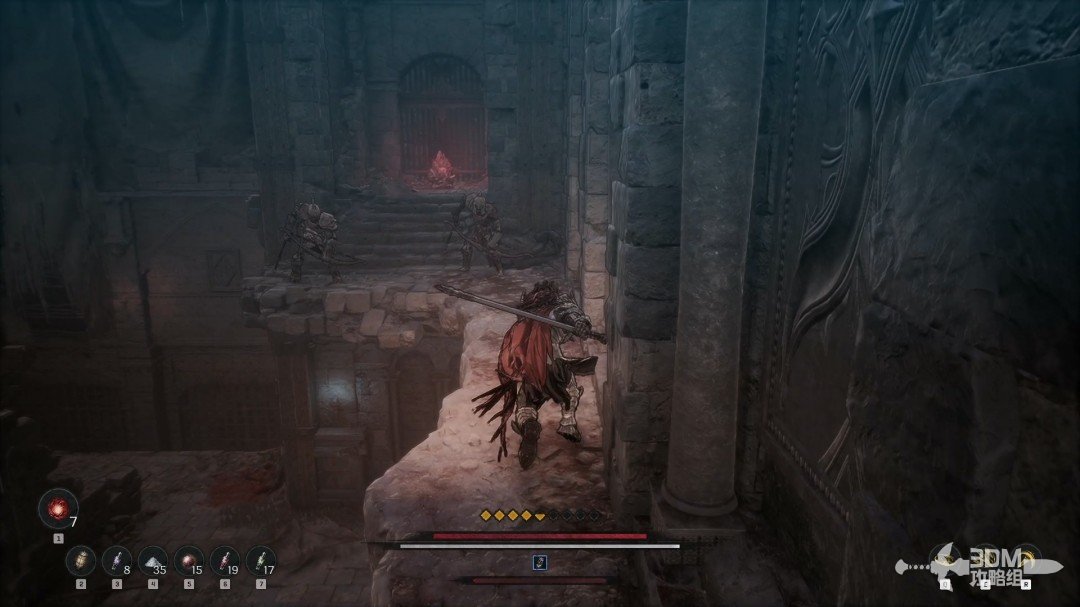 View route → | |
| Climb the left stairs and use a javelin on the second Soulstone inside the cage high above. | 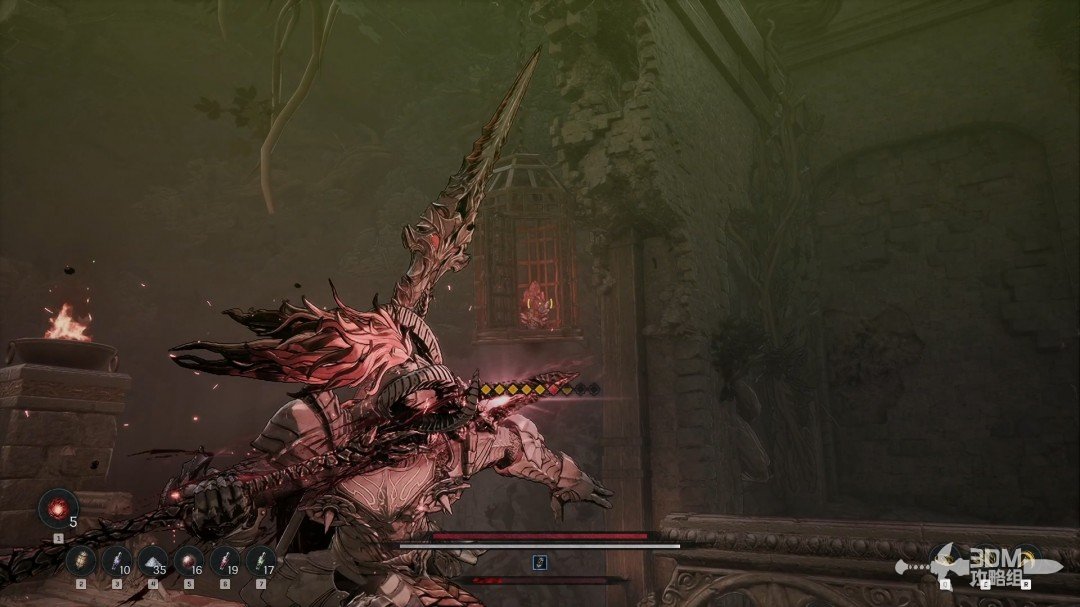 View route → |
Side mission · The Suicide Squad
| Item | Location | Walkthrough |
|---|---|---|
| Enter the suicide squad mission and inspect the bridge's right side for its Soulstone. | 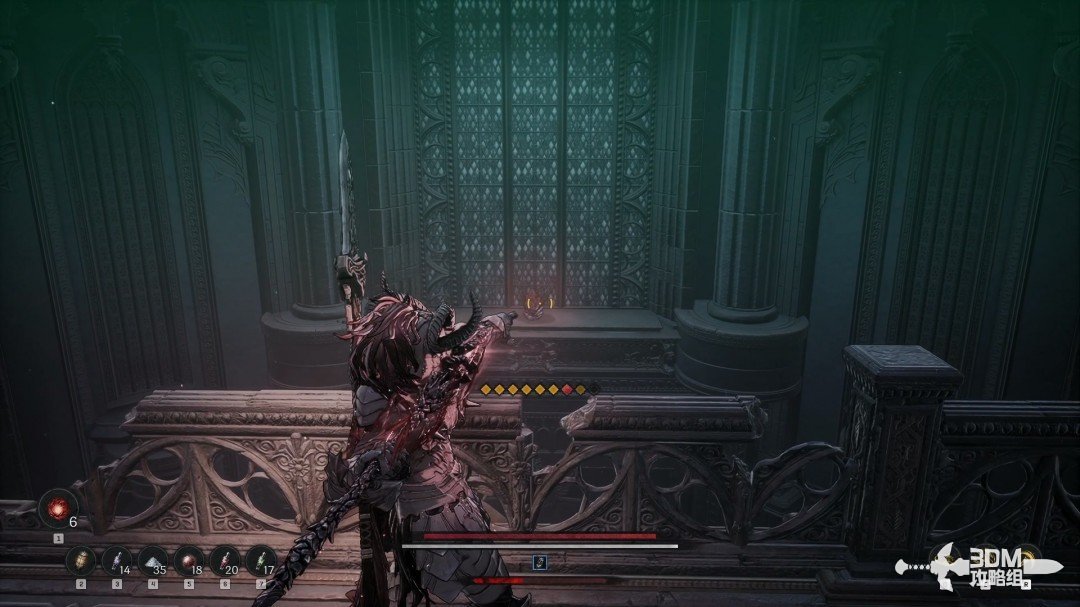 View route → |
Side mission · Residual Chaos
| Item | Location | Walkthrough |
|---|---|---|
| At the start of Residual Chaos, turn back for the memory and take the left corner for the Soulstone before using the portal. | 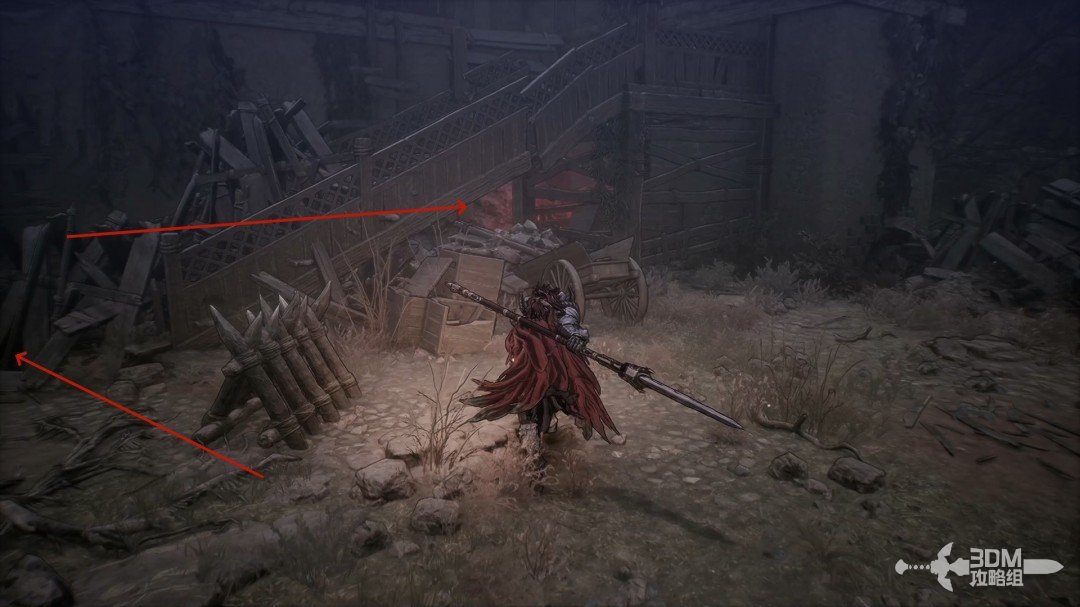 View route → |
Side mission · Disobedience
| Item | Location | Walkthrough |
|---|---|---|
| Climb the stairs used by the succubus and javelin the Soulstone high on the left before opening the gate. | 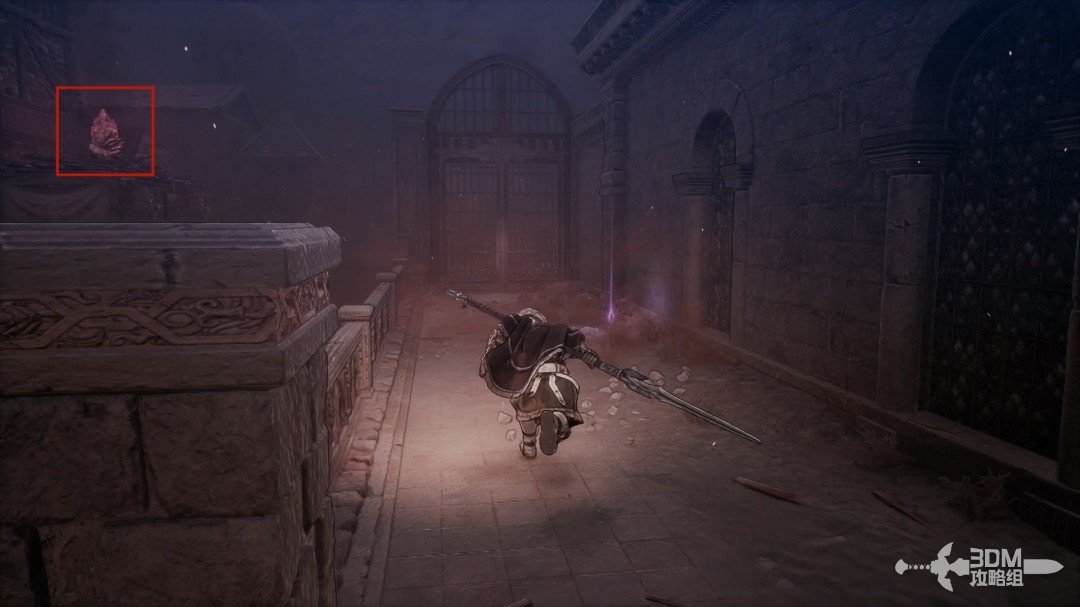 View route → |
Side mission · The Birth of Evil
| Item | Location | Walkthrough |
|---|---|---|
| Descend through the growths and check the grass on the right for the first Soulstone. | 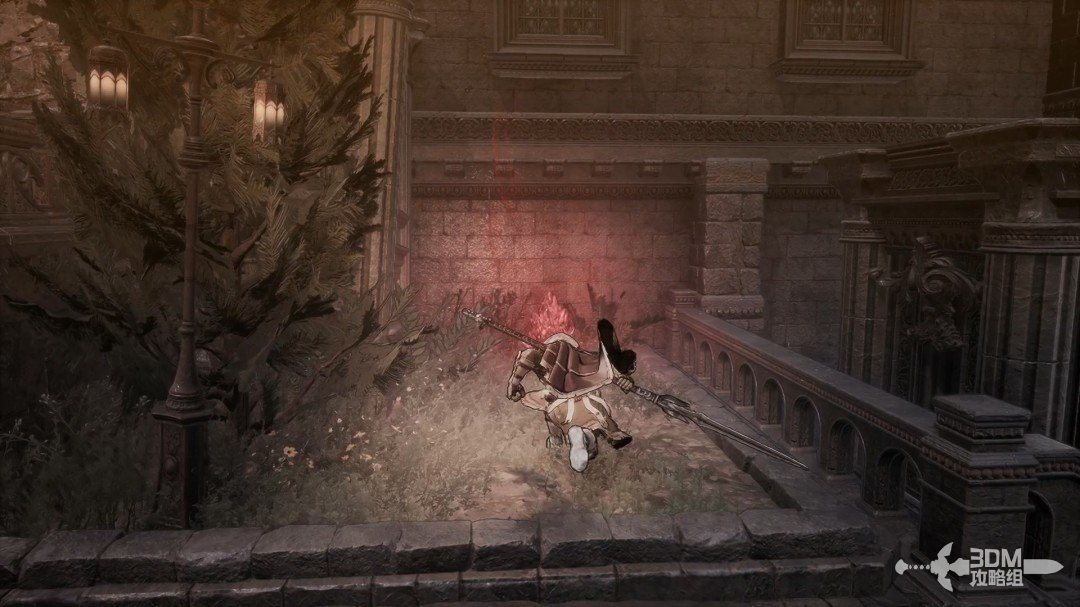 View route → | |
| Use the nearby growths against the elite, then climb beyond the checkpoint for the ghostly gem beside the statue and the second Soulstone behind the pillar. | 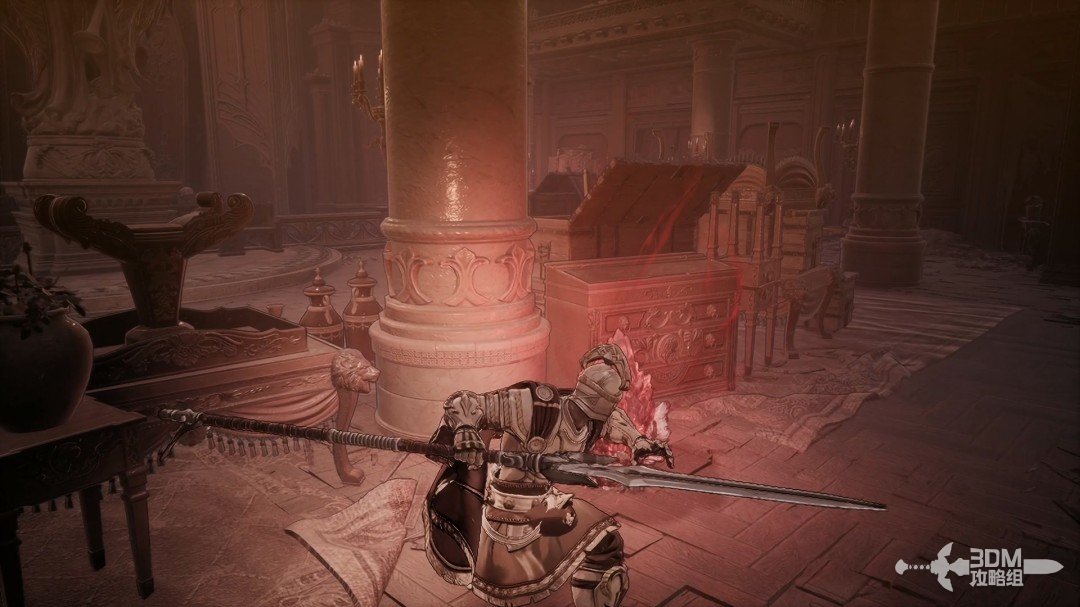 View route → |
Side mission · The Vow
| Item | Location | Walkthrough |
|---|---|---|
| Pass the elite and leave through the gate. Open the hidden wall at the right dead end for the first Soulstone. | 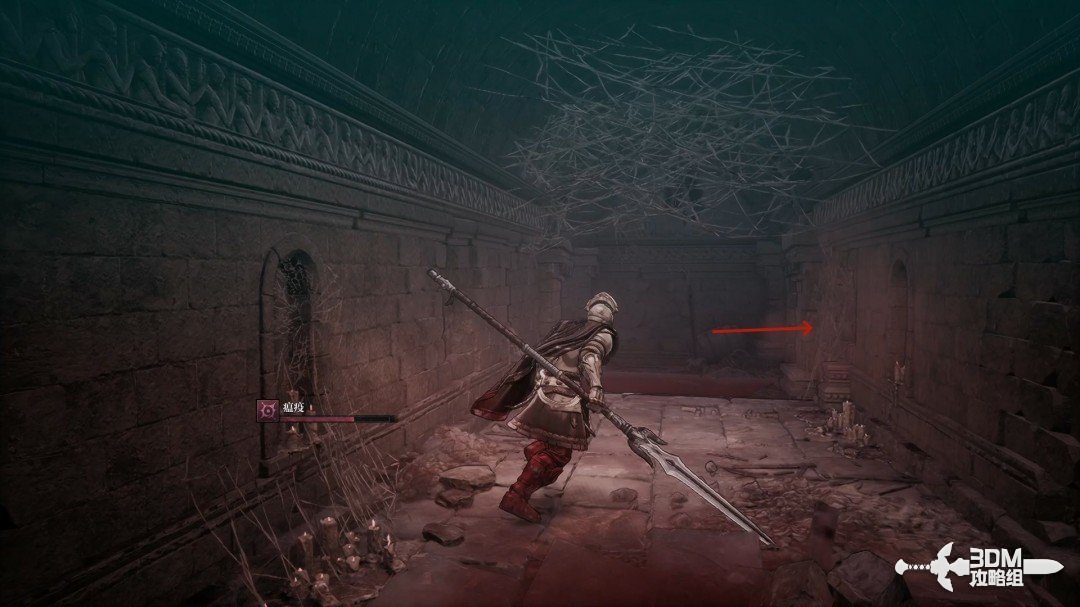 View route → | |
| Return from the side chest, defeat the gatekeeper, and take the second Soulstone behind the right pillar. | 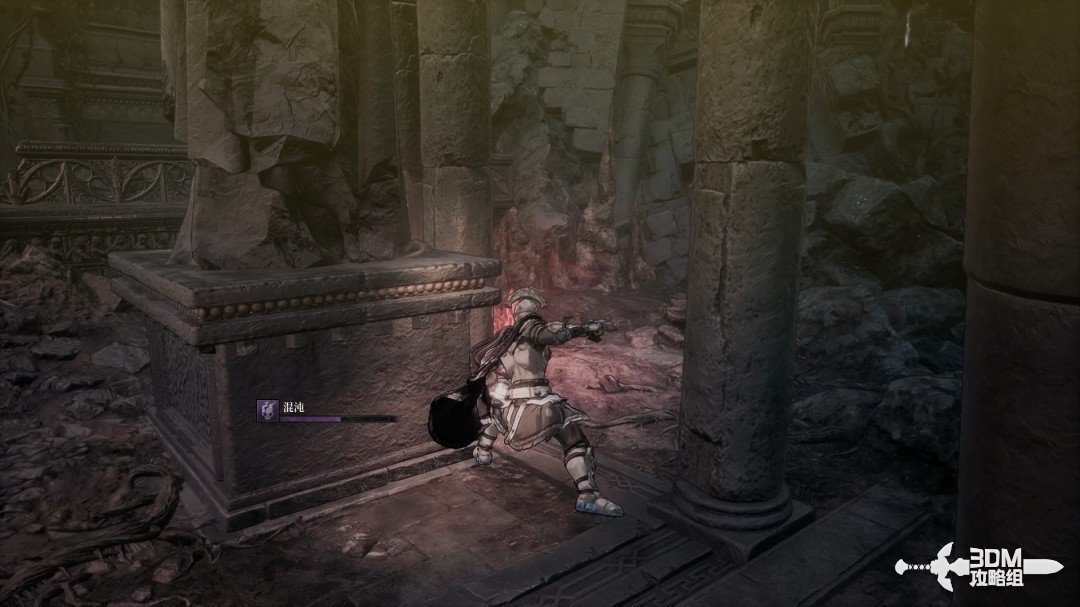 View route → |
Reference: 3DM Guide Team
GAME NOTE has reorganized and rewritten the routes from this walkthrough.