Locations are grouped by mission. Search or filter, then open the illustrated route.
Import adds completed items and preserves existing progress.
Progress is saved in this browser, shared between languages. Clearing browser data removes it; devices do not sync.
Main mission · 01 · The Banished Hero
| Item | Location | Walkthrough |
|---|---|---|
| After finishing the jar enthusiast mission, revisit the opening area and break the jar near the crow for a Jarling. | 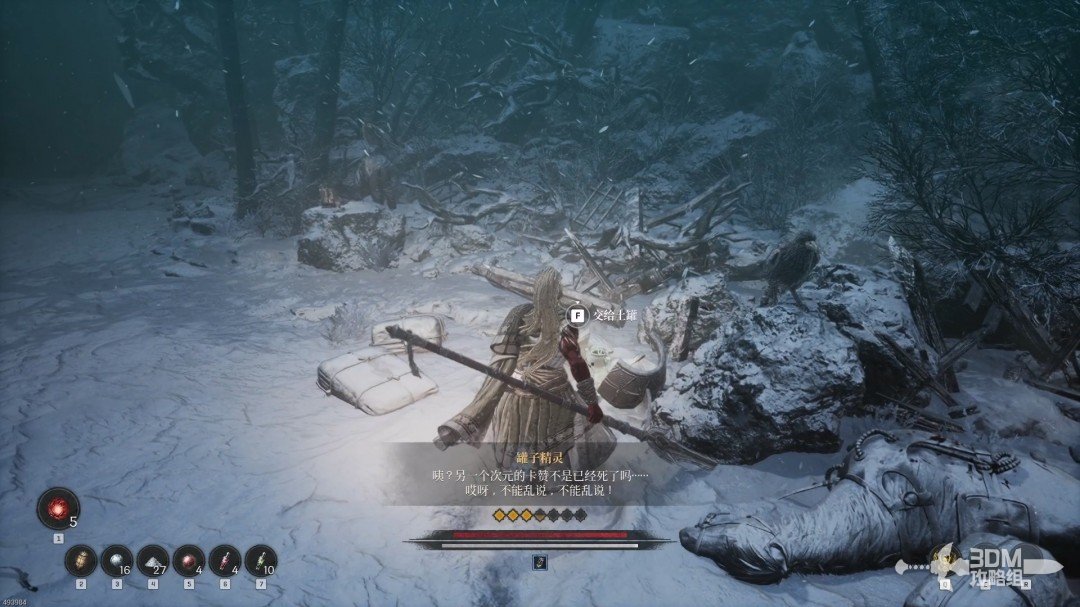 View route → |
Main mission · 02 · Trials of the Frozen Mountain
| Item | Location | Walkthrough |
|---|---|---|
| After Jar Enthusiast, revisit Ice Canyon and check the pot beside the arrival point. | 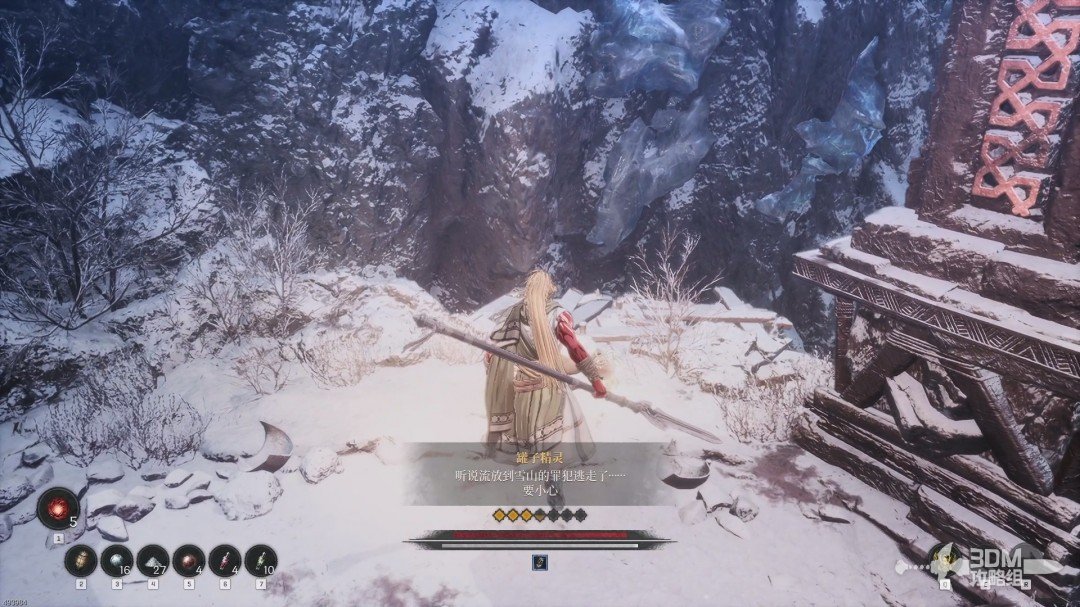 View route → |
Main mission · 03 · Forgotten Temple
| Item | Location | Walkthrough |
|---|---|---|
| Replay the temple statue mechanisms, turn left at the circular platform, and check the jar on the underground passage's left side. | 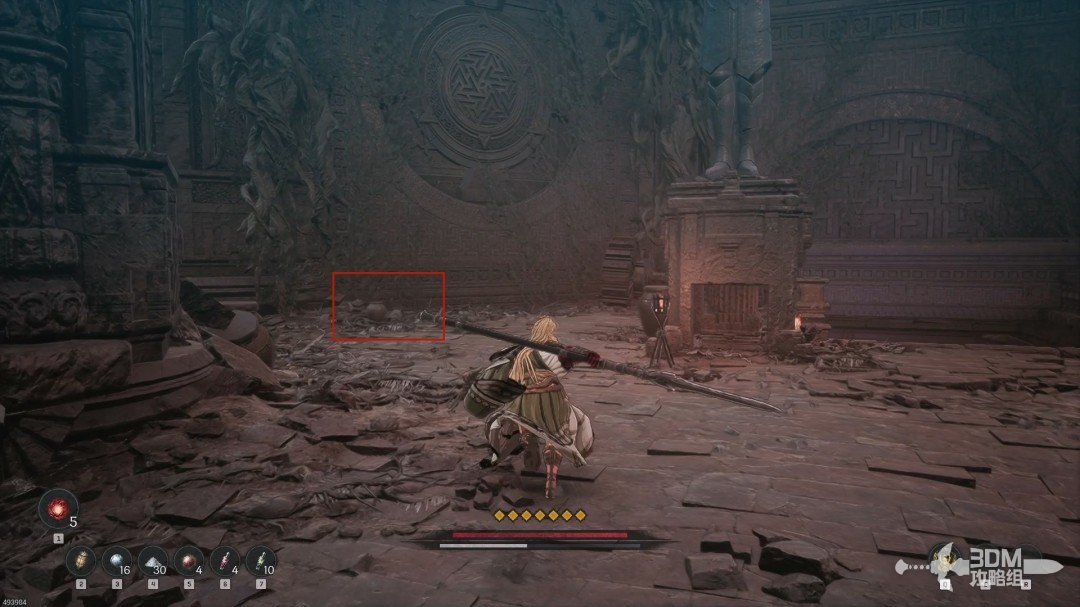 View route → |
Main mission · 04 · First Act of Revenge
| Item | Location | Walkthrough |
|---|---|---|
| Revisit the village, circle around the house, and break the jar behind it for a Jarling. | 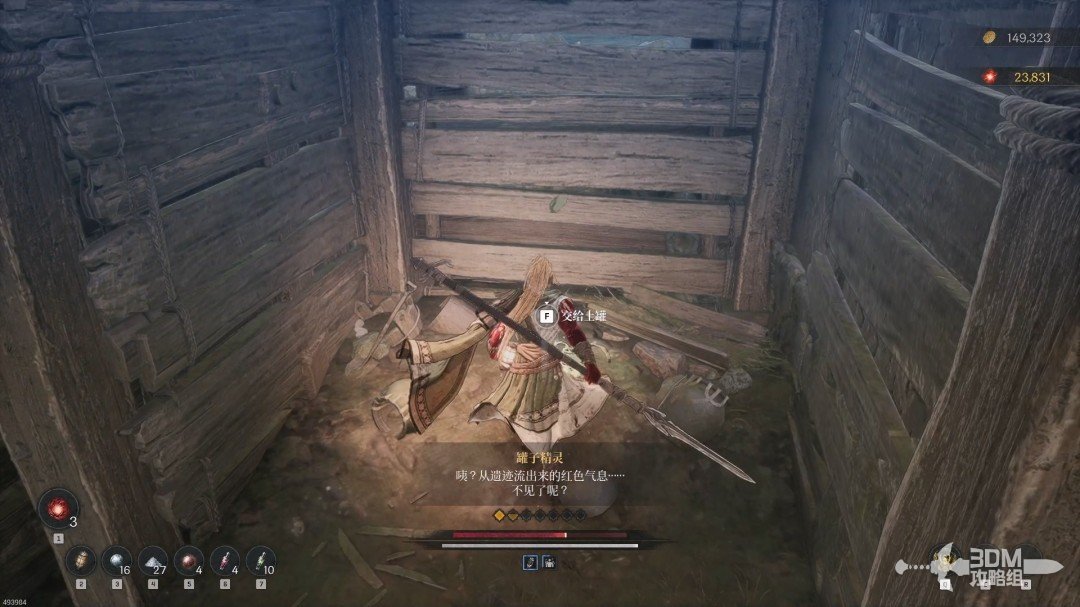 View route → |
Main mission · 05 · Strange Stench
| Item | Location | Walkthrough |
|---|---|---|
| Return through the mine to the room with several undead and break the jar beside the table for a Jarling. | 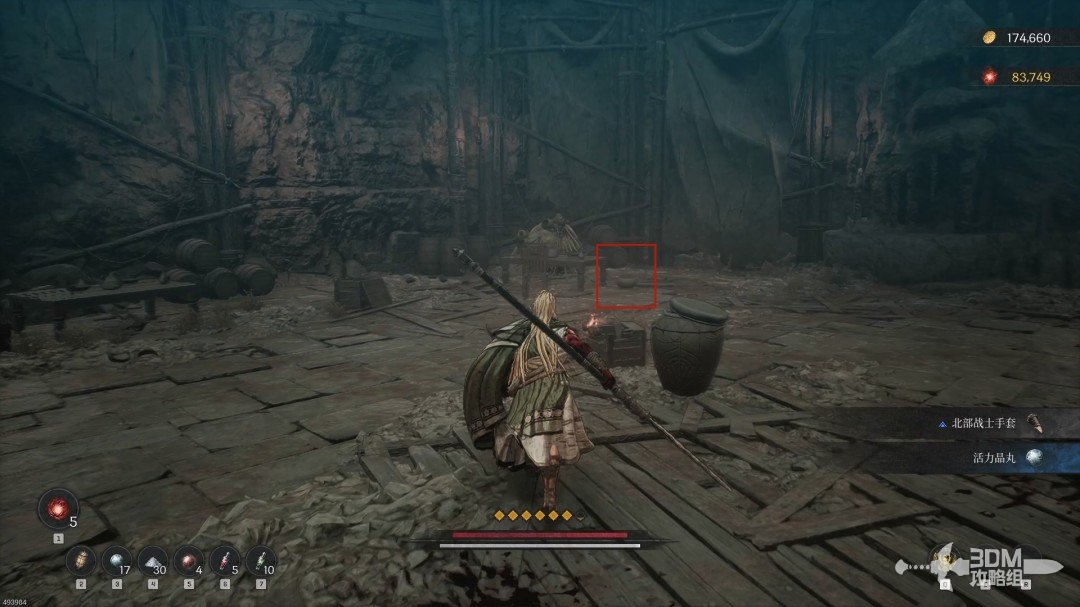 View route → |
Main mission · 06 · Traitor Revealed
| Item | Location | Walkthrough |
|---|---|---|
| Break the wall at the study corner for the bard scroll and the Jarling in the hidden room's corner. | 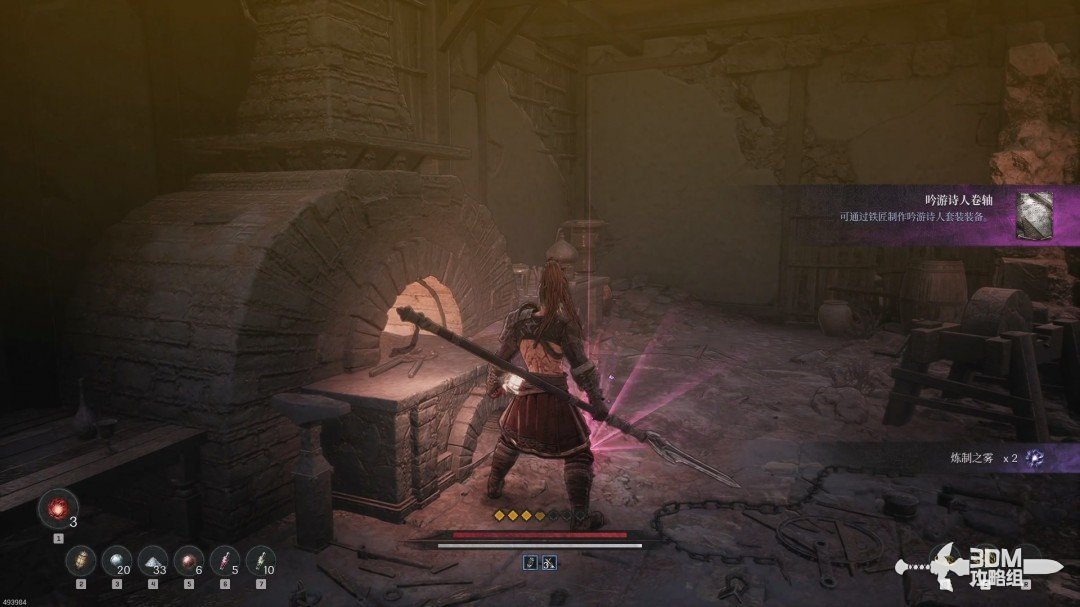 View route → |
Main mission · 07 · Veiled Knives
| Item | Location | Walkthrough |
|---|---|---|
| Search beyond the cart and strong enemy. The Jarling is inside the ruined house. | 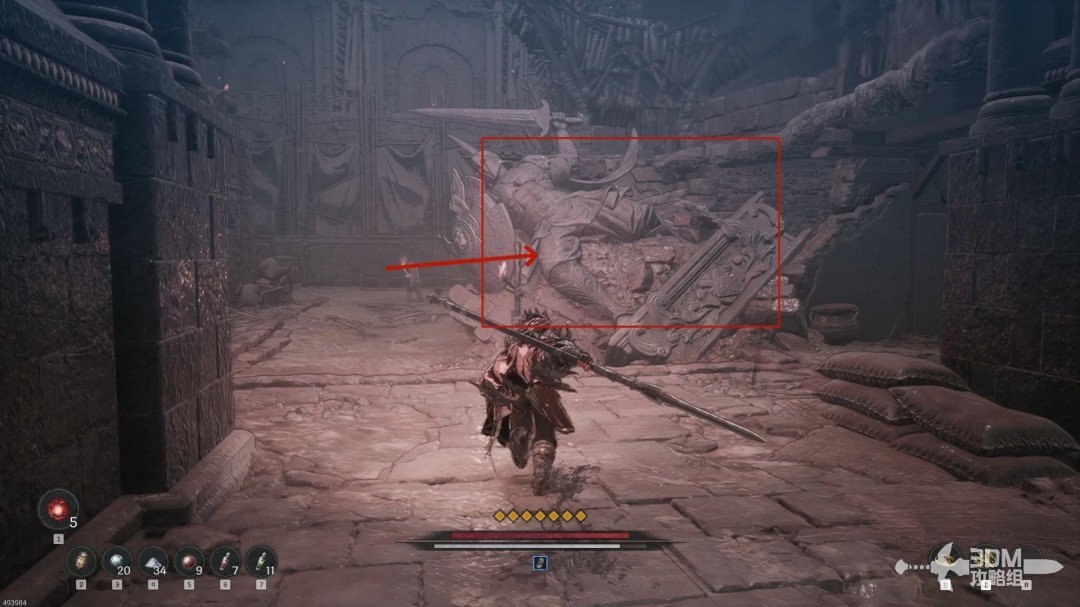 View route → |
Main mission · 08 · Devoured Village
| Item | Location | Walkthrough |
|---|---|---|
| Drop through the red opening and use the pipe ladder to reach the checkpoint. Check the left corner of the room for a Jarling. | 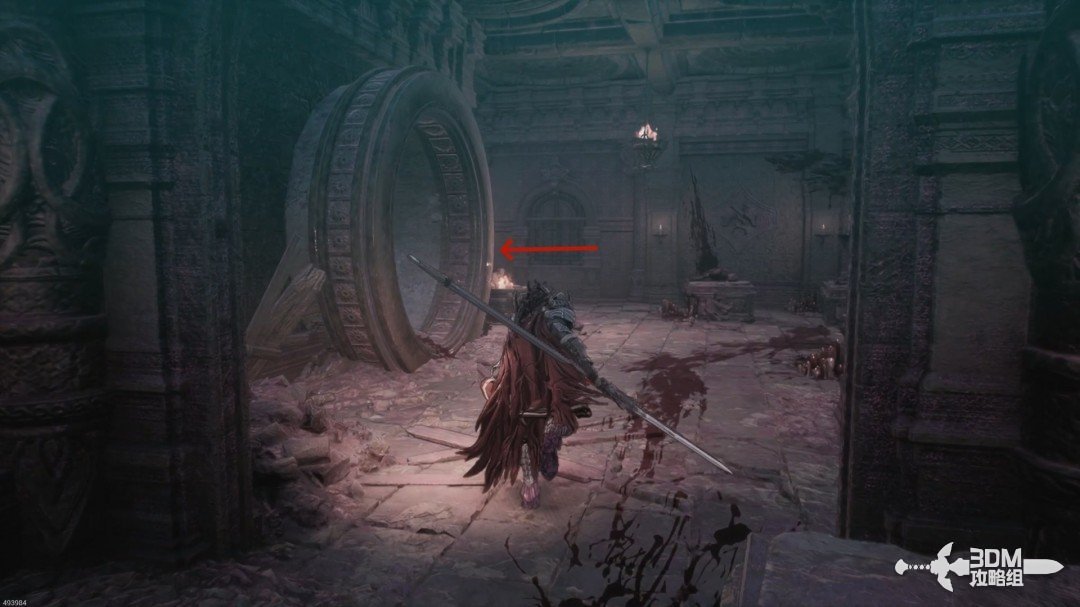 View route → |
Main mission · 09 · Inconceivable Truth
| Item | Location | Walkthrough |
|---|---|---|
| Cross the bridge into the mine, collect the memory, and inspect the jar on the right for a Jarling. | 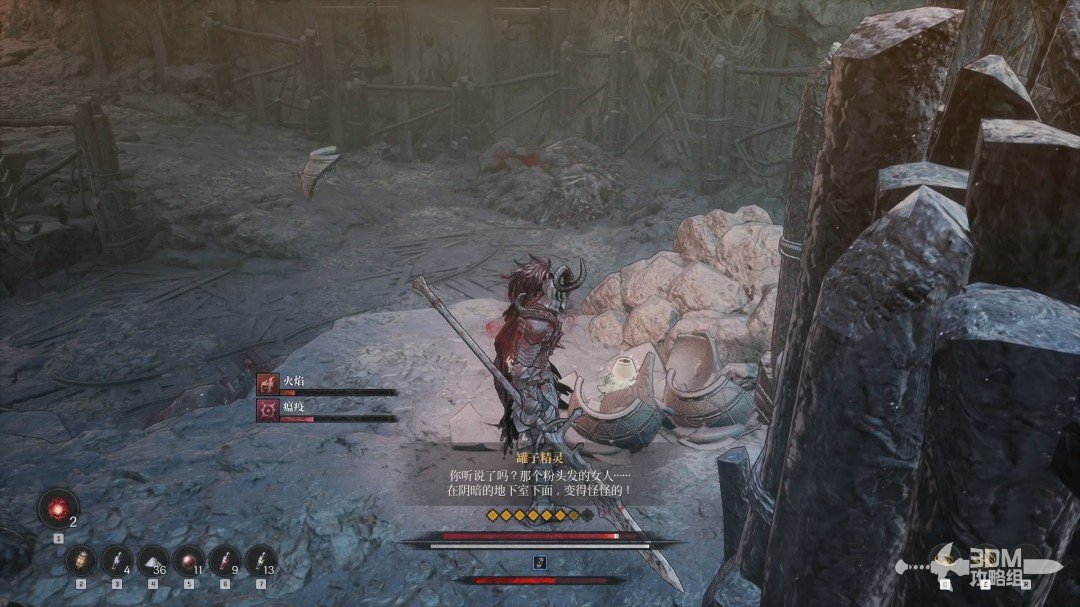 View route → |
Main mission · 10 · Witch’s Castle
| Item | Location | Walkthrough |
|---|---|---|
| Search both sides of the hall. The right study holds Soulstone four; the left library has a Jarling behind a shelf and Soulstone five behind a bookshelf mechanism. | 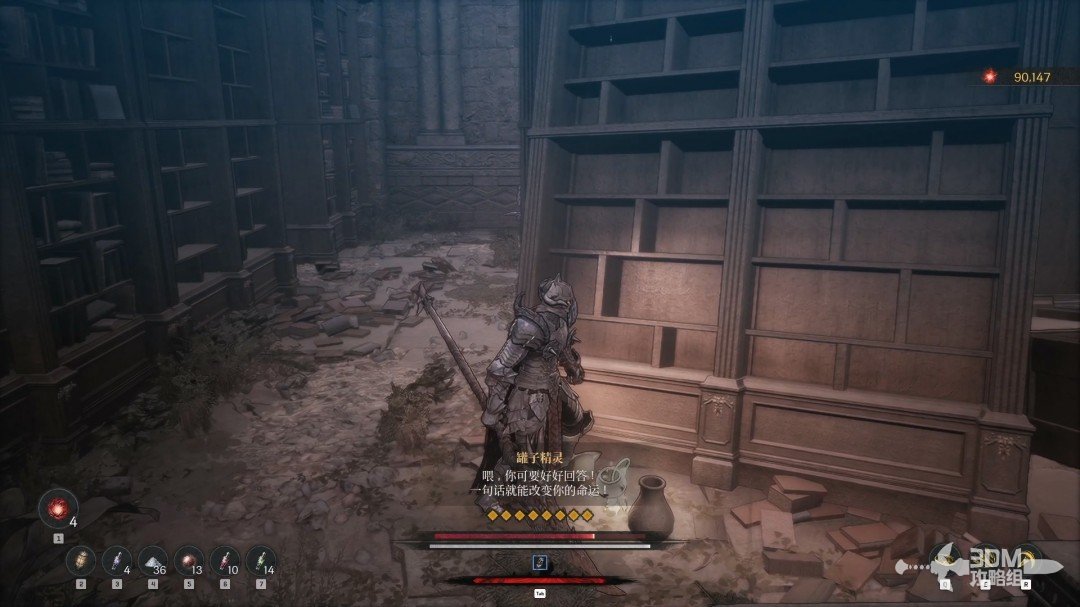 View route → |
Main mission · 11 · Hermit Mountains
| Item | Location | Walkthrough |
|---|---|---|
| Clear the Plague bats, then descend to the bard's room and inspect the jar behind him for a Jarling. | 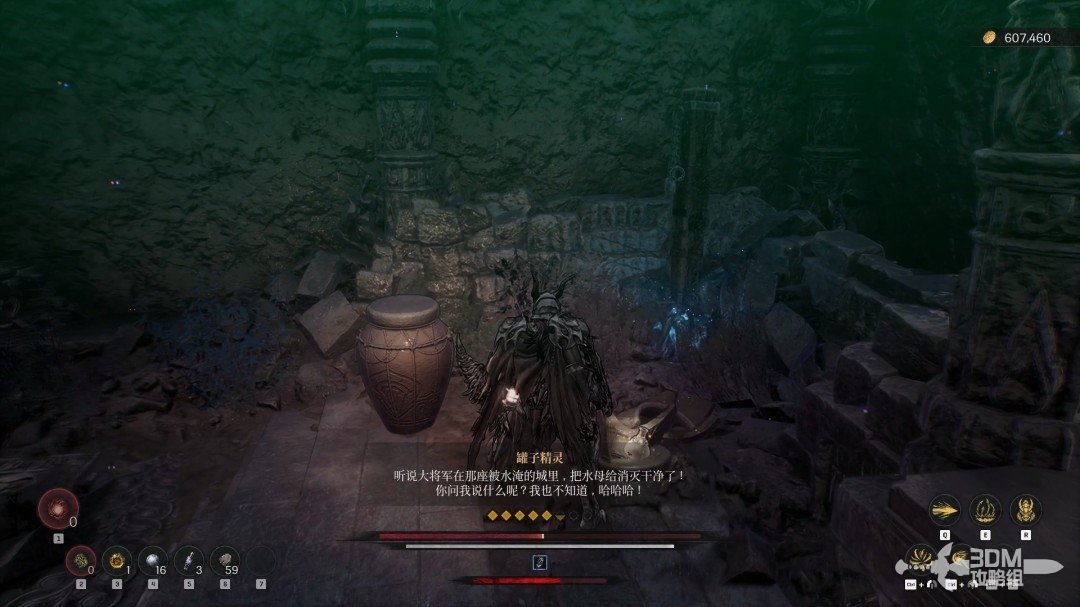 View route → |
Main mission · 12 · Corruptors’ Fortress
| Item | Location | Walkthrough |
|---|---|---|
| Pass the shield soldier and traps, then drop onto the wooden ledge in the tower shaft for the Jarling. | 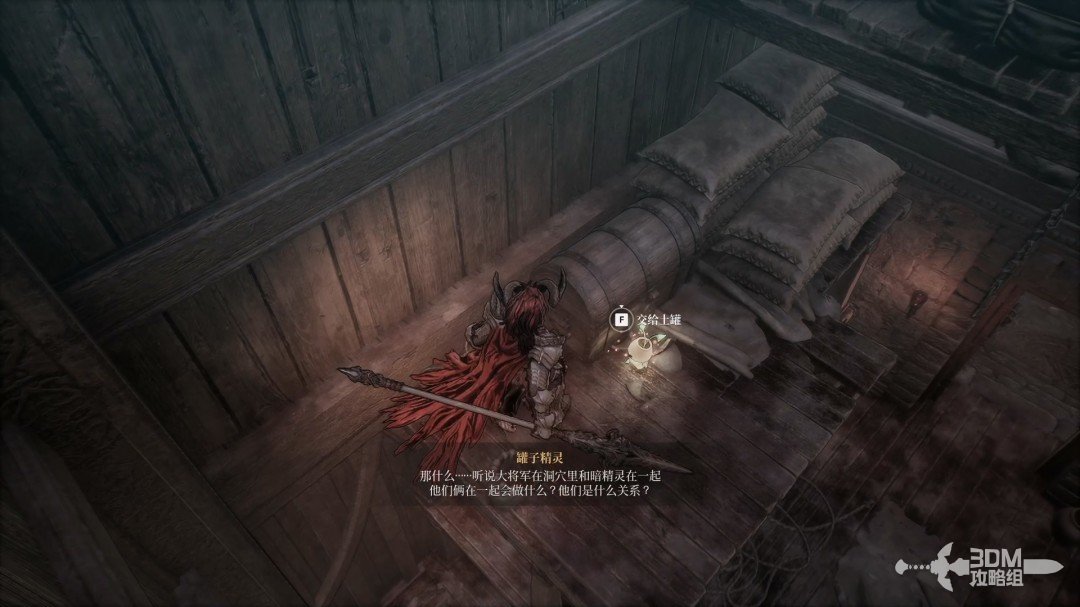 View route → |
Main mission · 13 · Strange Melody
| Item | Location | Walkthrough |
|---|---|---|
| Pass the gramophone behind the model and open the hidden door behind the right statue for a Jarling inside. | 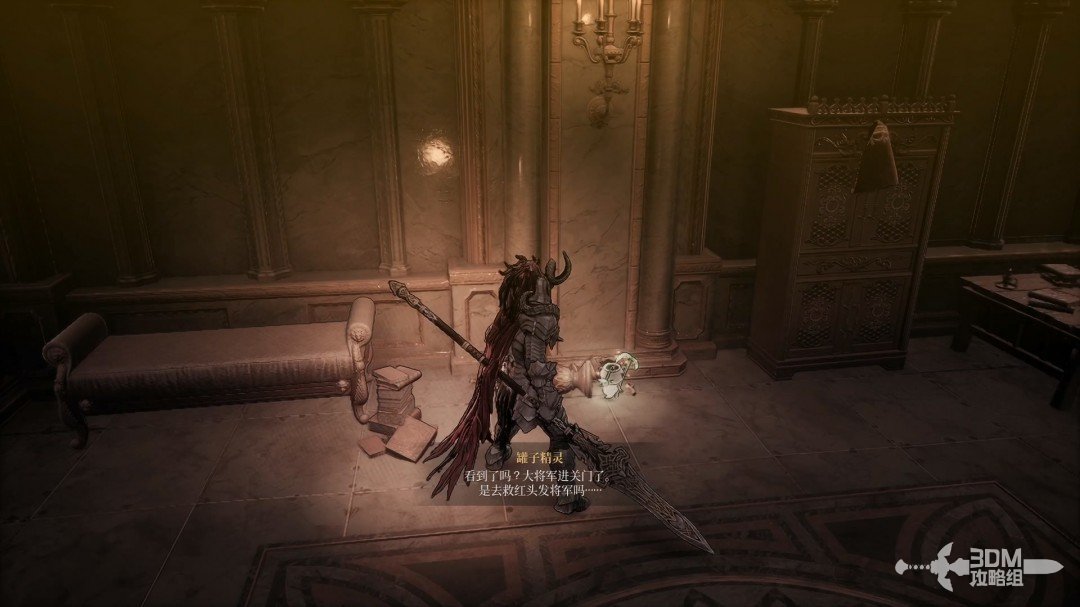 View route → |
Main mission · 14 · Fall of the Empire
| Item | Location | Walkthrough |
|---|---|---|
| Climb through the study outside the church and inspect the corner jar in the left house for a Jarling. | 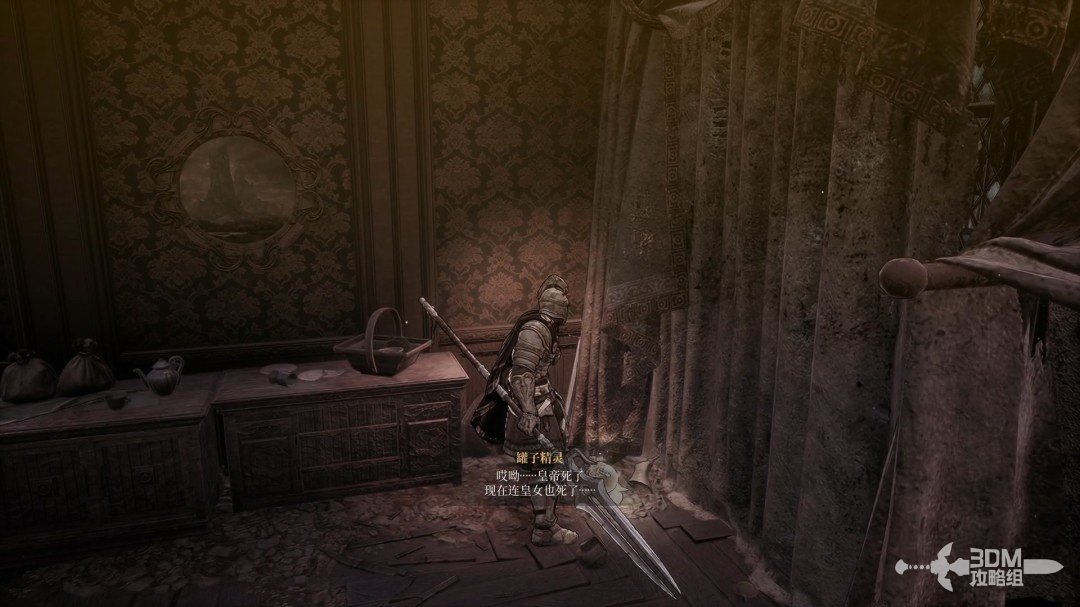 View route → |
Main mission · 15 · Bloodied Sanctuary
| Item | Location | Walkthrough |
|---|---|---|
| Face the two statues toward each other, then clear the ambush in the small right room and collect its Jarling. | 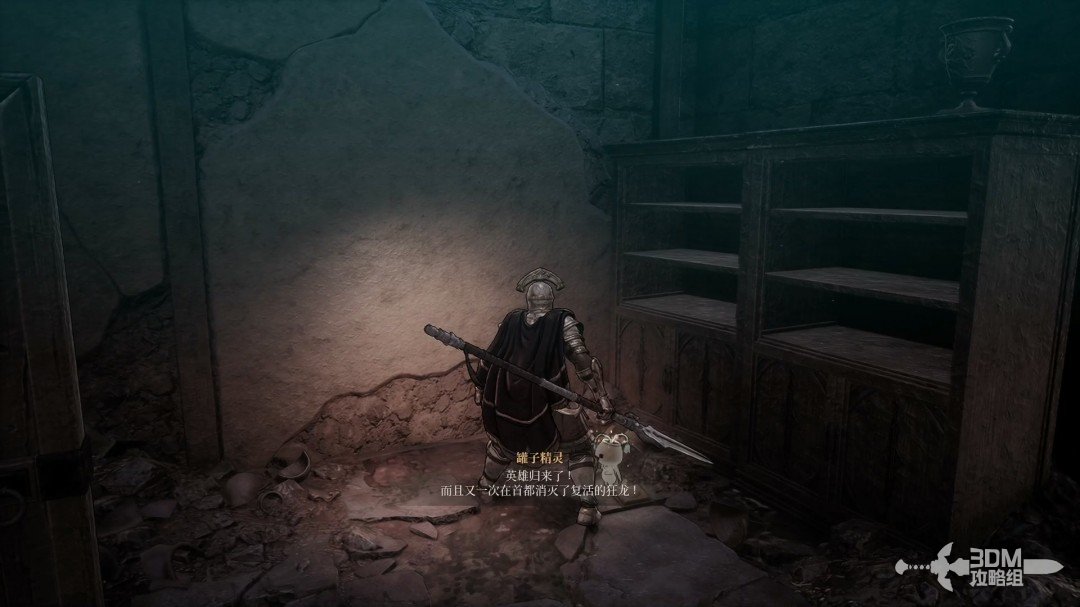 View route → |
Main mission · 16 · Master of Chaos
| Item | Location | Walkthrough |
|---|---|---|
| Follow the spiral stairs to the checkpoint and take the upper right corridor for the Jarling behind the fallen cabinet. | 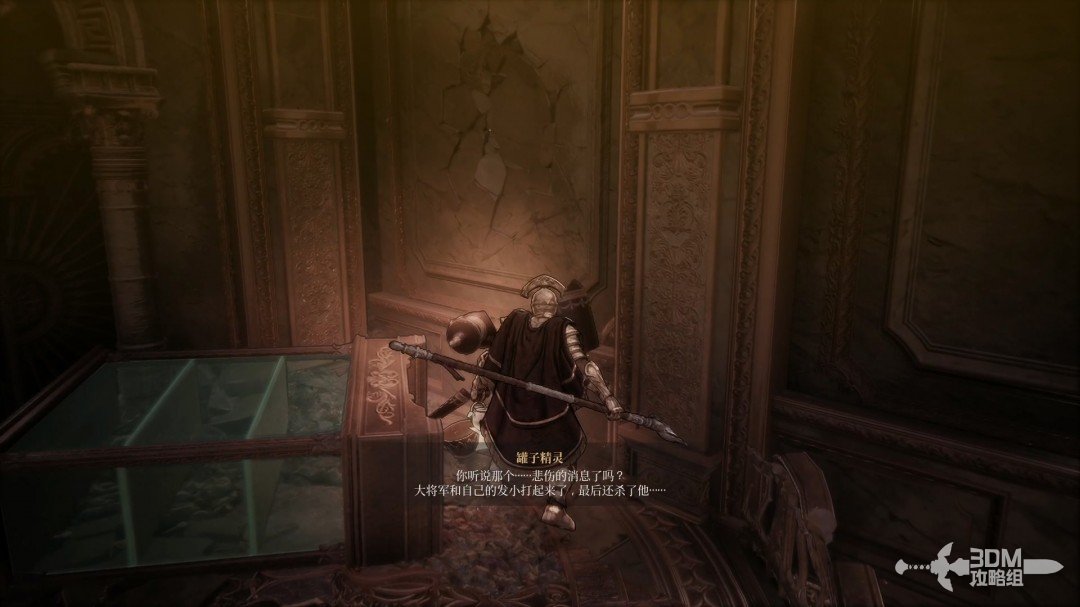 View route → |
Side mission · Jar Enthusiast
| Item | Location | Walkthrough |
|---|---|---|
| The first jar is beside the bridge near the start. | 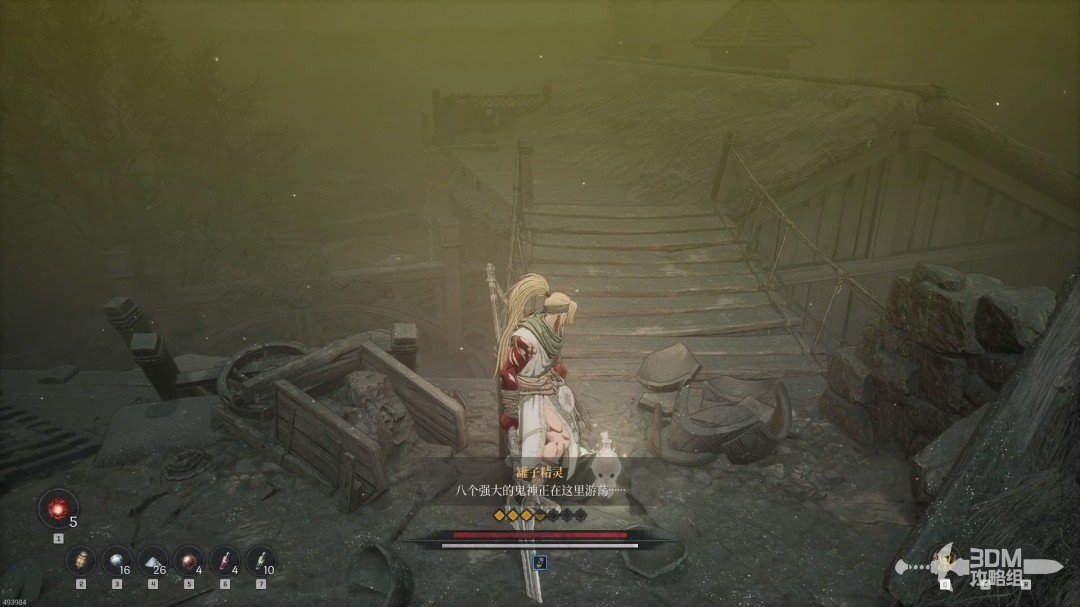 View route → | |
| Pass the invisible enemy and descend to the house for the second jar inside. | 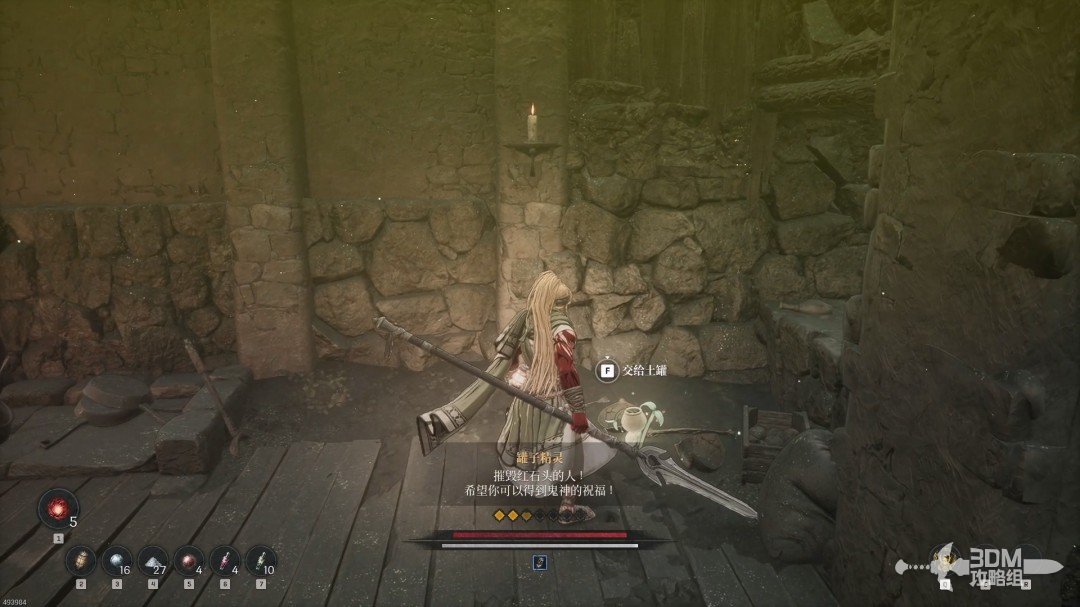 View route → | |
| Climb the stairs in the right house; the third jar is in the house on the left. | 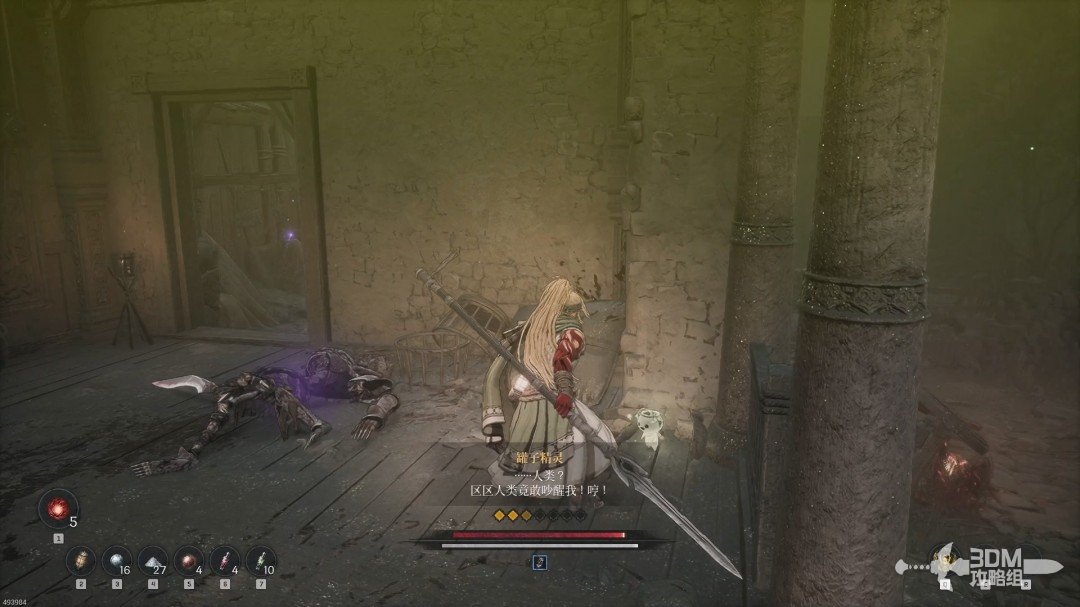 View route → | |
| Continue along the road for the fourth jar in the next house on the left. | 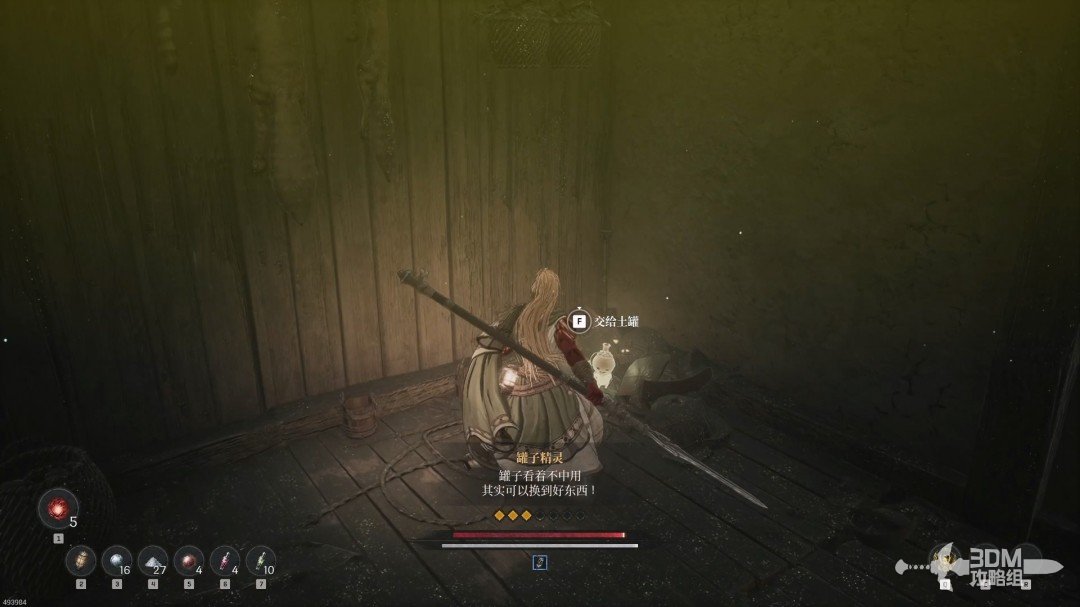 View route → | |
| Leave the fourth jar’s house and inspect the upper right area for the fifth jar. | 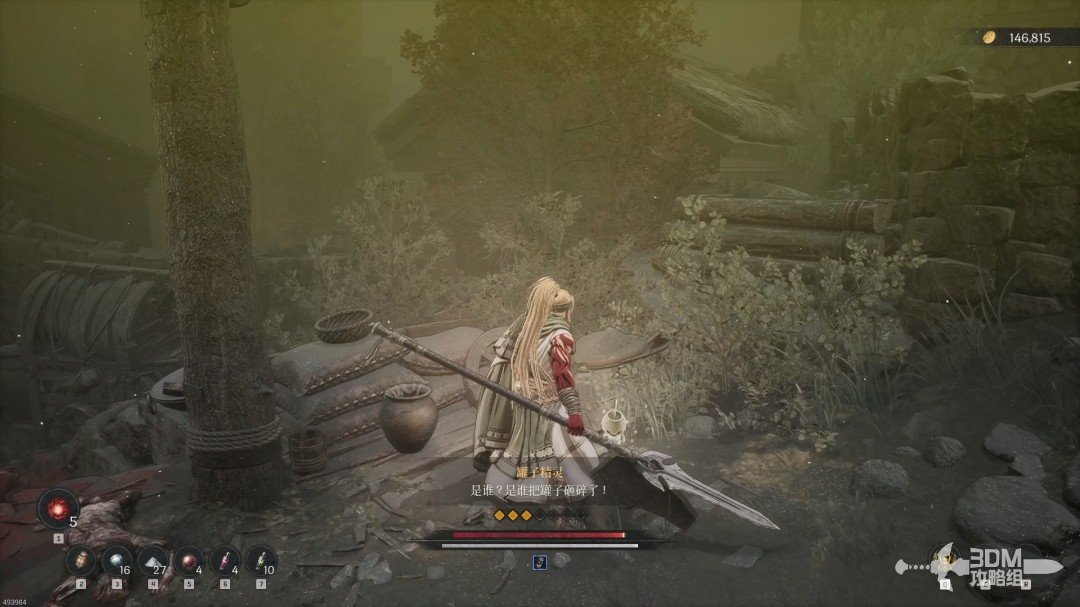 View route → | |
| The last jar is on the left at the end of the road, where the return portal appears. | 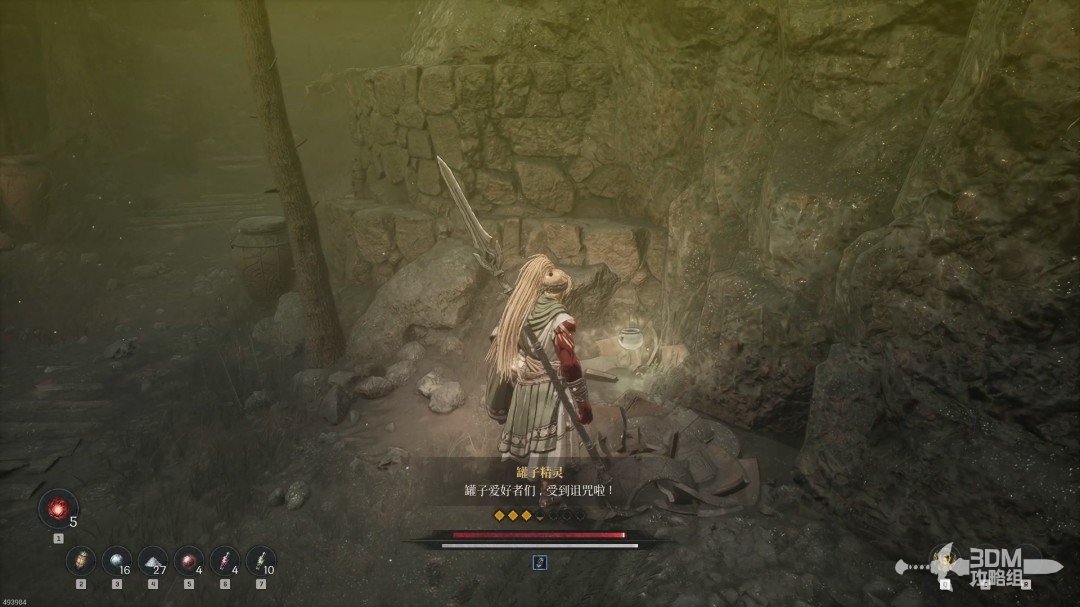 View route → |
Side mission · The Blacksmith’s Heirloom
| Item | Location | Walkthrough |
|---|---|---|
| Enter the Spider Tomb for the blacksmith's quest. At the fork, collect the Soulstone on the left and the Jarling on the right. | 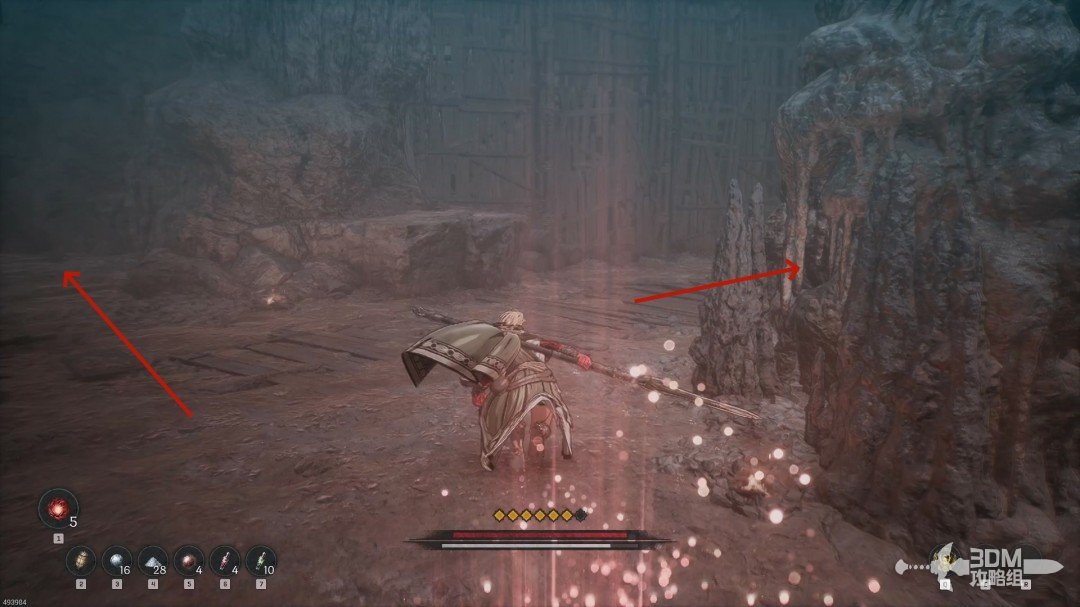 View route → |
Side mission · Tragic Night
| Item | Location | Walkthrough |
|---|---|---|
| Collect the fire summon scroll as you advance. Beyond the bridge, avoid the false memory and inspect the Jarling jar on the left. | 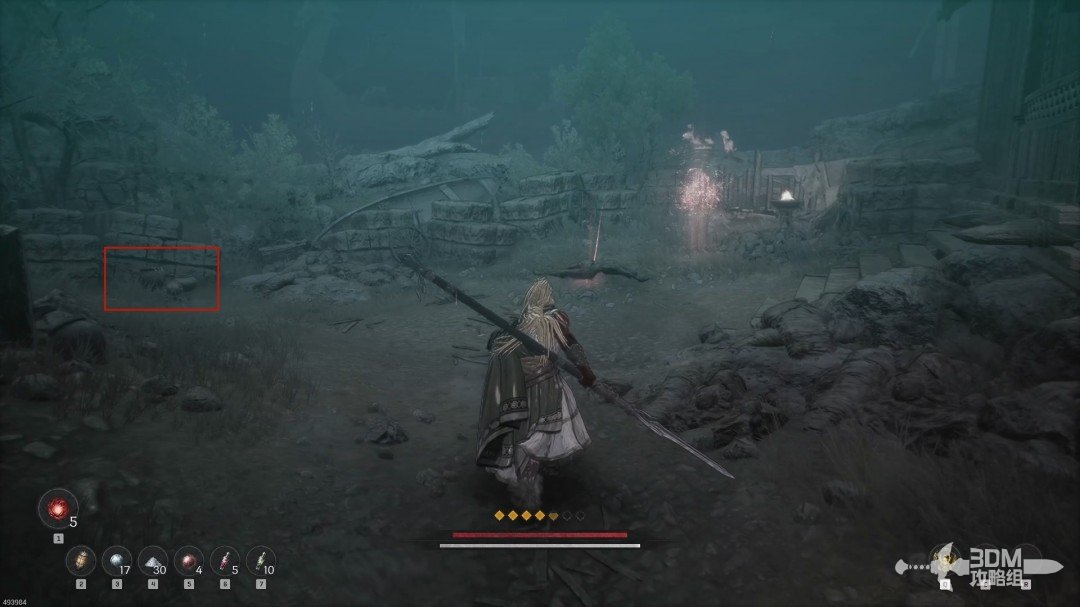 View route → |
Side mission · Silent Temple
| Item | Location | Walkthrough |
|---|---|---|
| Collect the magic scholar's record and the Jarling below the trapped chests. Defeat the undead soldier and report back to unlock gear services. | 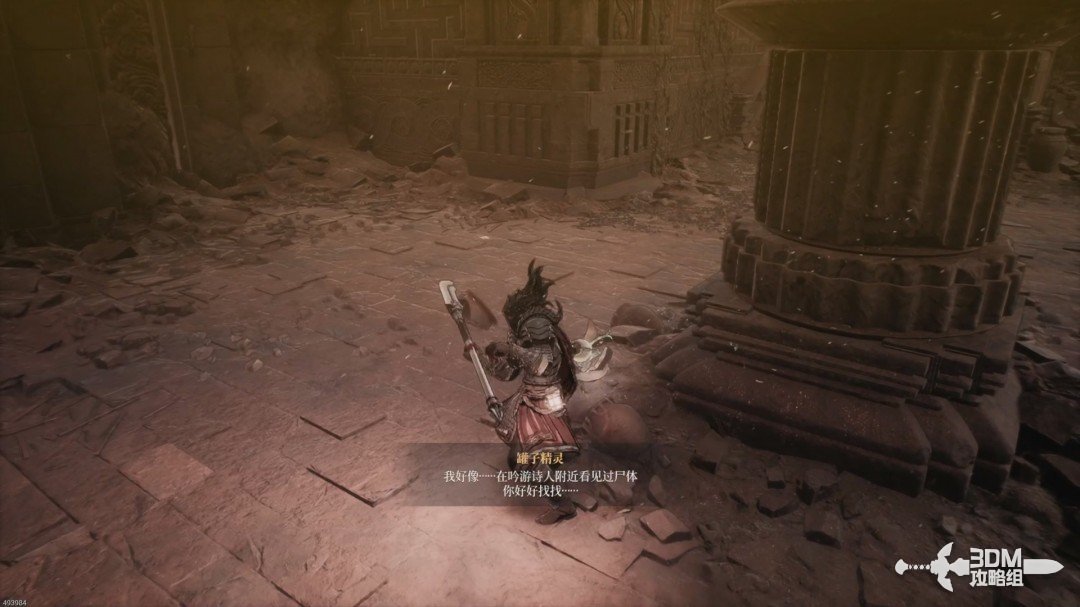 View route → |
Side mission · Human Xilence
| Item | Location | Walkthrough |
|---|---|---|
| Pass the chest and elevator to the checkpoint, then inspect the jar in the corner ahead for a Jarling. | 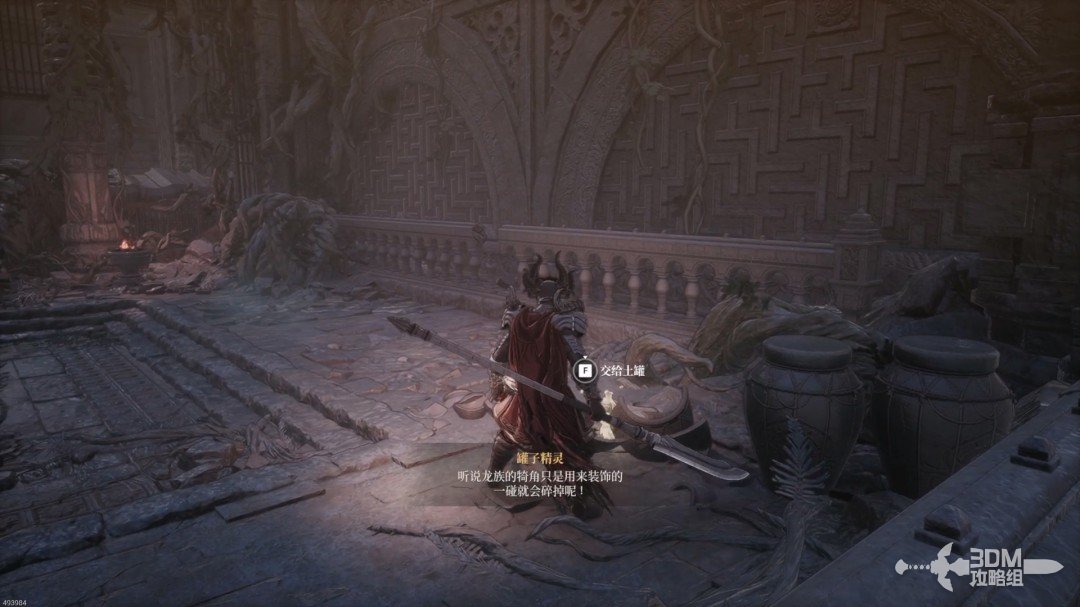 View route → |
Side mission · The Final Subjugation
| Item | Location | Walkthrough |
|---|---|---|
| Break the cart blocking the route, search the outside clearing, and find the Jarling in the jar ahead on the left. | 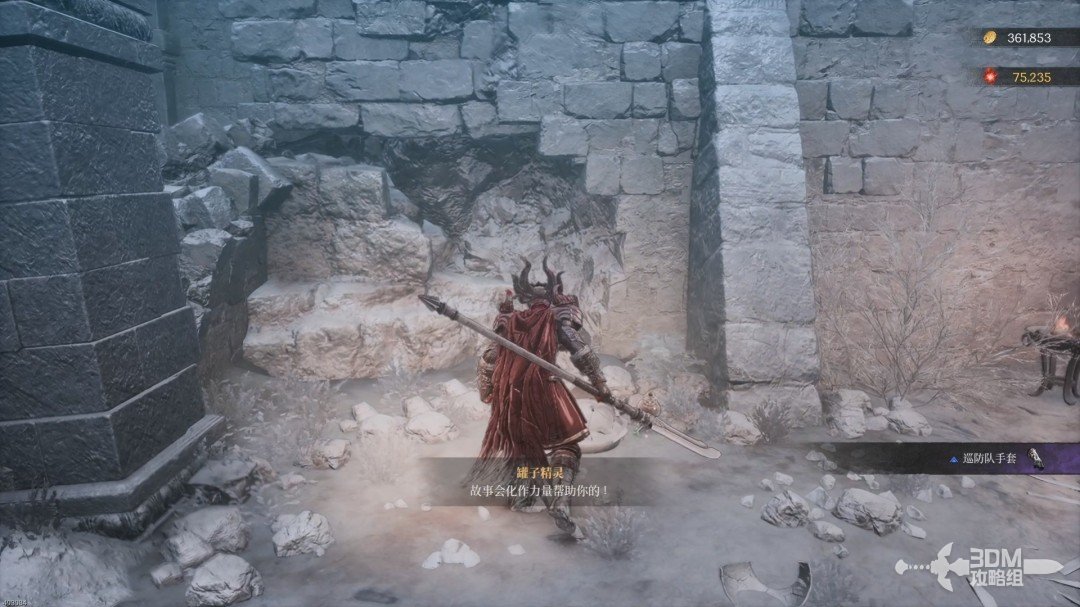 View route → |
Side mission · Pavel’s Final Words
| Item | Location | Walkthrough |
|---|---|---|
| Return from the Soulstone, take the left gate, and clear the ranged enemies above. The first house on the left contains a Jarling. | 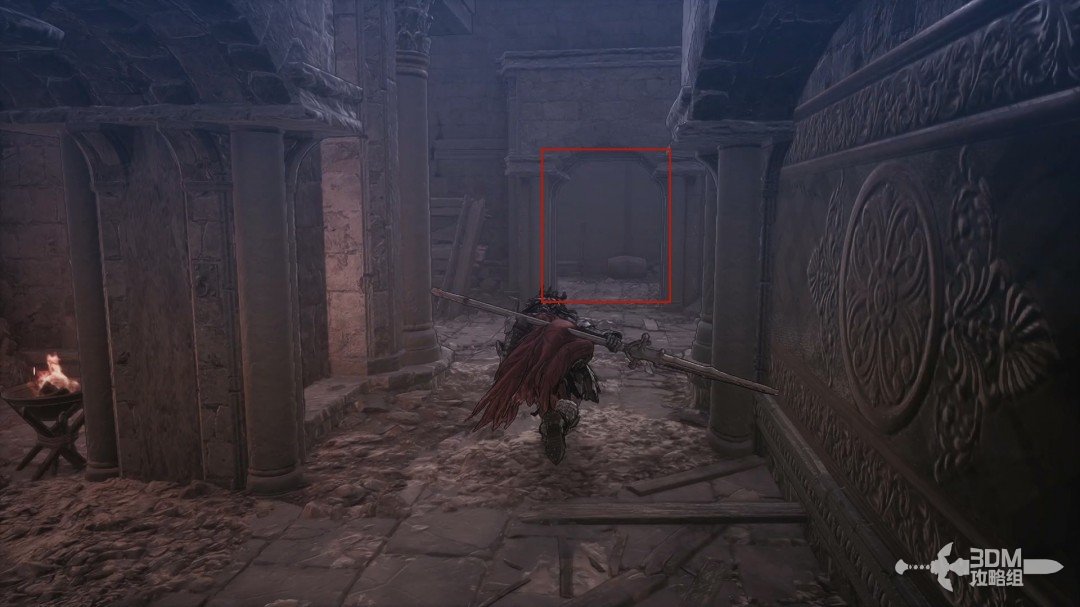 View route → |
Side mission · Why Did You Abandon Us
| Item | Location | Walkthrough |
|---|---|---|
| Search the right pickup, then inspect the jar in the bookshelf corner for a Jarling. | 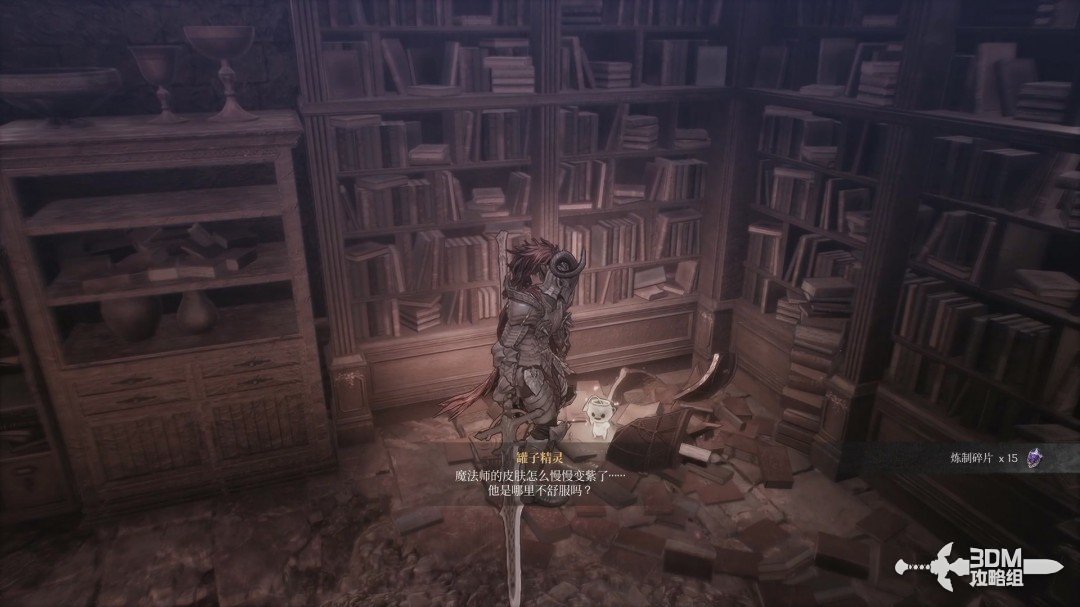 View route → |
Side mission · Escaping Linon Mine
| Item | Location | Walkthrough |
|---|---|---|
| Accept Escaping Linon Mine from Yulian. Clear the spiders, collect the memory, and inspect the corner jar for a Jarling. | 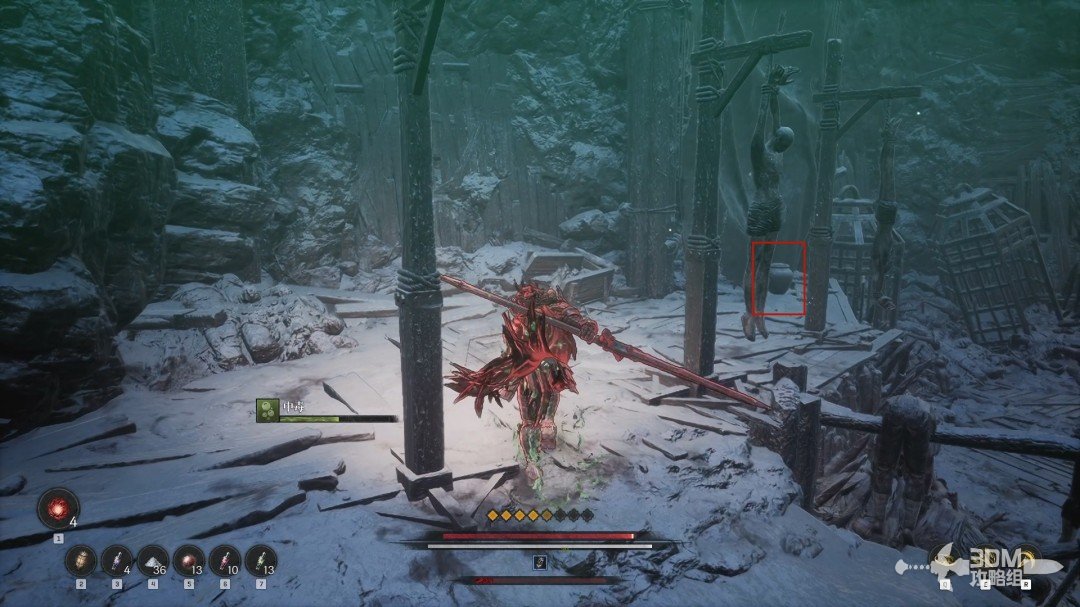 View route → |
Side mission · The Last Command
| Item | Location | Walkthrough |
|---|---|---|
| Rescue soldiers during The Last Command. Deal with the archer in the barrel room, then inspect the jar on the left after leaving. | 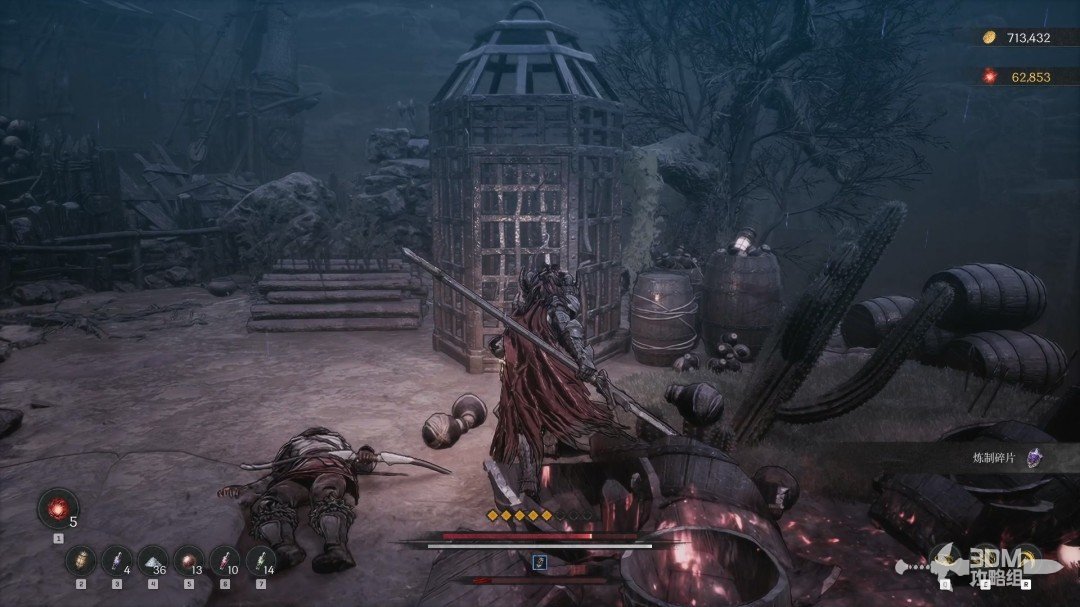 View route → |
Side mission · Lacrima
| Item | Location | Walkthrough |
|---|---|---|
| Enter the small left doorway and check behind the wooden railing on the left for a Jarling. | 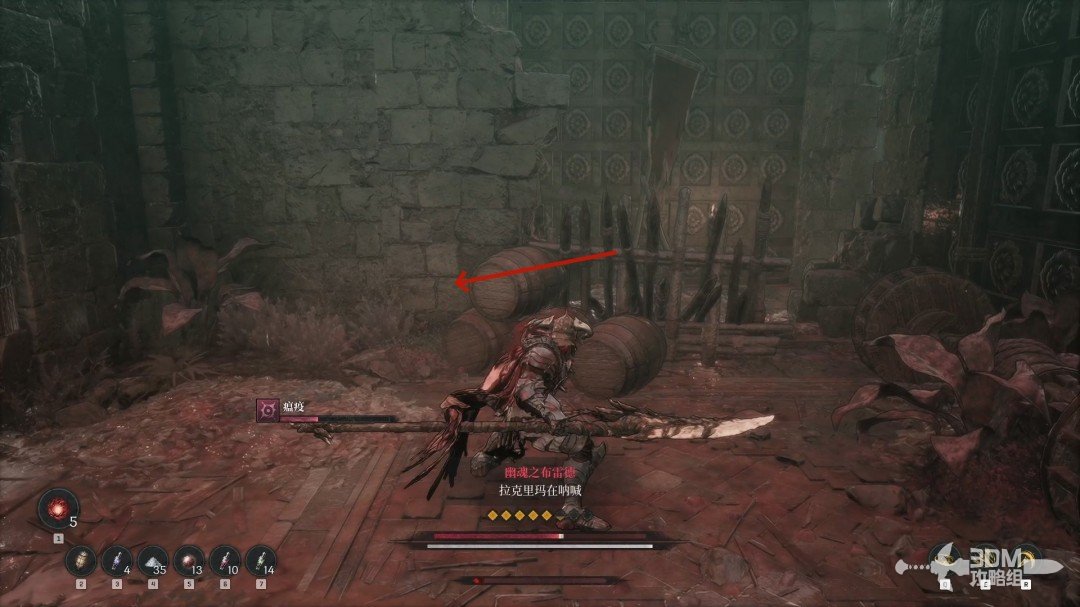 View route → |
Side mission · Unrequited Love
| Item | Location | Walkthrough |
|---|---|---|
| Open the shortcut, take the main stairs on the left, and watch for laser enemies. The Jarling is between the cabinets inside. | 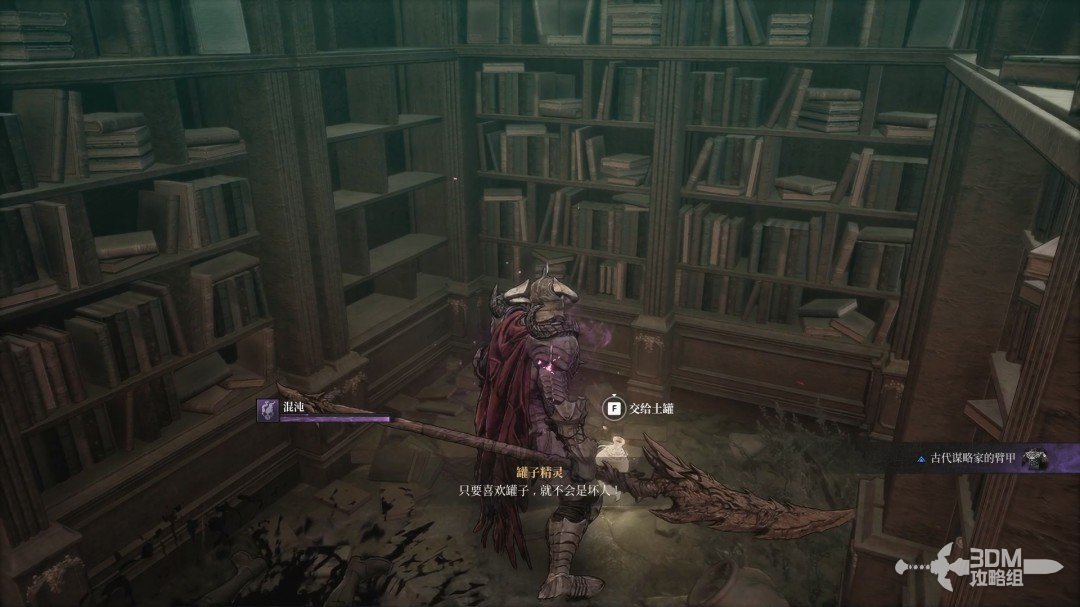 View route → |
Side mission · Varus’s Axe
| Item | Location | Walkthrough |
|---|---|---|
| Loot the chest left of the doorway, then enter the right room for the memory and Jarling. | 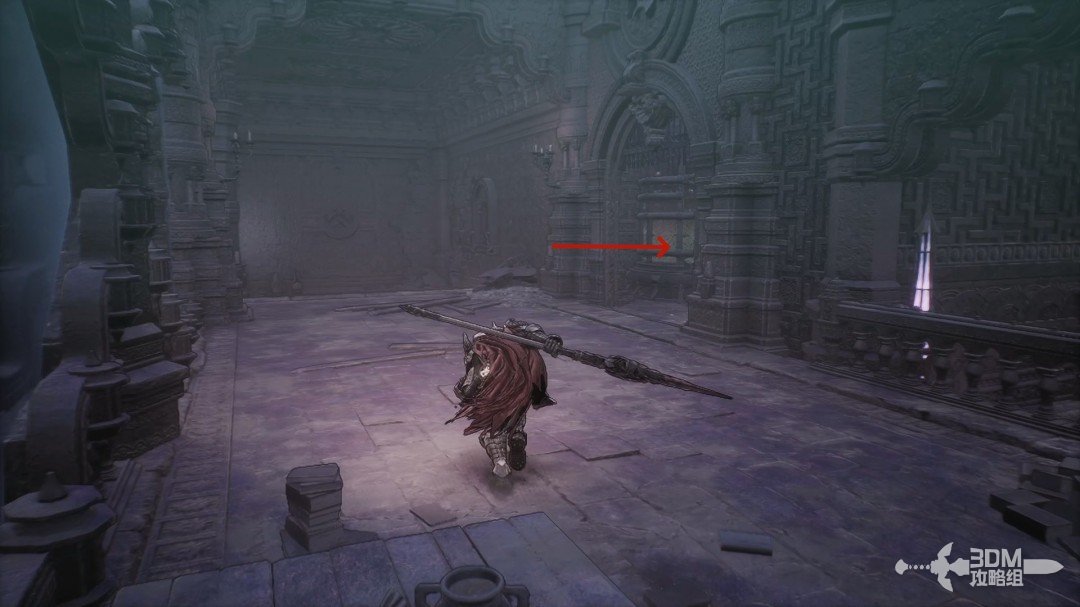 View route → |
Side mission · Atlante the Precise
| Item | Location | Walkthrough |
|---|---|---|
| Clear the skeleton beyond the checkpoint and break the jar on the left for a Jarling. | 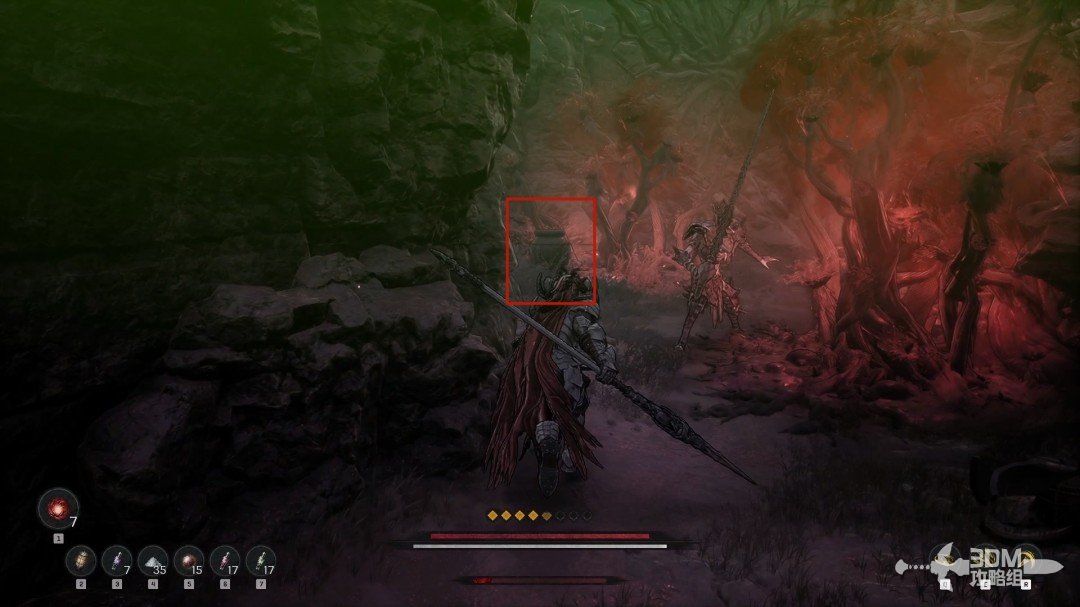 View route → |
Side mission · Crimson Trace
| Item | Location | Walkthrough |
|---|---|---|
| Climb the left stairs, collect the room's memory, and inspect the jar beside it for a Jarling. | 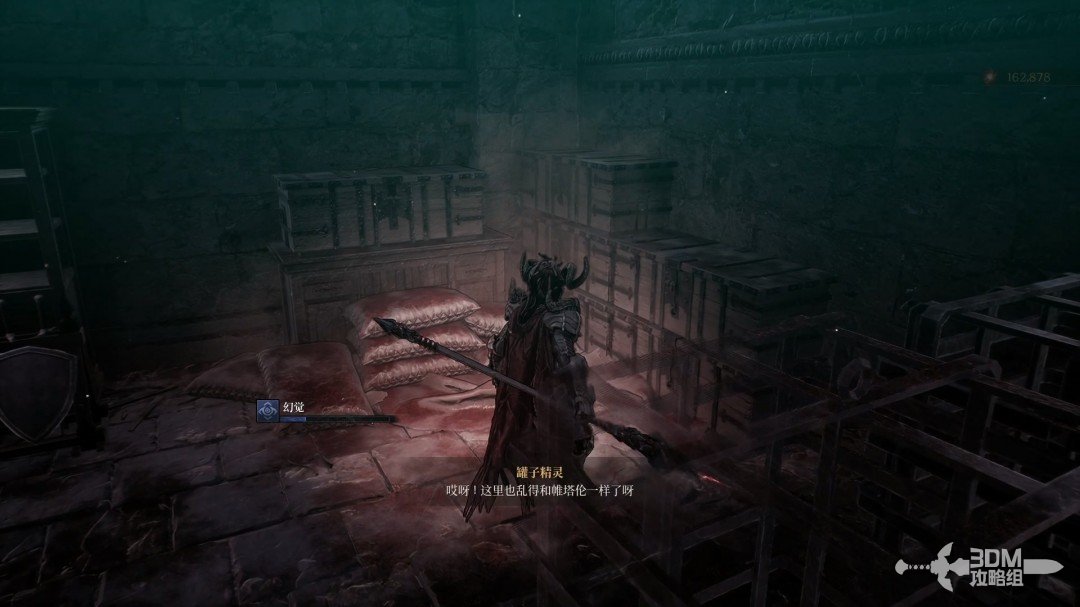 View route → |
Side mission · The Last Guard
| Item | Location | Walkthrough |
|---|---|---|
| Leave the hall shortcut for later and climb the spiral stairs. The Jarling is in the jar on the right. | 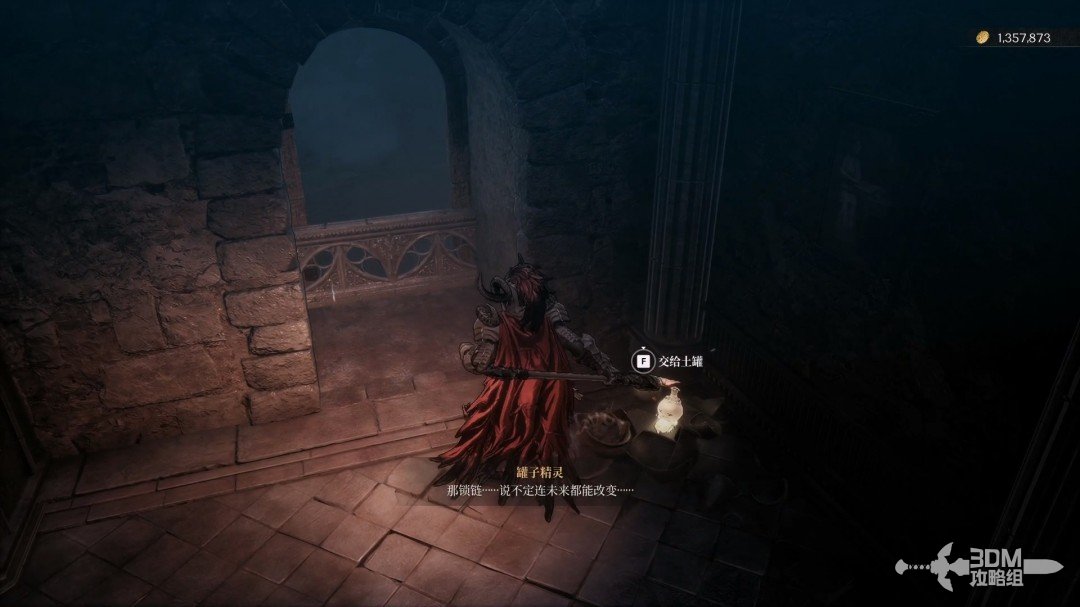 View route → |
Side mission · Transcendental Sword
| Item | Location | Walkthrough |
|---|---|---|
| Take the left route around the locked gate. Avoid the floor trap behind the boards and inspect the adjacent jar for a Jarling. | 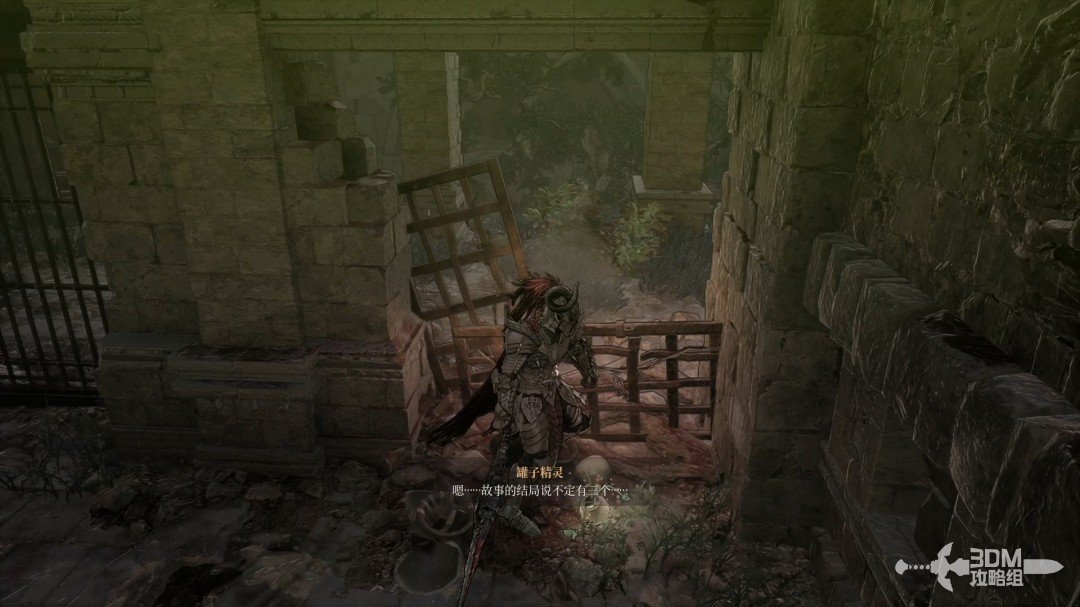 View route → |
Side mission · The Suicide Squad
| Item | Location | Walkthrough |
|---|---|---|
| Clear the soldiers left of the stairs and open the mural passage. Find the Jarling on the right and Prophecy III inside. | 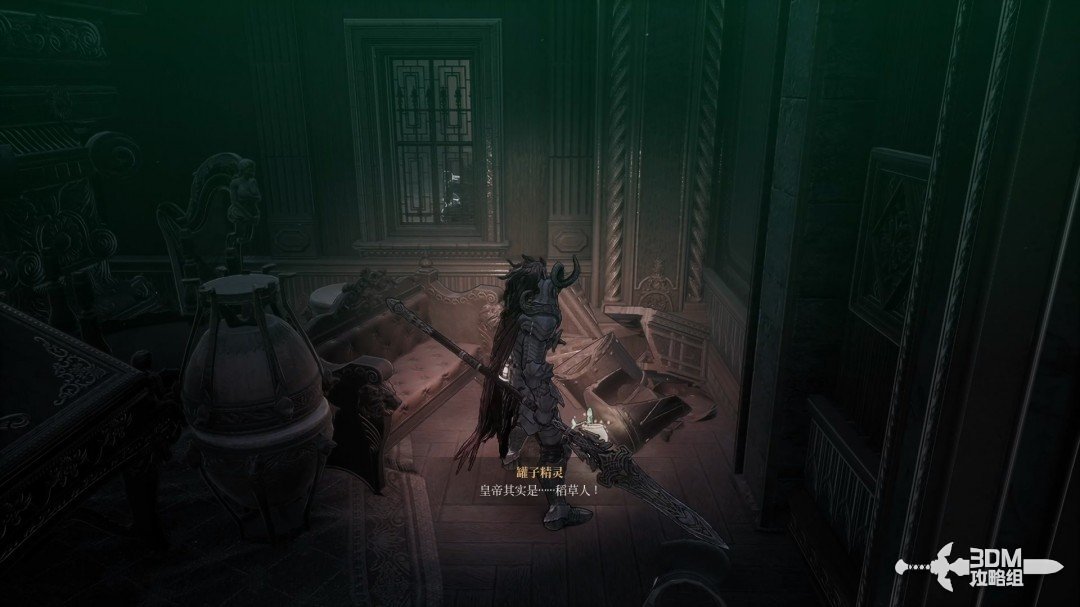 View route → |
Side mission · Residual Chaos
| Item | Location | Walkthrough |
|---|---|---|
| Open the hidden door left of the stairs for the endless tragedy scroll and the Jarling in the corner. | 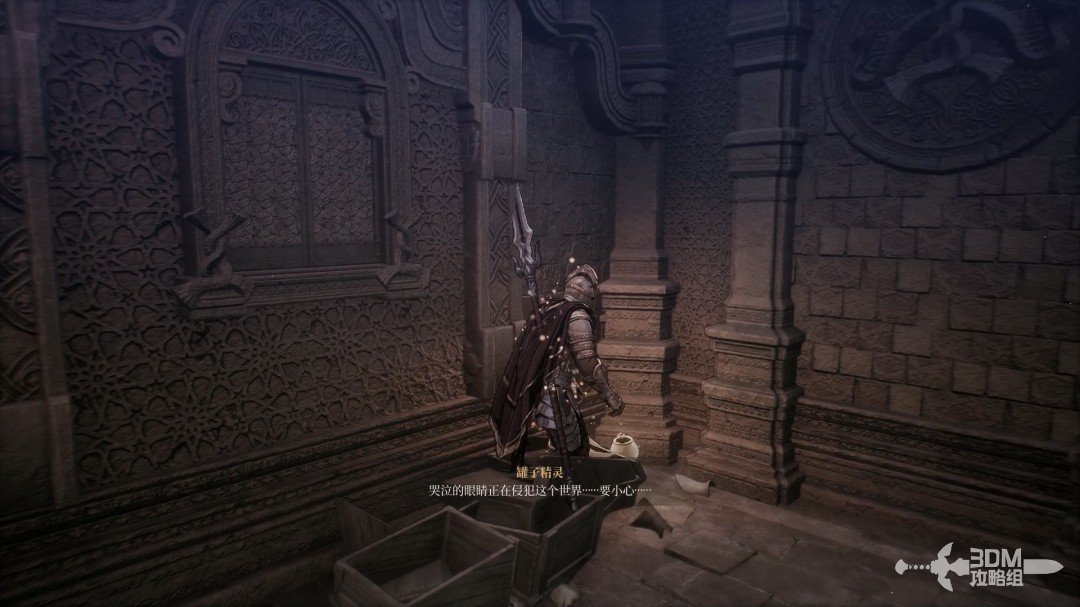 View route → |
Side mission · Disobedience
| Item | Location | Walkthrough |
|---|---|---|
| Collect the memory by the bodies on the right and inspect the jar in the nearby grass for a Jarling. | 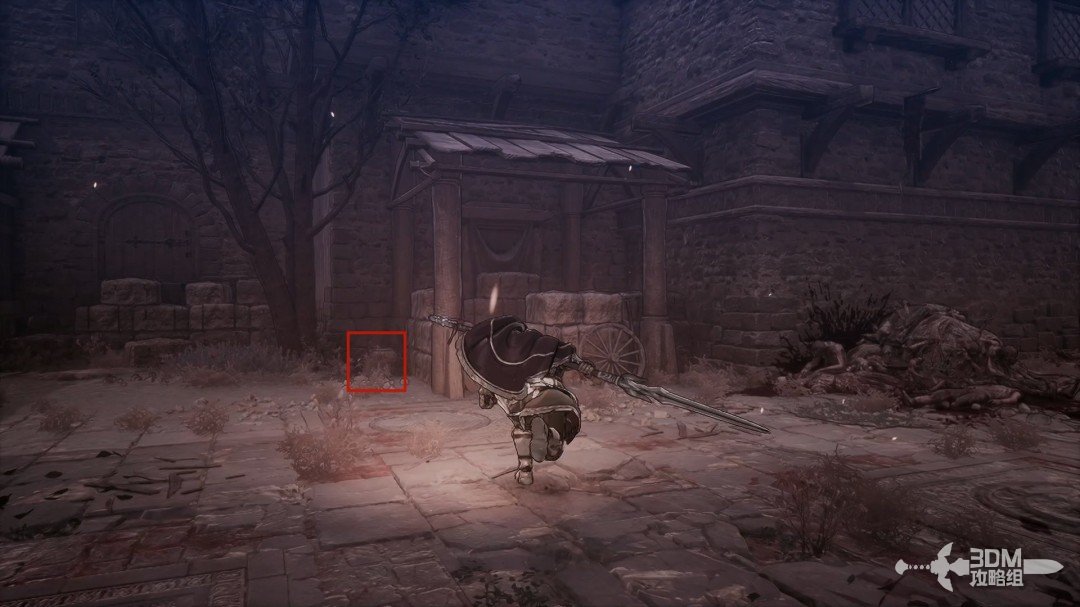 View route → |
Side mission · Charon’s Chains
| Item | Location | Walkthrough |
|---|---|---|
| Find the Jarling in the barrels left of the checkpoint, then enter the right room for three consecutive boss fights and Daphrona's dialogue. | 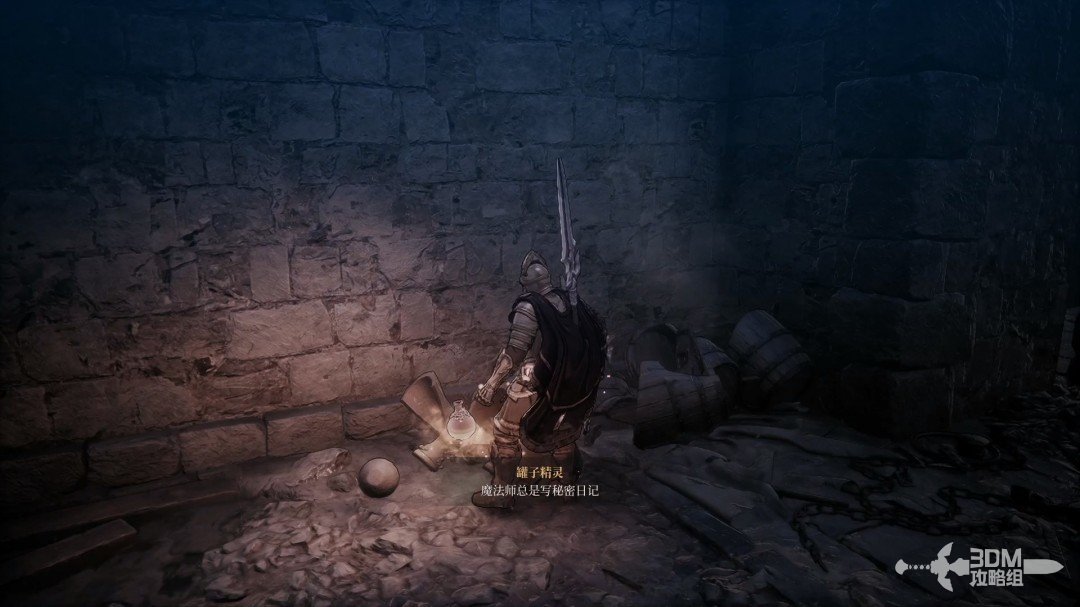 View route → |
Side mission · The Birth of Evil
| Item | Location | Walkthrough |
|---|---|---|
| Speak to the starting NPCs, loot the chest, then inspect the group of jars a few steps left for a Jarling. | 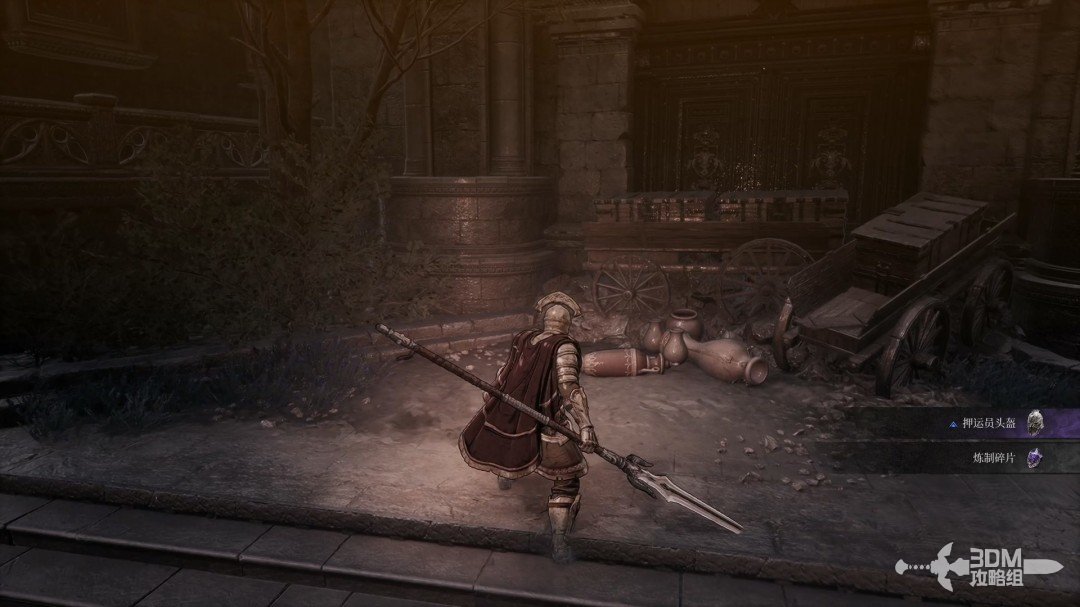 View route → |
Side mission · The Vow
| Item | Location | Walkthrough |
|---|---|---|
| Take the right route, search the statue room, and inspect the jar on the left for a Jarling. | 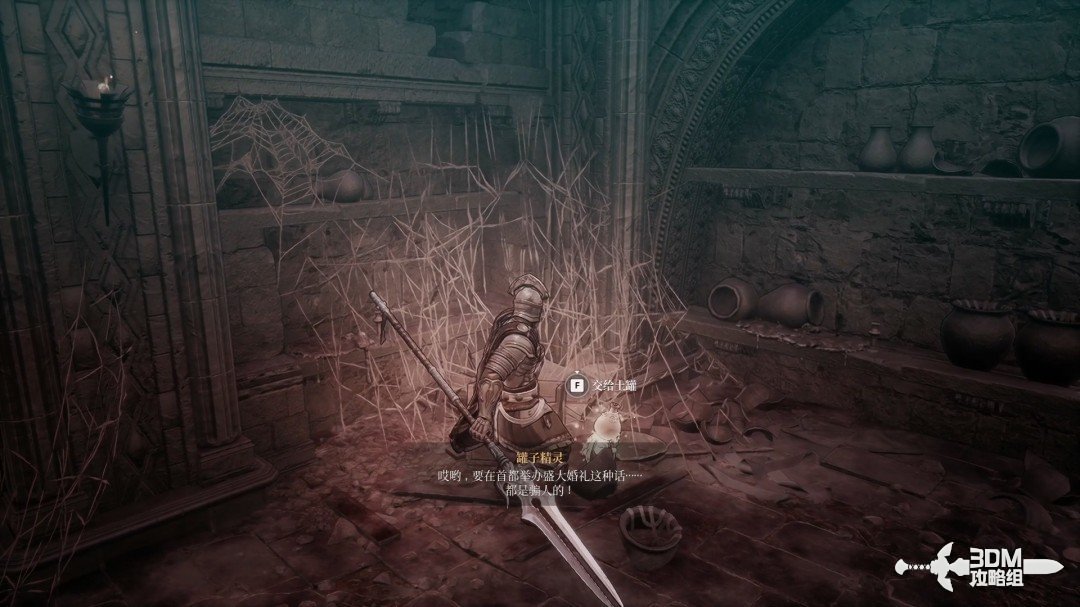 View route → |
Reference: 3DM Guide Team
GAME NOTE has reorganized and rewritten the routes from this walkthrough.